It’s Your Day!

Hi everyone! It’s Jeannie (InsideoutJeans) on the blog today with a sneak peek for Penguin Palace’s new release with another adorable set named, It’s Your Day.

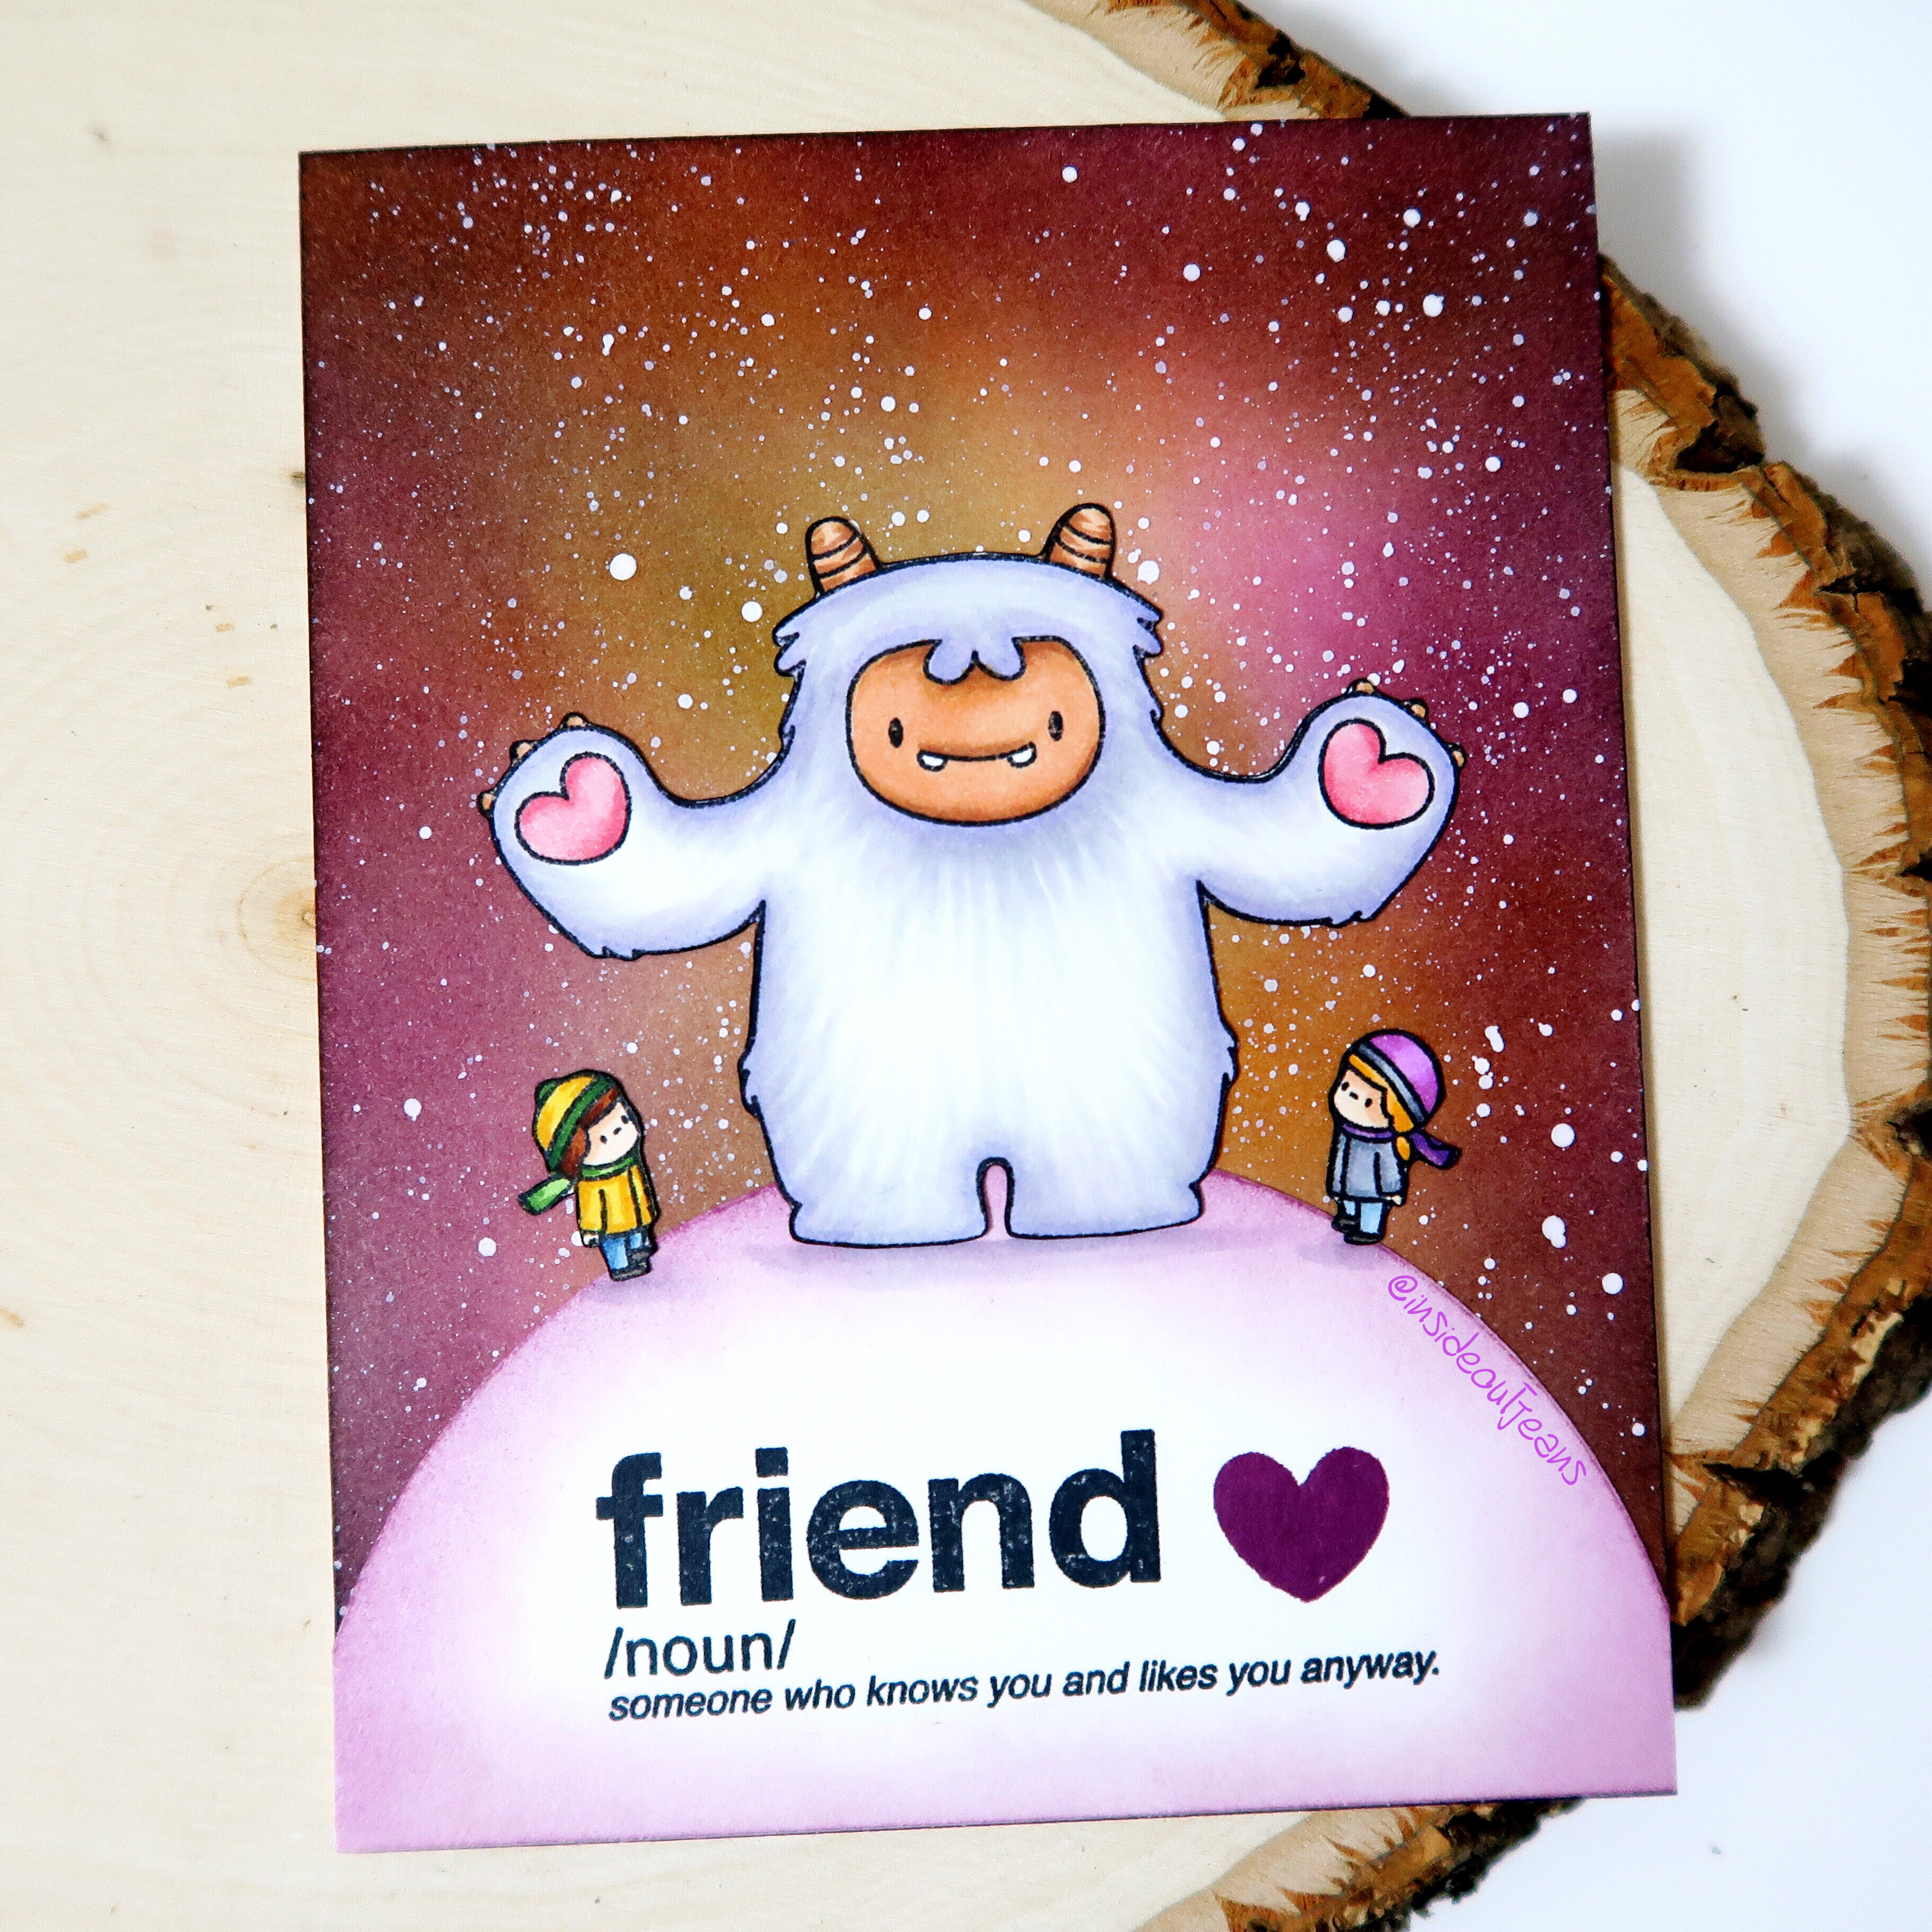
In this set, there’s a variety of images but I focused on two of the characters and two accessory items. I wanted to create a small storyline of someone enjoying a glamorous day.

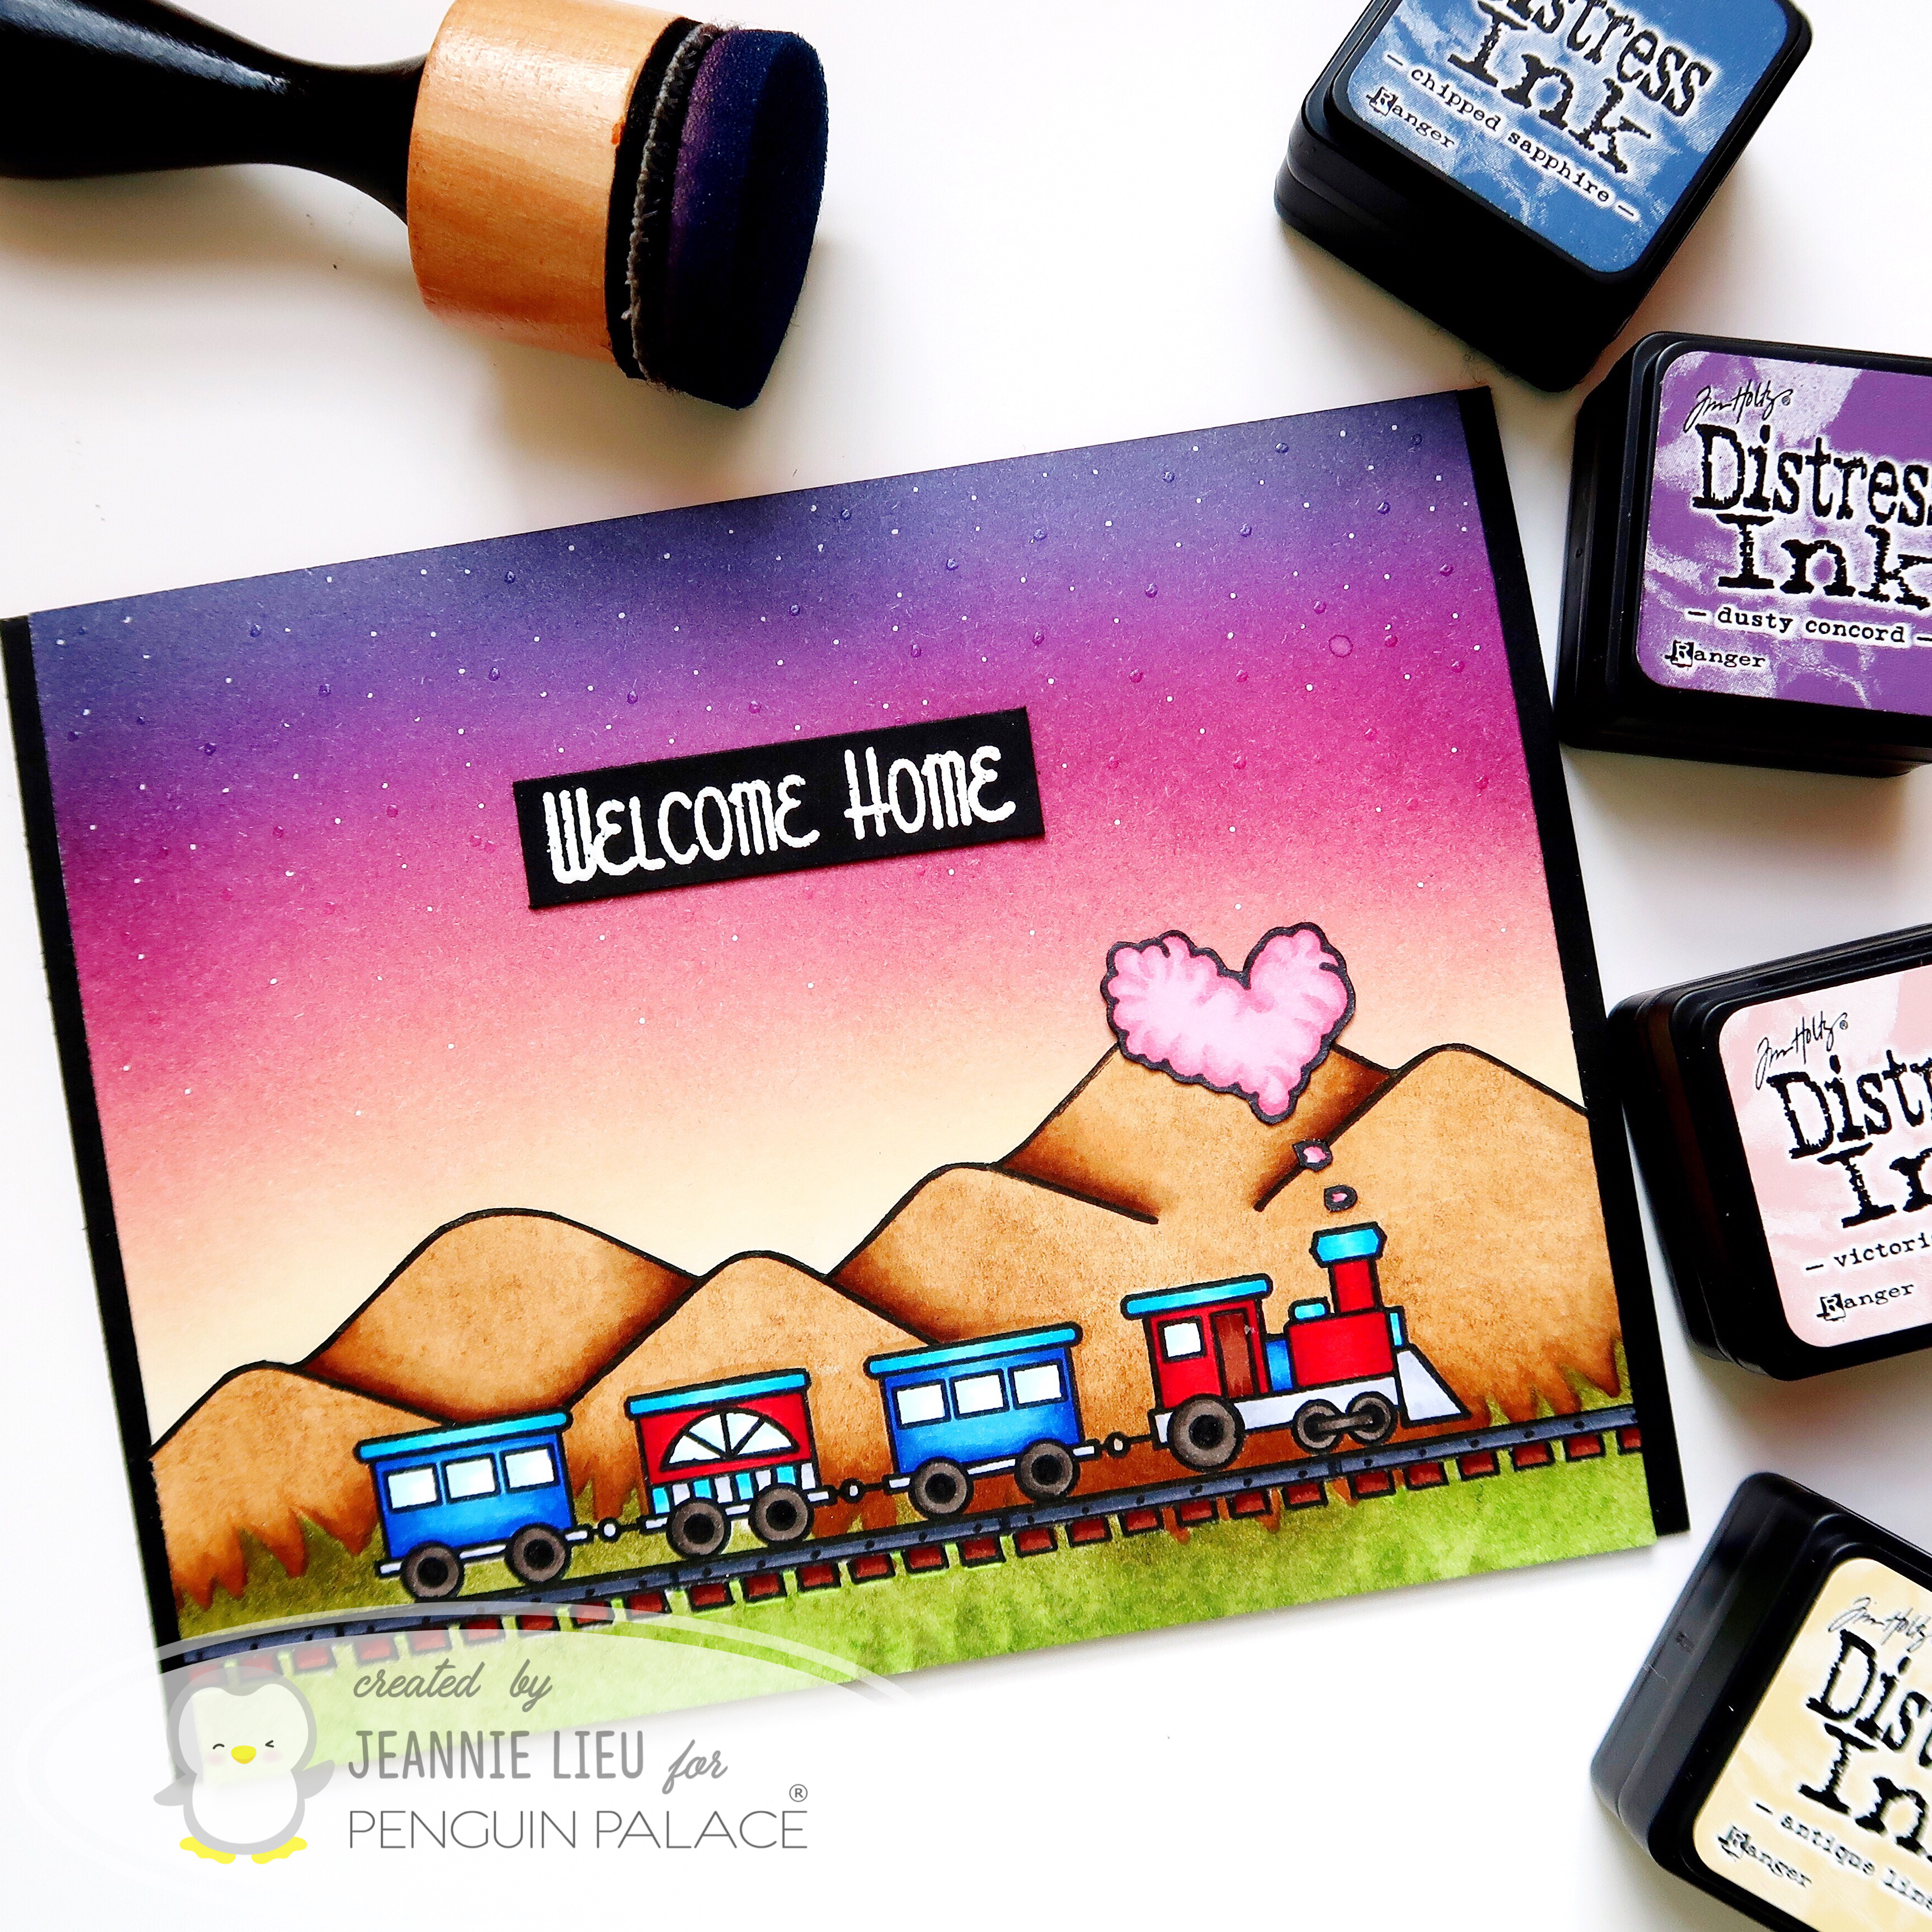
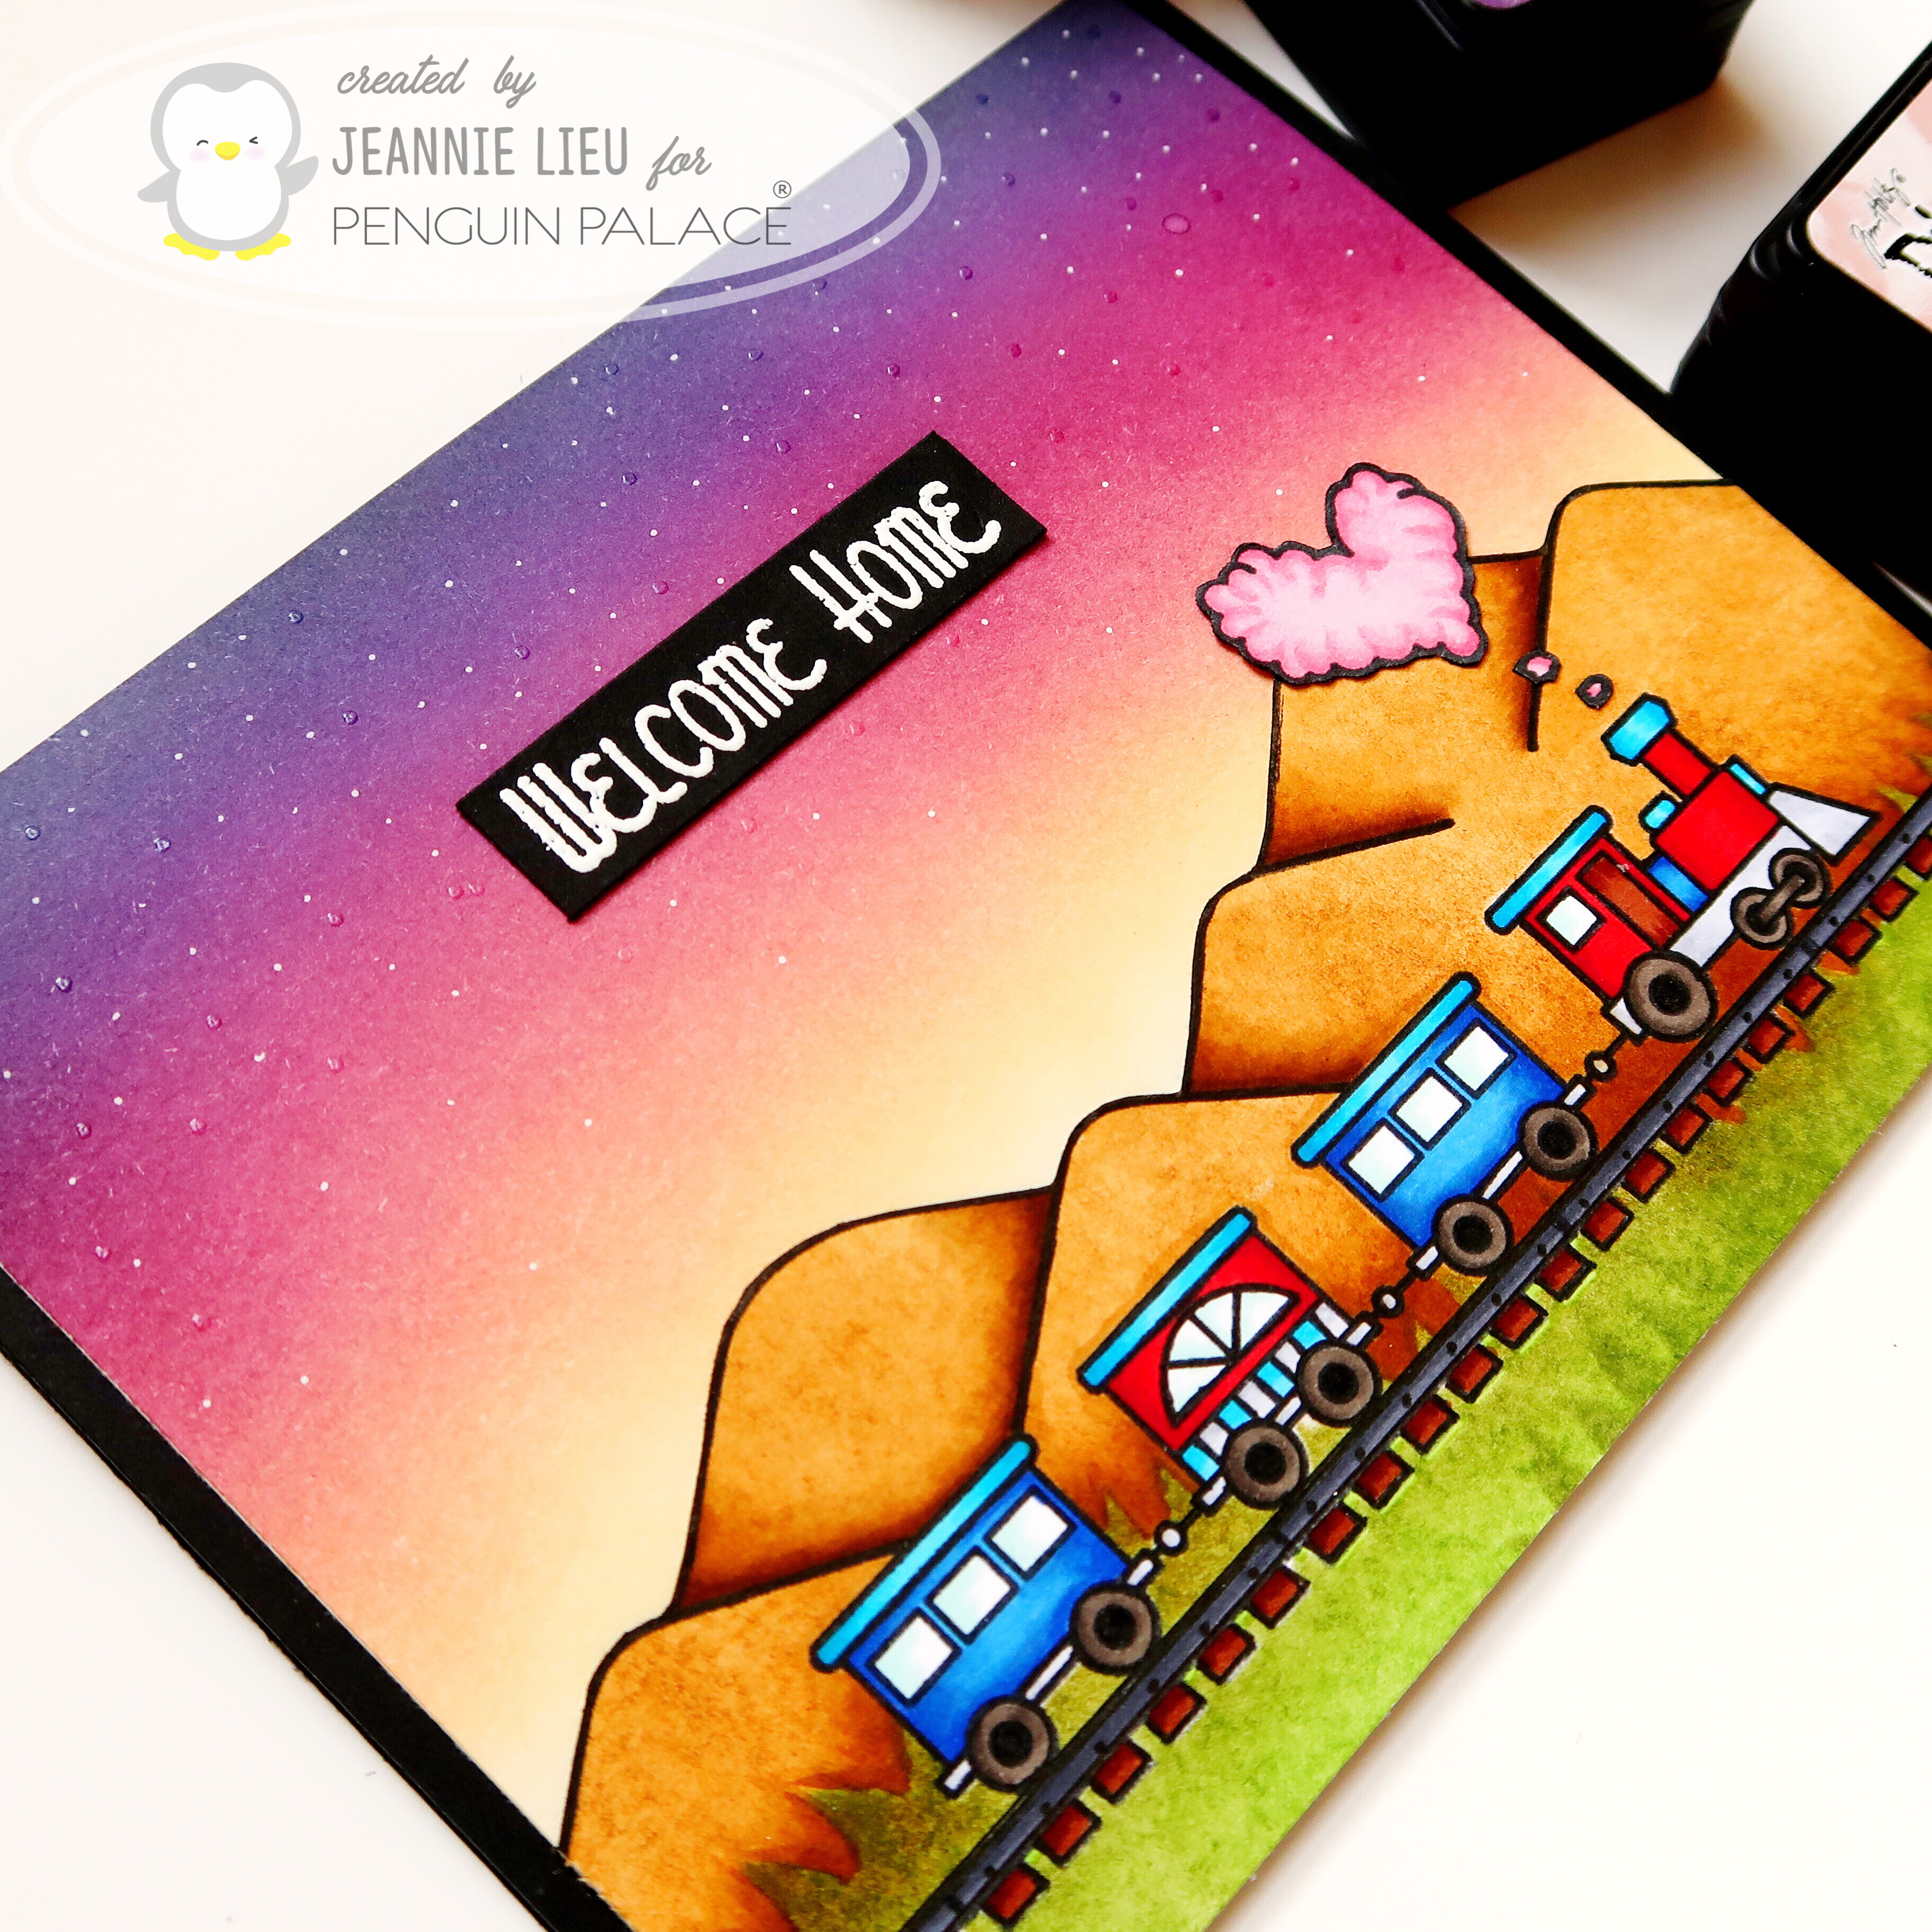
I stamped out the images I wanted to use on rectangles and I masked them off so I could use distress oxide inks to color up the background. I added both water and silver paint splatter to them for a bit more interest.

After coloring up the images, I lined the rectangle edges with a black pen creating a frame. I really loved how these came out. I wanted them to be the main focus but needed to add the sentiment for the card. I chose a piece of Smokey Eyes card stock and it has this really fine, pretty sandstone texture to it. It was a bit hard to picture, but you can notice it in the picture above. If you haven’t tried the cardstock from the store, I highly recommend it. I am really enjoying the subtle texture on the card stock that provides a little interest in the background but not deterring away from your main focus of the card.

I stamped the sentiments directly on the card stock, having no issues even with the texture and trimmed the card panel so I could mat it on black cardstock. I wanted to tie the black color back to the lined rectangles.

That’s it for today’s card. I really like the colors that pop against the neutral grey and I hope you enjoyed it too!

Thanks for stopping by and I hope you enjoyed the sneak peeks. Come back again soon for some more inspiration and ideas!

→ SUPPLIES USED ←
Items marked with an asterisk (*) were provided by a store or the manufacturer for review and use. All other items were personally purchased. Affiliate links may be used at no cost to you.
STAMP SET(S): *It’s Your Day
INK: Distress Oxide Ink – Squeezed Lemonade, Picked Raspberries, Wilted Violet Versafine Ink
COLORING:

TOOLS: Misti, Tim Holtz Comfort Trimmer
MISCELLANEOUS: Smokey Eyes card stock*

→ TO SEE MORE ←
FACEBOOK: https://www.facebook.com/Insideoutjeans/
INSTAGRAM: https://www.instagram.com/insideoutjeans/
YOUTUBE: https://www.youtube.com/c/insideoutjeans

Love Train | Penguin Palace

Hi everyone! I hope you have enjoyed Thanksgiving and had a lot of family time, which is what I did. Now, it’s Monday and back to reality.

Today I’m sharing another card using a stamp set from Penguin Palace, Love Train. It’s a super cute set that has buildable train sections so you can customize one as you please.

I decided that for this card, I wanted to mask and build a semi-one layer card. For the bottom portion of the card, I stamped out the train, the railroad, and the mountains. I was able to mask all of this off and use distress inks for the grass and mountains. I did use some Copics to enhance the shading and give the mountains some dimension.

The sky at dusk is the star of the card though. I used a variety of distress inks to blend out the sky and I loved how it turned out. I also used a white glaze pen and a clear glaze pen to add little stars to the sky, adding a bit of interest to the card generally. I definitely love how this turned out.

If you haven’t already, you should check out Penguin Palace stamps and use “GRANDOPEN” for a 20% off all the items in the store.

Have a great day!

Galaxy Backgrounds | Mama Elephant

Hi there! I received a bunch of questions about the galaxy backgound for one of my previous cards, so I decided to put together a video to show how I created two different ones using distress inks and white cardstock.

It’s definitely the perfect background for a card that doesn’t need much else.

I have had this set for awhile and even though they are perfect for Christmas cards, it also works for birthday cards or just because cards.

For this card, I used colors for the balloons that matched the colors peeking through the galaxy in the background, making it really playful and whimsical.

IMG_5903

For the second card, I really wanted to play with purple colors for a galaxy instead of a typical dark blue and black background. I like how this looks so different from the first one, with just a few color changes. It makes such a big difference.

IMG_5904

If you’re interested in learning more, below is my video showing my process video of these two cards.

SUPPLIES
Items marked with an asterisk (*) were provided by a store or the manufacturer. All other items were personally purchased.

DISCLAIMER
Some products are provided by manufacturers for review and use. Affiliate links may be used at no cost to you.

Peek-a-boo Pull Tab card | GSD

Hi there! It’s Jeannie and I’m so happy to be back to share a card as an official Design Team member.

Gerda Steiner Designs recently released a handful of new stamp sets and they are all adorable! Today, I’m focusing one of the smaller sets, Upside Down Flamingo. This set comes with one large flamingo and two large sentiments. I think it’s such a cute image… it’s so silly and I love it!

When I first saw this stamp set, I liked how the head was between the legs peeking at you. I thought it was perfect for an interactive card.

Putting this together was a little tricky because I just wasn’t sure how to go about creating it but once I figured it out, it turned better than expected. It’s also just as silly as the image.

This is a spin on a pull tab using the element of the stamp image itself. Check it out in my video tutorial here:

Hope you love this card as much as I do. I think it’ll bring a smile to anyone’s face. It’s so random and unexpected.

SUPPLIES
Items marked with an asterisk (*) were provided by a store or the manufacturer. All other items were personally purchased.

DISCLAIMER
Some products are provided by manufacturers for review and use. Affiliate links may be used at no cost to you.


Rainbow Background | Simon Says Stamp

Hello there! I’ve had Simon Says Stamp’s Beautiful Flower stamp set for such a long time and I never used it because it is such a large floral image. I just couldn’t do it justice in my head. I finally pulled it out to create something super fun and outside my comfort zone.

I usually am pretty OCD but with alcohol inks… you just can’t be. They have a mind of their own! Even if you loved how something turned out, the chances of you duplicating the same again, is nearly impossible.

I decided for today’s card to let the image speak for itself. It’s only stamped and heat embossed on vellum and yet, it makes such a statement against the alcohol ink. I wanted to do a super colorful background and what is more colorful than the colors of the rainbow.

ACS_0687

Check out how this came together in my process video:


SUPPLIES
Items marked with an asterisk (*) were provided by a store or the manufacturer. All other items were personally purchased.

DISCLAIMER
Some products are provided by manufacturers for review and use. Affiliate links may be used at no cost to you.

LDRS – Shore Lucky

Screen Shot 2018-06-30 at 10.59.08 AM

Thank you for joining us on our LDRS Creative inspiration week blog hop! We are showcasing lots of gorgeous projects using products from our new release. You can even see them in action with step-by-step projects by our amazing designers on their blogs and our own LDRS Creative Youtube channel (make sure you subscribe)!

 We have TWO new paperpads bursting of colours, with awesome patterns all ready for your projects called You Are My Sunshine (from TLC Crafting) and Sweet Summer! There are FIVE clear stamp sets that are oh-so-sweet: Shore Lucky, Lemonade, Ants Pants, A New Beginning and Heatwave (two sets from Cre8tive Cre8tions)! But wait, you’re about to die for… FIVE new die sets that can be used as accessories or full backgrounds: Sunburst, Scalloped Rectangle, Sun & Clouds, Surfing Waves & Sandy Beach, Waves & Clouds. And for the first time at LDRS Creative, you can grab them in bundles, because you KNOW you need them all!

Simply use the list at the end of the post to keep hopping!
Each day we are giving away a $50 LDRS Creative gift card to one lucky hopper!  To enter leave a comment on each blog in the hop, plus follow us on Facebook and Instagram. Winners will be announced on the LDRS Creative inspiration blog on July 10th.
AND for the release event we are excited to offer some great savings!
Save 25% on the new release* and use code Jul25
(*Coupon valid until midnight EST 7/8/18, not on bundles)

Today I’m using the stamp set called Shore Lucky, along with some of the new release dies. But first, I picked out a piece of paper from the You Are My Sunshine paper pack that mimicked the ocean with the blue lines and trimmed it down to an A2 card panel. I thought it needed a little more color, so I pulled out the Little Boy Blue ink and inked up the edges.

JEANNIE-SHORE LUCKY1-JULY5

I stamped out the images from Shore Lucky using Raven hybrid ink and colored them in using alcohol ink. I like how these images are smaller so I can use a lot of them in a smaller space. I trimmed down a piece of paper to use as the spotlight panel so the pattern paper can frame the main card space. I die cut paper using the Surfing Wave die and used the same Little Boy Blue color to ink up the die cuts, except the top of the wave, which I left white.

I also took a piece of Kraft cardstock and die cut it using the Shady Beach die. Using Coffee Bean ink, I inked up the edges of this die cut to add a little dimension. I stamped the sentiment from the Shore Lucky set, using the same Coffee Bean ink.

JEANNIE-SHORE LUCKY2-JULY5

I think this card turned out great and this little set really packs a punch and allows you to create a super cute beachy stamp set.

JEANNIE-SHORE LUCKY3-JULY5

Come back tomorrow for my last card I’m sharing using the LDRS July new release. 


Hop along and leave a comment so you could win!

Day 2:
And make sure to be back tomorrow for more inspiration!

LDRS – A New Beginning

 Screen Shot 2018-06-30 at 10.59.08 AM
Thank you for joining us on our LDRS Creative inspiration week blog hop! We are showcasing lots of gorgeous projects using products from our new release. You can even see them in action with step-by-step projects by our amazing designers on their blogs and our own LDRS Creative Youtube channel (make sure you subscribe)!
 
 We have TWO new paperpads bursting of colors, with awesome patterns all ready for your projects called You Are My Sunshine (from TLC Crafting) and Sweet Summer! There are FIVE clear stamp sets that are oh-so-sweet: Shore Lucky, Lemonade, Ants Pants, A New Beginning and Heatwave (two sets from Cre8tive Cre8tions)! But wait, you’re about to die for… FIVE new die sets that can be used as accessories or full backgrounds: Sunburst, Scalloped Rectangle, Sun & Clouds, Surfing Waves & Sandy Beach, Waves & Clouds. And for the first time at LDRS Creative, you can grab them in bundles, because you KNOW you need them all!
Simply use the list at the end of the post to keep hopping!
 
Each day we are giving away a $50 LDRS Creative gift card to one lucky hopper!  To enter leave a comment on each blog in the hop, plus follow us on Facebook and Instagram. Winners will be announced on the LDRS Creative inspiration blog on July 10th.
 
AND for the release event we are excited to offer some great savings!
 
Save 25% on the new release* and use code Jul25

(*Coupon valid until midnight EST 7/8/18, not on bundles)

Today, I’m sharing a card I put together using the A New Beginning stamp set. I really like the floral images and wanted to use them for this card.

First, for the background, using Flesh and Pink Tutu Hybrid Ink, I inked up an A2 card panel. I kept Flesh in the middle and Pink Tutu on the edges. Most of this will be covered up but, I still wanted to blend it nicely between the two colors. Using the Sunburst die, I die cut a piece of white paper. This particular die cuts a little smaller than an A2 panel, so the Pink Tutu ink on the edges will create a nice frame for the card. I love how the two colors are subtle but look really pretty behind this die cut panel.

Second, I stamped out the image of the girl and the florals using Raven Hybrid Ink. I wanted to keep a orange and pink color theme, so I used shades of those two colors to color in these images. Once I was done, I fussy cut the images and placed them in the center of this card.

It’s a super simple card, but I think it turned out to be really pretty. Whenever, I decide to give away this card, I can add the appropriate sentiment along the bottom half of the card. I really like leaving cards ready to go minus a sentiment so it can fit any occasion.

Hope you enjoyed my first card for this release. Come back tomorrow for more card inspiration. 

Hop along and leave a comment so you could win!


Day 1:
And make sure to be back tomorrow for more inspiration!

Spring Blossoms | Honey Bee Stamps

Hi there!

Today, I’m sharing this card using Honey Bee Stamps’ Spring Blossoms stamp set to create this really pretty card. I mixed simple coloring with heat embossing on acetate to create this card. I really love flowers on cards since it adds elegance to them, especially with this set.  I wanted to use a mix of different elements and I’m really happy with the end result.

022_Honey Bee Stamps_Spring Blossums_Watermarked

I also have a process video for this card:

SUPPLIES
Items marked with an asterisk (*) were provided by a store or the manufacturer. All other items were personally purchased.

DISCLAIMER
Some products are provided by manufacturers for review and use. Affiliate links may be used at no cost to you.

Drop Shadow | Sweet Stamp Shop

Hi there. A couple releases back, I created some drop shadow postcards for Sweet Stamp Shop and I got a lot of questions about how I did it. I finally found the time to create a video to show off two ways of achieving this technique: using a scan n cut or using masking post its.

It’s a pretty simple technique but it creates a super cool effect. This time, I use it as a more subtle part of the card since I wanted the focus on the main stamp image and the sentiment. I looooove tequila so it was the perfect time for this.

IMG_2399.JPG

Check out the video below for how I created it and also all the supplies I used to create these two cards.

SUPPLIES
Items marked with an asterisk (*) were provided by a store or the manufacturer. All other items were personally purchased.

DISCLAIMER
Some products are provided by manufacturers for review and use. Affiliate links may be used at no cost to you.

Shaped Card | Waffle Flower


Hi there! I totally forgot to make a congratulatory baby card for my friend who just had a baby girl. I’ve been friends with her since high school so I wanted it to be special.

I have always adored the Waffle Flower stamp set, Popping in. It’s SUPER adorable and perfect for any baby card so I had to use it to create my card.

I really love that little cabinet stamp in the set but it just wasn’t big enough, so I figured out how to create a larger cabinet (A2 sized). I used the little animals and outfit from the set to put this all together. Check it out in my tutorial below:

SUPPLIES
Items marked with an asterisk (*) were provided by a store or the manufacturer. All other items were personally purchased.

DISCLAIMER
Some products are provided by manufacturers for review and use. Affiliate links may be used at no cost to you.


Easy Colorful Vellum Background

Hi there! Today I’m sharing one of my favorite techniques for using the small images in stamp sets because they are often neglected but it’s so easy to use up to create a fun, colorful background.

You probably have the supplies sitting around as well. All you really need is vellum, heat embossing supplies and some alcohol markers.

ACS_0340.JPG

I also created a video to go with it so you can check out all the steps in creating this card.

SUPPLIES
Items marked with an asterisk (*) were provided by a store or the manufacturer. All other items were personally purchased.

DISCLAIMER
Some products are provided by manufacturers for review and use. Affiliate links may be used at no cost to you.


Generational Stamping | GSD

Happy Friday! Today I’m sharing a card using the Vrooming By clear stamp set (Coming soon!), which has a similar digital stamp image. Personally, I prefer having an actual stamp because I don’t have easy access to a printer so I was delighted to play with this cute image.

I wanted to depict how fast the dog was going on his scooter and decided to do this using the second and third generation stamping. A stamp positioner is really helpful in creating cards where you need precision and I think it’s one of my most used tools. In this instance, I’m using it to help stamp the same image multiple times but shifted over just a little bit.

IMG_1413.JPG

Using some light grey Copic markers, I colored them lightly to help portray that he’s zipping by. It turns out pretty cool, doesn’t it? It’s a very simple card but I think the additional stamped images gives it enough to catch your interest.

This card is a bit out of my comfort zone, but I decided to share it and the video tutorial anyway:

I hope you enjoy the card and try it out. As always, the supplies I used are also listed below. Have a great day!

SUPPLIES
Items marked with an asterisk (*) were provided by a store or the manufacturer. All other items were personally purchased.

DISCLAIMER
Some products are provided by manufacturers for review and use. Affiliate links may be used at no cost to you.