Aquarium Shadow Box & Planner Layout

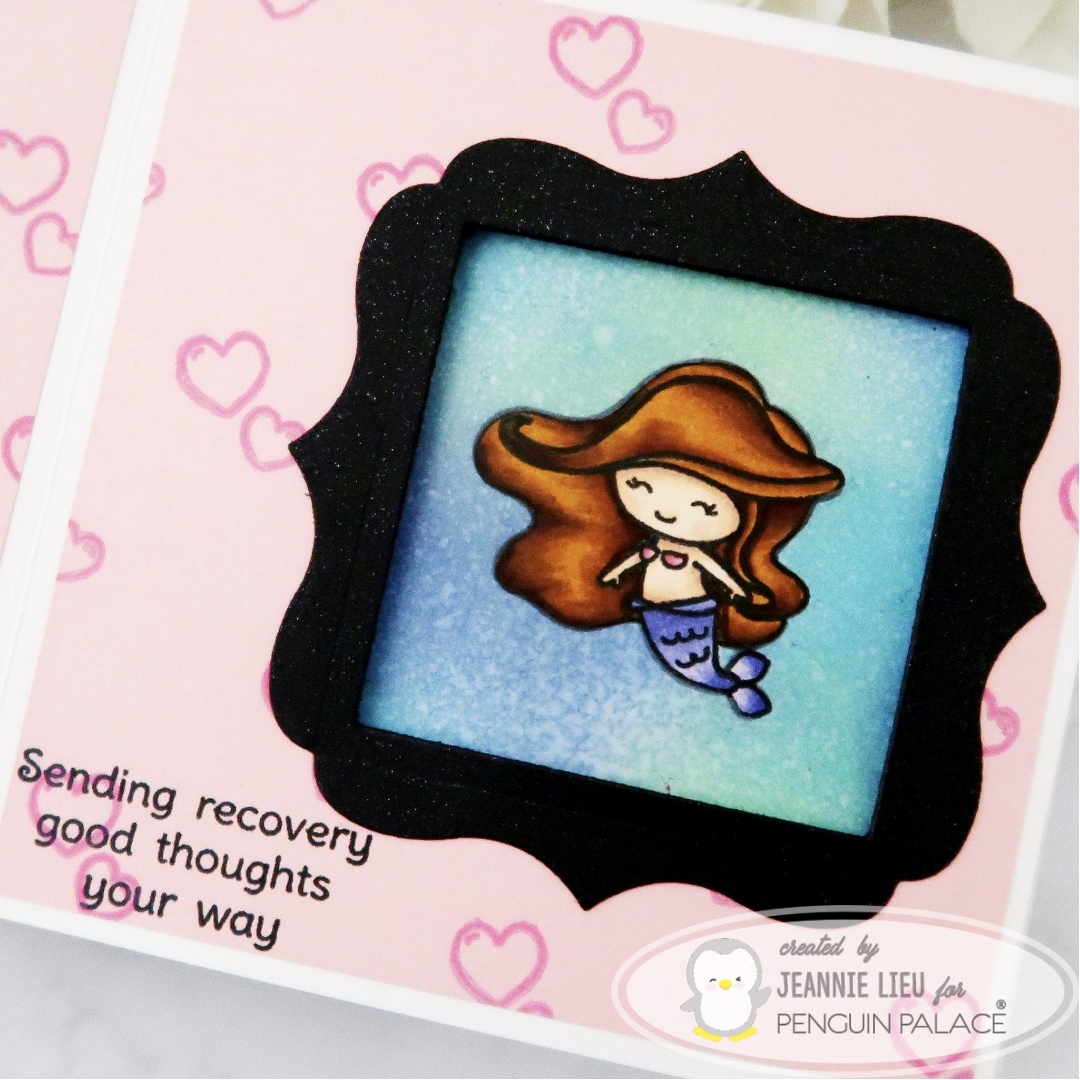
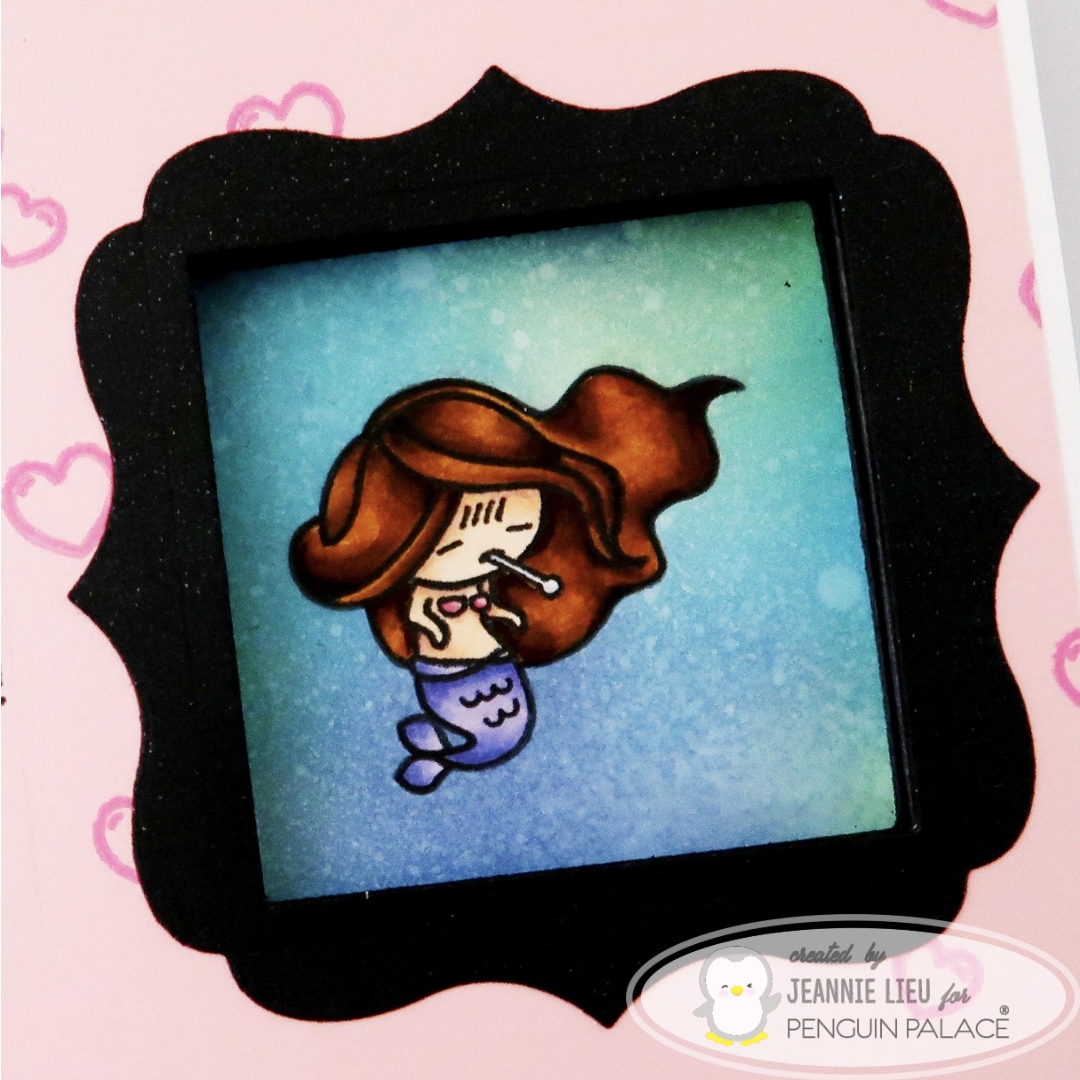
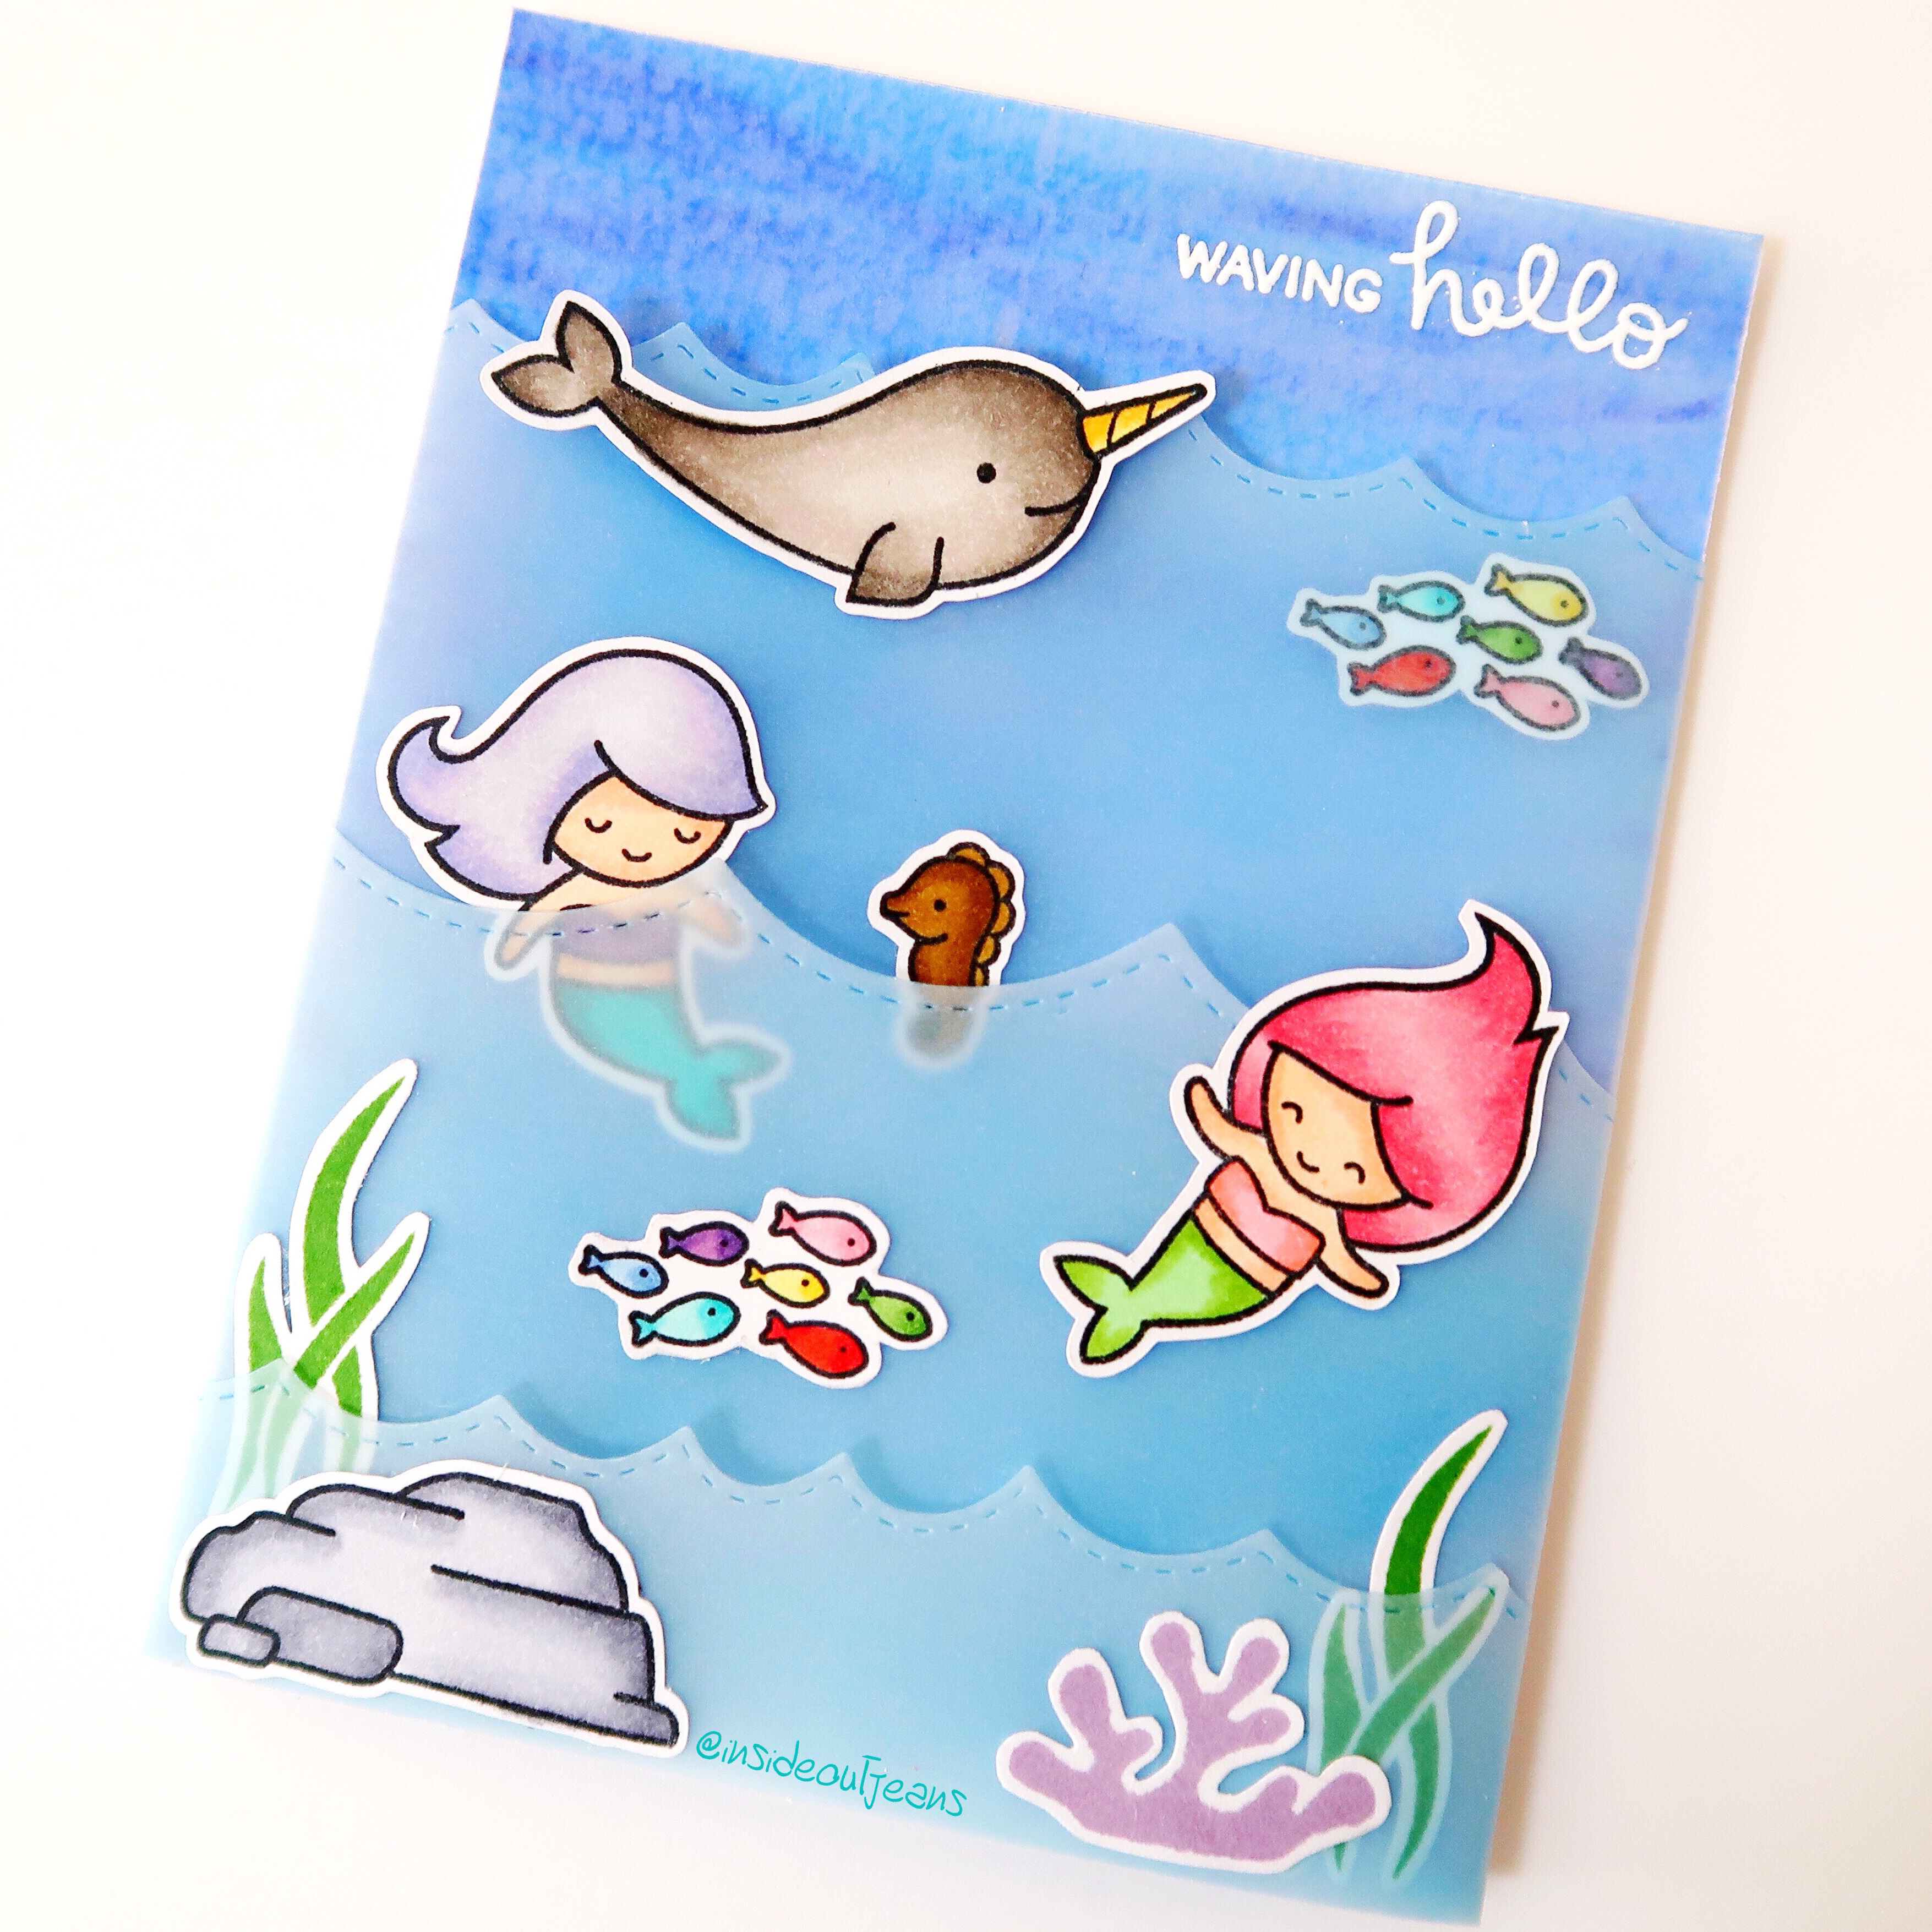
Hello, hello! I’m back today with a super fun card I made along with a video showing the process for creating this card. Today, I’m featuring The Sassy Club’s, Under the Sea and Sea Creatures. All supplies used will be listed at the bottom of this post for your convenience.

I generally love interactive cards and this one is no different. It’s only a little different in the sense of what paper medium I’m using. Today, I’m using mainly acetate to create my card.

For my video today, I’m focusing more on putting together this aquarium, which is actually really easy and putting all the elements together to form this card so I hope you enjoy it.

It’s also part of a video hop and my particular channel will be giving away a $25 gift certificate of your choice (US and International). You’ll just need to leave a message on my YouTube. For an extra entry, head over to my instagram, follow me there and leave a comment on this card’s post. The winner will receive a $25 gift certificate of your choice and this is open to US or International. Entries for the giveaway will close on April 20. The winner will be announced on April 21. Good luck!

https://youtu.be/sXMOGqhnNyY

Additionally, if you’ve been following me on Instagram already I’ve started including my planner layouts inspired by my cards. I’ve been really obsessed with this and I love planner stamping. I use one additional set for the planner, called Making Waves. It’s absolutely adorable and can’t wait to start next week!

Thanks for stopping by! Come back soon!

→ SUPPLIES USED ←

Items marked with an asterisk (*) were provided by a store or the manufacturer for review and use. All other items were personally purchased. Affiliate links may be used at no cost to you.

STAMP SET(S):
The Sassy Club – Under the Sea: https://bit.ly/2HKGSn5
The Sassy Club – Sea Creatures: https://bit.ly/2UOirJg
DIES:
My Favorite Things – Snowy Drifts: http://shrsl.com/1ihxz
STENCIL(S):
Make Waves: http://shrsl.com/1ihy2
INK:
Mini Distress Ink – Walnut Stain: http://shrsl.com/1eplq
TOOLS:
Fiskars Paper Trimmer: http://shrsl.com/1epax  
Teflon Bone Folder  – https://goo.gl/ZULq1v
Distress Ink Blending Tool: http://shrsl.com/1epb9
Scor Tape 0.25”: https://goo.gl/tJKrxy
Xyron Sticker Marker: http://shrsl.com/1ihys
Glue Dots: http://shrsl.com/1ihyw
MISCELLANEOUS:
Tim Holtz Glass Media Mat: http://shrsl.com/1epat
Duralar Acetate: https://amzn.to/2FhNW80

→ TO SEE MORE ←
FACEBOOK: https://www.facebook.com/Insideoutjeans/
INSTAGRAM: https://www.instagram.com/insideoutjeans/
YOUTUBE: https://www.youtube.com/c/insideoutjeans

LDRS Blog Hop – Day 1

Thank you for joining us on our LDRS Creative inspiration week blog hop! We are so excited to feature what was showcased at Creativation in January! There are lots of gorgeous projects using products from our new release. You can even see them in action with step-by-step projects by our amazing designers on their blogs and our own LDRS Creative Youtube channel (make sure you subscribe)!

There are two brand new full size stamp sets from Cre8tive Cre8tions, each combining 8 stamps; Celebration and Flower Power!

Next, we have something for all our Polkadoodles fans! We have two brand new characters, each featuring lovely scenes: Ruby (Celebration, Pretty Cute, So Sassy) and Holly (Delightful Daisy, Feathered Friends, Story Time, Watch It Grow). And fear not, Winnie is also joining the party with the mini set called Let’s Go, and some amazing paper doll dies in the Die-licious collection to create to your soul content: A Gift For You, Miss Pretty, Puppy Princess, Super Scenes. What’s best is that we came up with the perfect 6“x6” Die-Licious paperpack to combine all skin, hair and clothing patterns as a perfect complement!

If you are more into flowers, then you will simply adore these brand new stamp and die combo sets: If Friends Were FlowersLove And Smell The Roses.

And did we say we were throwing a surprise party for you all? Thanks to these sweet stamp sets, you can have one, too: Wordalicious, Sweet Treats, Party Time, Life Is Sweet, Ice Cream Party, Goody Gumdrops!

What’s even cooler are the interactive stamps (and some even as a die combo!) we are proud to have designed: Going Places, On The Move-NeighborhoodOn The Move-Landscape. Adorable critters? Yes! Right here: On The MoveHippo Hooray, Super Critters!

We also have FOUR new die sets that will help you get a professional look in no time, on top of being simply adorable: Twirling Pop-Up, Barber Stripes Rectangle, Fringe, Scalloped Borders.

Who’s ready for mini hybrid inks? We are adding the latest two sets of our very popular Hybrid inks in a mini version, perfect for ink blending, stenciling, stamping, colouring and embossing: At The Beach and On The Farm!

Next, we have two new 6″x6″ stencils that are sure to be as popular as the others: Playful Patterns and the Waffle!

Lastly, because we wanted to give you the perfect time with papers AND stamps, we created the new Playful Pattern collection that includes 6″x6″ and 12″x12″ packs: Homemade Happiness, Candy Counter, Sweet Sensations!

Each day we are giving away a $25 LDRS Creative gift card to one lucky hopper!  To enter leave a comment on each blog in the hop, plus follow us on Facebook and Instagram. Winners will be announced on the LDRS Creative inspiration blog on March 5th.

AND for the release event we are excited to offer some great savings!
Save 15% on the new release*, including already discounted bundles and use code FEB15
(*Coupon valid until midnight EST 3/6/18)


Hi everyone! Thanks for checking out the blog hop for LDRS Creative. I hope you’ve been enjoying all the new items and get inspired to create. I have a project using the new stamp set called Super Critters! It’s one of the new interactive stamp sets that was showcased at Creativation and I personally think it’s super cute.

I was drawn to the raccoon because it’s pretty adorable and it’s actually a critter I don’t see often in stamp sets. This particular raccoon is the image that has an interactive element to it.

I stamped the main image and the interactive body part (tail and leg) using Raven hybrid ink, which you can use with alcohol markers and watercolor. For the main image, you don’t need to color the tail and the left leg since you actually trim this portion off.

The interactive body part goes right behind the main image and is held together by a brad. I only had a star brad around, and this is ok because it looks like a little tattoo on the raccoon.

I used a few of the smaller images from the set to create a background scene. Using a pencil, I filled out the rest, including a little fence so the raccoon with her two paws could be looking over something.

Once I finish drawing everything in, I used an alcohol marker friendly pen to outline all the areas I drew in. I went ahead and colored everything bringing the scene to life.

For the main raccoon, I added a little bit of foam tape behind his head and behind his right leg. The foam tape gives the image enough dimension so that the brad and his tail and leg could move freely.

To finish off this card, I added the sentiment “You’ve Stolen My Heart”. I also used the little hearts from the Scalloped Rectangle Die and cut hearts from red glitter cardstock. It adds a cute touch to the card and corresponds to the sentiment.

I love how it turned out and I’m loving the movement. Check out the card in action over on my instagram!

Thanks for stopping by! Come back again soon for some more inspiration and ideas!

Hop along and leave a comment so you could win!

LDRS CREATIVE BLOG
JANE
KASSI
ALANNA
JEANNIE – You are here!
ZSOFIA
MARTHA
MELISSA
ILINA
KIRSTEN
MELANIE
RALUCA

Get Well Soon | Penguin Palace

Hi everyone! Today I wanted to share a card I created using Penguin Palace’s stamp set named, Get Well Soon. This is a smaller stamp set but a perfect one to wish someone good thoughts. I previously did a flip card that showed the sick mermaid and then flipped to a happy, healthy mermaid.

Today, I wanted to share this peek-a-boo card that is essentially the same idea just one step up from a flip card. There are a ton of tutorials for this type of card and this set is perfect for it. The front of the card will feature the sick mermaid and then when you open it, it’ll feature a healthy mermaid.

I used pink cardstock and used the top two hearts from the bubbles to stamp all over, creating my own patterned paper for the front and inside of the card. For the frame, I used Mama Elephant’s Union Square and Sizzix’s Square Framelits to create the window. I chose Penguin Palace’s Mysterious Galaxy cardstock for this because it has this gorgeous glitter on it. I love how it’s super smooth and not grainy. I was able to die cut using the paper easily. 

For the background of the mermaid, I used three distress oxide ink colors, sprayed it with Hero Art’s Shimmer Spray, and used a paper towel to pick up the splatters creating a watery effect.

I really like how this card came out and I hope you did too!

Thanks for stopping by! Come back soon!

→ SUPPLIES USED ←
Items marked with an asterisk (*) were provided by a store or the manufacturer for review and use. All other items were personally purchased. Affiliate links may be used at no cost to you.

STAMP SET(S): Penguin Palace Get Well Soon
DIES: Mama Elephant Union Square, Sizzix Square Framelits
INK: Picked Raspberries, Broken China, Cracked Pistachio, Faded Jeans, Memento Tuxedo Black
COLORING:
Copic Sketch C1, C3, R20, R83, R85, E00, E04, E11, E25, E27, E29, YR24, BV00, BV04, BV13, BV17
PAPER: Penguin Palace Mysterious Galaxy
MISCELLANEOUS: Hero Art’s Shimmer Spray

→ TO SEE MORE ←
FACEBOOK: https://www.facebook.com/Insideoutjeans/
INSTAGRAM: https://www.instagram.com/insideoutjeans/
YOUTUBE: https://www.youtube.com/c/insideoutjeans

Birthday Unicorn Shaker

Hi everyone! I’m back to share a card I created using Penguin Palace’s stamp set named, Birthday Unicorn.

I’ve already created some cards using this set because it’s so easy to work with and super versatile. However, I really wanted to do something bright, fun, and pink.

I wanted to create a shaker card for today. I used one of the Stitched Dome STAX Die-namics for my opening because I wanted something different from a circle, square or rectangle. Since I decided to use a pink background, I wanted to break up the color by using a piece of fun patterned paper for the bottom portion of the card. I added the sentiment using Versamark ink and Hero Art’s white embossing powder to a strip of black cardstock.

I added acetate to the die cut opening, placing foam tape around the dome area and around the card panel. Adding bits of glitter and shaker bits, I completed the shaker portion of this card.

I originally used one of the unicorn images but adding it to the card, it looked really empty so I stamped, colored and die cut another one. It really helped fill out the card and I totally love it!

Thanks for stopping by! Come back soon!

→ SUPPLIES USED ←
Items marked with an asterisk (*) were provided by a store or the manufacturer for review and use. All other items were personally purchased. Affiliate links may be used at no cost to you.

STAMP SET(S): Penguin Palace – Birthday Unicorn
DIES: Penguin Palace Perfect Cuts – Birthday Unicorn, Stitched Dome STAX Die-namics
INK: Memento Tuxedo Black Ink
TOOLS: Misti, Wagner Heat Gun, Versamark Ink, Anti-Static Powder Pouch
MISCELLANEOUS: Hero Arts – White Embossing Powder, 3M Foam tape, Acetate:

→ TO SEE MORE ←
FACEBOOK: https://www.facebook.com/Insideoutjeans/
INSTAGRAM: https://www.instagram.com/insideoutjeans/
YOUTUBE: https://www.youtube.com/c/insideoutjeans

Pink and Main & Glue Dots Blog Hop

Hi there! Thanks for stopping by my blog for the Glue Dots and Pink & Main Blog Hop collaboration, where you can win a $25 gift card just for leaving a comment. Winners will be announced on Wednesday, September 26, 2018 at 6am.

For today’s card, I decided to use the new stamp set from this month, Eskimo Kisses, and its coordinating dies. I stamped this out on white cardstock and used the dies to cut easily cut all these images out.

IMG_4393

After I colored all the images I cut out, I decided that I wanted to use the Box Card die, which made creating an interactive card extra easy!

IMG_4394

Once I cut out the box card pieces, I used Glue Dot’s glue lines to put everything together. These glue lines are perfect for the tabs that make the box card. Two work perfectly for the side tabs.

IMG_4395

For the inner part of the box, I used Bristol Smooth paper and created a Northern Sky look using distress inks and white splatter. I truly believe that white splatter makes anything into a galaxy or a star filled sky. For the outer part of the card, I die cut out blue paper to mimic ice. Once, I did that I used the Glue Dot’s glue runner to tape all these pieces to the box card.

IMG_4396

I was able to use various Glue Dots adhesive to add the stamped and die cut images to the box. It works really well since Glue Dots has a variety of sizes so it could be added to the nooks and crannies of the images. In particular, the mini dots are a favorite for box cards. Look at the little girl’s feet! They are so small but the mini dots fit perfectly on behind each shoe.

IMG_4397

To finish off this card, I stamped out the sentiment on the matching blue on the interior of the card. I loved how this card turned out and can’t wait to give this away! I hope you enjoyed it and the blog hop. All the other participants are listed below… and remember to comment for a chance to win! Enjoy!

IMG_4398

BLOG HOP LINEUP
Glue Dots 
Tracy 

Robyn
Lynnea 
Amanda
Ilina
Samantha
Zsofia
Dawn
Jeannie — You are here!
Melanie
Jackie 
Grace
Andrea
Danielle
Pink and Main

42165854_10156971014979683_8580890254163050496_n

Peek-a-boo Pull Tab card | GSD

Hi there! It’s Jeannie and I’m so happy to be back to share a card as an official Design Team member.

Gerda Steiner Designs recently released a handful of new stamp sets and they are all adorable! Today, I’m focusing one of the smaller sets, Upside Down Flamingo. This set comes with one large flamingo and two large sentiments. I think it’s such a cute image… it’s so silly and I love it!

When I first saw this stamp set, I liked how the head was between the legs peeking at you. I thought it was perfect for an interactive card.

Putting this together was a little tricky because I just wasn’t sure how to go about creating it but once I figured it out, it turned better than expected. It’s also just as silly as the image.

This is a spin on a pull tab using the element of the stamp image itself. Check it out in my video tutorial here:

Hope you love this card as much as I do. I think it’ll bring a smile to anyone’s face. It’s so random and unexpected.

SUPPLIES
Items marked with an asterisk (*) were provided by a store or the manufacturer. All other items were personally purchased.

DISCLAIMER
Some products are provided by manufacturers for review and use. Affiliate links may be used at no cost to you.


Rocking Card | The Sassy Club

Hello there! The Sassy Club recently had a release and I always love the Darla images.  However, when I spotted a unicorn floatie, I HAD to put this in my cart and get it immediately.

I created a rocking card, which is a circle shaped card. When you prop it up and give it a little push, it’ll rock! How cute is that?

IMG_3508 (1).JPG

Check out the video tutorial for how I put this together.

SUPPLIES
Items marked with an asterisk (*) were provided by a store or the manufacturer. All other items were personally purchased.

DISCLAIMER
Some products are provided by manufacturers for review and use. Affiliate links may be used at no cost to you.

Side Step | MFT Lucky Dog

Hello! I am so excited to share this card because this is one of my favorite cards that I’ve made in a long time.

My friend LOVES dogs and I needed to create a birthday card for her. I have a lot of dog stamp sets, but I think the MFT Lucky Dog is one of my favorite ones. The variety is awesome.

I imagined this backyard scene with a dog house and a fence with a dog peeking in. I adore that dog that this set includes, having his face and behind!

039_MFT Lucky Dog_Stamped.JPG


039_MFT Lucky Dog Back

And I have a video for this one… so watch me create it (with some issues, lol).

Oh and duh! Template here:

IMG_3085

SUPPLIESItems marked with an asterisk (*) were provided by a store or the manufacturer. All other items were personally purchased.

DISCLAIMER
Some products are provided by manufacturers for review and use. Affiliate links may be used at no cost to you.

Pink & Main – Catitude

I’m so excited to post my first design team card for Pink & Main. I adore their stamps and I love this July release so much!

The first set I played with was Catitude. If you love cats, you’ll adore this set. I love the variety of cats within this set and I wanted to use them all. I almost did!

I decided to use four of them. Three repeated twice and one was a very subtle one in the middle of my card. I also to add some action to this so I created a simple spinning card. I have a similar card with a video tutorial here.

On a piece of 5.5 x 5.5 paper from the Shades of Spring paper pack, I stamped out three kitties on top of a circle and repeated it on the mirror side. I’ll fussy cut out these images adding a circle to connect them all. I decided to make things super simple and used a piece from the Shades of Spring paper pack as my background. For the middle part, I stamped one of the images using a lighter grey ink and added the sentiment in black. The technical details can be seen in the video, but the idea is that the kitties will be spinning around in a circle. It’s sooooo adorable.

IMG_2935 (1)

Hope you enjoyed today’s card and hope you’ll be back for more of my projects.

LDRS – Ant’s Pants

Screen Shot 2018-06-30 at 10.59.08 AM
Thank you for joining us on our LDRS Creative inspiration week blog hop! We are showcasing lots of gorgeous projects using products from our new release. You can even see them in action with step-by-step projects by our amazing designers on their blogs and our own LDRS Creative Youtube channel (make sure you subscribe)!
 
 We have TWO new paperpads bursting of colours, with awesome patterns all ready for your projects called You Are My Sunshine (from TLC Crafting) and Sweet Summer! There are FIVE clear stamp sets that are oh-so-sweet: Shore Lucky, Lemonade, Ants Pants, A New Beginning and Heatwave (two sets from Cre8tive Cre8tions)! But wait, you’re about to die for… FIVE new die sets that can be used as accessories or full backgrounds: Sunburst, Scalloped Rectangle, Sun & Clouds, Surfing Waves & Sandy Beach, Waves & Clouds. And for the first time at LDRS Creative, you can grab them in bundles, because you KNOW you need them all!
Simply use the list at the end of the post to keep hopping!
Each day we are giving away a $50 LDRS Creative gift card to one lucky hopper!  To enter leave a comment on each blog in the hop, plus follow us on Facebook and Instagram. Winners will be announced on the LDRS Creative inspiration blog on July 10th.
AND for the release event we are excited to offer some great savings!
Save 25% on the new release* and use code Jul25
(*Coupon valid until midnight EST 7/8/18, not on bundles)
Hi there! This is the last day of the blog hop and I’m sharing one of my favorite cards from the release. I used Ant’s Pants and the Sun & Clouds die to put together this scene in the pop up box card. It also features one of my childhood fascinations …. an ANT FARM!
JEANNIE-ANTS PANTS2-JULY 6
For this card, it’s a little more detailed so thankfully I have a video to go along with it! The link and supply list is listed at the very end of this post. Remember to check out the other design team members’ blogs and comment for a chance to win prizes!
JEANNIE-ANTS PANTS1-JULY 6 
 
Hop along and leave a comment so you could win! ****(please add the brackets next to your name with ‘you are here’ so hoppers can easily keep track – add the specific list to each day; not all three at the same time ;-))
Day 3:

SUPPLIES
Items marked with an asterisk (*) were provided by a store or the manufacturer. All other items were personally purchased.

DISCLAIMER
Some products are provided by manufacturers for review and use. Affiliate links may be used at no cost to you.

Easy Slider & Stamp Manipulation

Hi there!

Today I’m sharing this card that I love so much! I had this idea in my head for awhile but when I went to the stamp set, I realized that the bear was actually holding the pie in his hand. I really wanted to make it so he would pop up from a window peeking at the pie.

This happens a lot when I have an idea for an interactive card in my head so sometimes I just have to mask and manipulate the image a bit.

Also, for this particular slider, I don’t need a slider die. I just create a channel using foam tape.

IMG_2435.JPG

Thankfully, it’s easier to show you than explain in words, so I have a video for you!

SUPPLIES
Items marked with an asterisk (*) were provided by a store or the manufacturer. All other items were personally purchased.

DISCLAIMER
Some products are provided by manufacturers for review and use. Affiliate links may be used at no cost to you.

No Bulk Interactive card | Lawn Fawn

Hello! Today I’m sharing a card where there’s movement on the card, but there’s not much added bulk. It’s a card I created so that the Narwhal and the Pink Mermaid move (or swim) in this fun underwater scene.

027_Lawn Fawn Mermaid for You_Stamped.JPG

To create this card, I used zig markers to blend out a fun watercolored background. I then used a ton of vellum to create “waves” for the scene, where I could let the images be in the water.

It’s such a fun card that I created a video so you can see how I created it. Check it out!

As always, all the supplies are listed down below and I’d love to hear what you think!

SUPPLIES
Items marked with an asterisk (*) were provided by a store or the manufacturer. All other items were personally purchased.

DISCLAIMER
Some products are provided by manufacturers for review and use. Affiliate links may be used at no cost to you.