Galaxy Backgrounds | Mama Elephant

Hi there! I received a bunch of questions about the galaxy backgound for one of my previous cards, so I decided to put together a video to show how I created two different ones using distress inks and white cardstock.

It’s definitely the perfect background for a card that doesn’t need much else.

I have had this set for awhile and even though they are perfect for Christmas cards, it also works for birthday cards or just because cards.

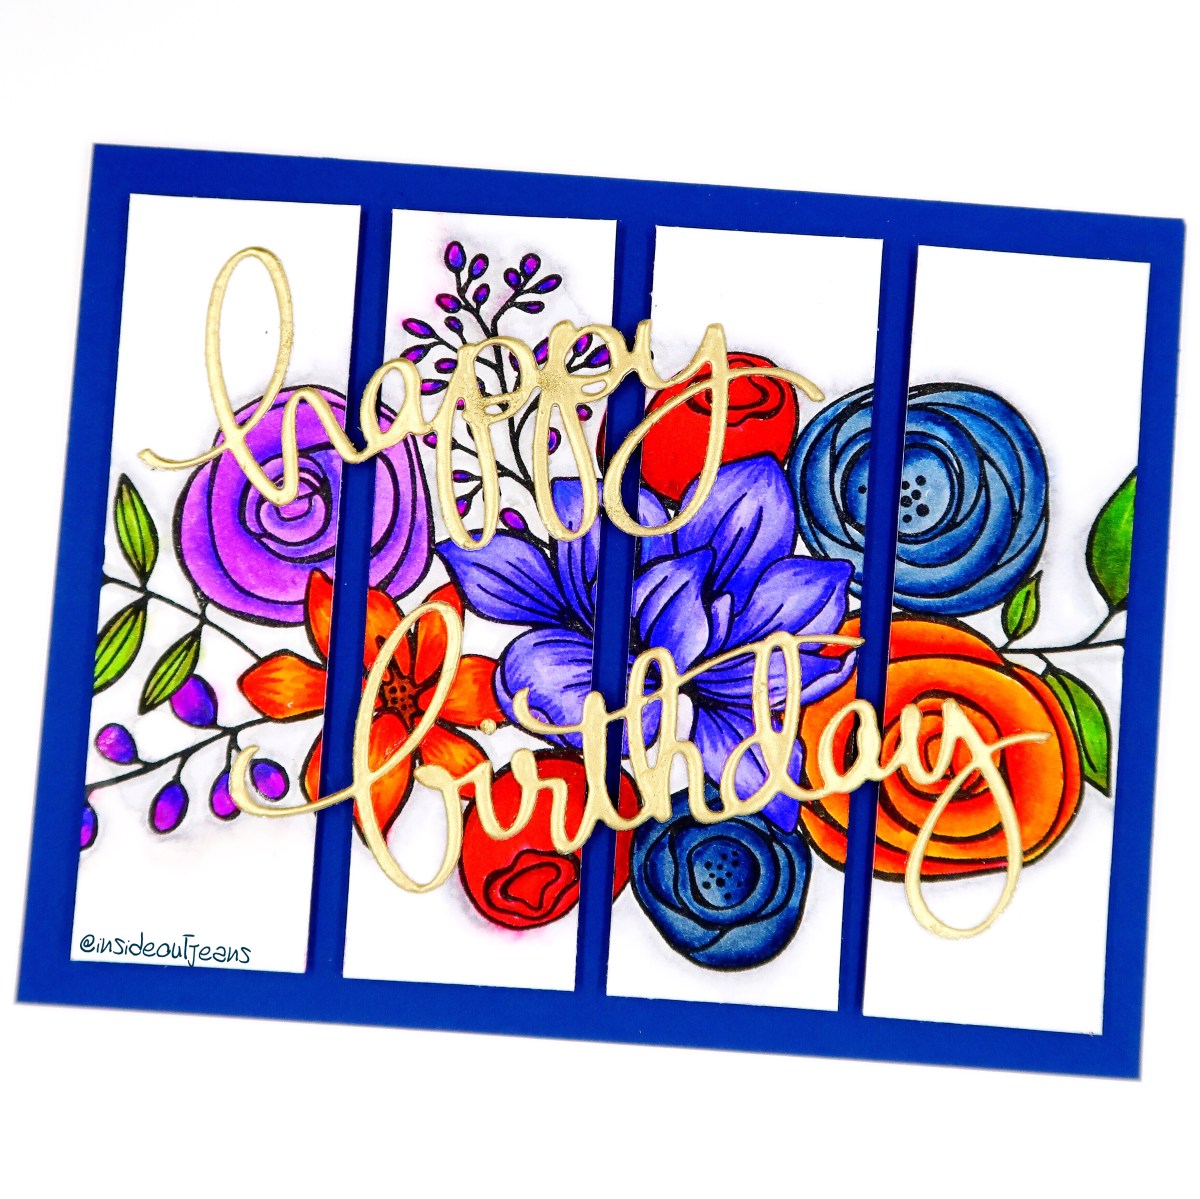
For this card, I used colors for the balloons that matched the colors peeking through the galaxy in the background, making it really playful and whimsical.

IMG_5903

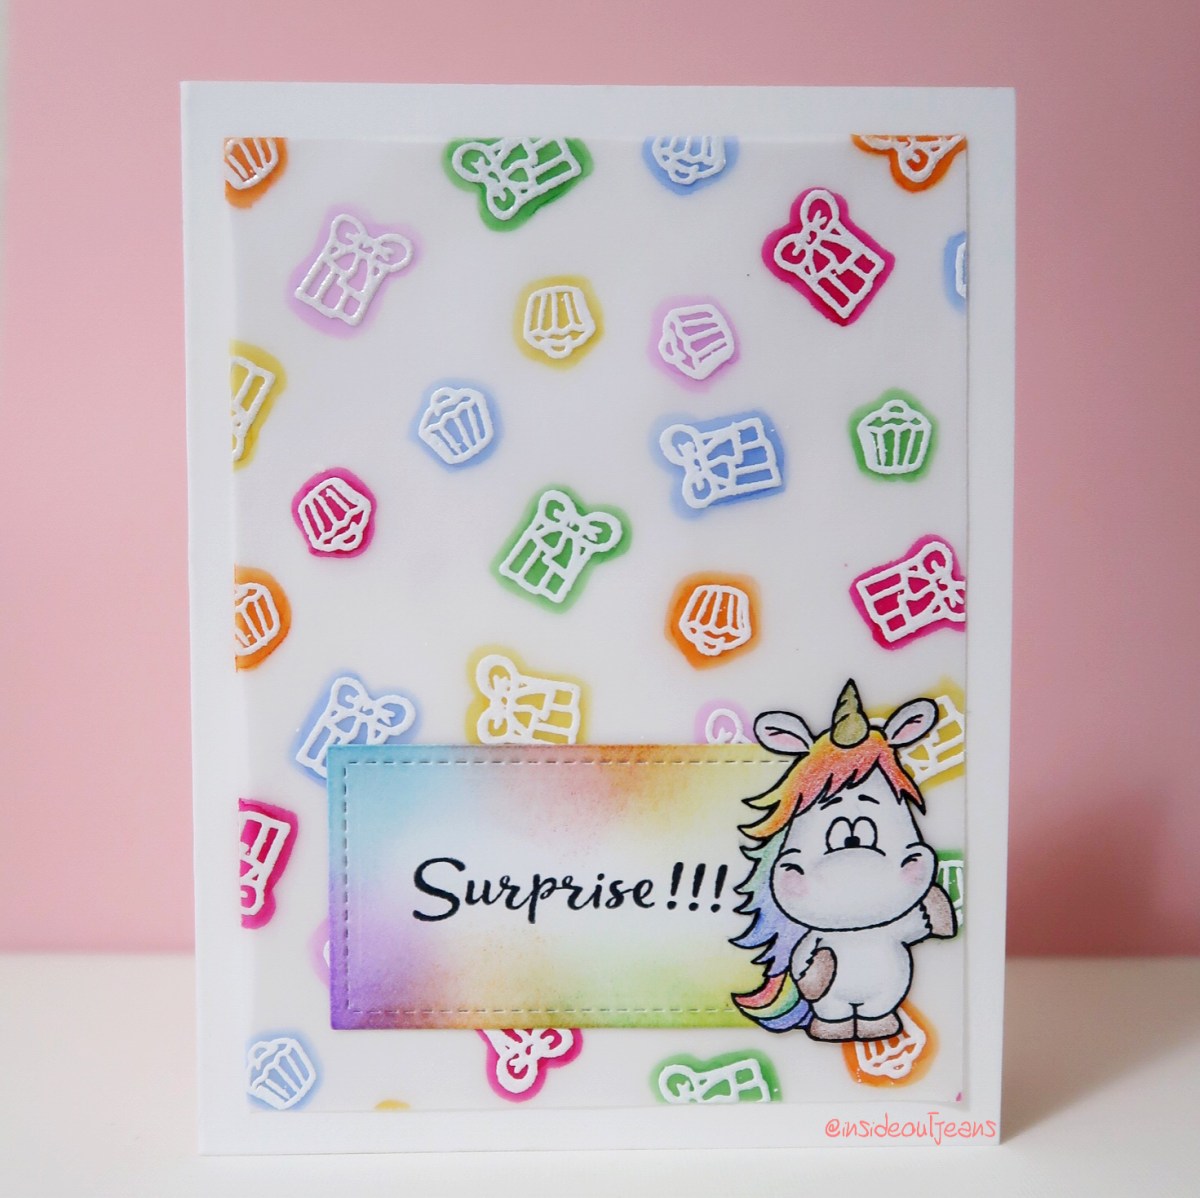
For the second card, I really wanted to play with purple colors for a galaxy instead of a typical dark blue and black background. I like how this looks so different from the first one, with just a few color changes. It makes such a big difference.

IMG_5904

If you’re interested in learning more, below is my video showing my process video of these two cards.

SUPPLIES
Items marked with an asterisk (*) were provided by a store or the manufacturer. All other items were personally purchased.

DISCLAIMER
Some products are provided by manufacturers for review and use. Affiliate links may be used at no cost to you.

Split Canvas Art

Hello everyone! I’m back today to share a card I put together based off of one of my favorite decorative items, split canvas art. I always love the look of it and wanted to translate that into a card. The only issue is the idea of cutting up an image that you spent time coloring but I think it’s totally worth it.

IMG_5402.JPG

The thin sentiment finishes off the card nicely. Check out how I put this all together here:

SUPPLIES
Items marked with an asterisk (*) were provided by a store or the manufacturer. All other items were personally purchased.

DISCLAIMER
Some products are provided by manufacturers for review and use. Affiliate links may be used at no cost to you.


Z Fold Card | Sweet Stamp Shop

Hello there!

I really loved this set from Sweet Stamp Shop’s latest release and I just HAD to do something fun with that girl on the trapeze. She had to hang from something right? I ended up using a z fold card to create the dimension I needed to do her justice.

IMG_3345.JPG

Check out how I did it here:

→ DIMENSIONS ←
A2 card panel: 11” x 4.25”, scored at 5.5”; Front panel of card scored at 2.75”
Long Black strip: 1.25 x 11”, scored at 5.5” and 2.75”
Long Red strip: 0.75” x 11”, scored at 5.5” and 2.75”
Interior black strip: 1.25” x 3.75”, scored at 0.5” on each edge (2.75” in the middle)
Interior red strip: 0.75” x 4/75”, scored at 1” on each edge (2.75” in the middle)

SUPPLIES
Items marked with an asterisk (*) were provided by a store or the manufacturer. All other items were personally purchased.

DISCLAIMER
Some products are provided by manufacturers for review and use. Affiliate links may be used at no cost to you.


Side Step | MFT Lucky Dog

Hello! I am so excited to share this card because this is one of my favorite cards that I’ve made in a long time.

My friend LOVES dogs and I needed to create a birthday card for her. I have a lot of dog stamp sets, but I think the MFT Lucky Dog is one of my favorite ones. The variety is awesome.

I imagined this backyard scene with a dog house and a fence with a dog peeking in. I adore that dog that this set includes, having his face and behind!

039_MFT Lucky Dog_Stamped.JPG


039_MFT Lucky Dog Back

And I have a video for this one… so watch me create it (with some issues, lol).

Oh and duh! Template here:

IMG_3085

SUPPLIESItems marked with an asterisk (*) were provided by a store or the manufacturer. All other items were personally purchased.

DISCLAIMER
Some products are provided by manufacturers for review and use. Affiliate links may be used at no cost to you.

Have a Ball! | Gerda Steiner Designs

Hello everyone! It’s been awhile since I’ve shared one of my cards and I really am loving this one. If you’re a fan of animals, especially doggies, this Dachshunds stamp set is for you! You’ll see that I used the Hoppiness stamp set as well to add a few extra elements to the card as well.

I used a grassy hills die to create a stencil. Using distress inks, I colored two layers of the grass. I definitely wanted to use two of the dogs in the set. I like how the first dog is looking back. I can’t really tell if he’s looking at that butterfly on his tail or the other dog chasing the tennis ball.

Since the second dog looked to be moving, I wanted to put him in action. And what dog doesn’t love chasing balls? I just had to have him chase the tennis ball included in this set. I create a pull tab channel so he could run towards the ball.

I used two sentiments in this card: It’s Your Birthday and Have A Ball. The first one is prominent on the front of the card, but the second one is hidden until the dog fetches the ball. It’s a small surprise for the card recipient.

I used the hearts and the butterfly from the Hoppiness set so I could add pop of color to the card. It looked a little too plain with just the doggies. I think it helps add that special something to the card.

I hope you enjoyed this card and picked up the set. It’s so fun! Thanks for stopping by!

(Not so) Moody Unicorns

Hi all,

I’m really excited to be back at Gerda Steiner Design’s blog. Here I created a simple and colorful card. Please go check it out and find out how I created it. I think it turned out really cute!

Her blog: Gerda Steiner.

IMG_3983.JPG

Supplies:
Vellum paper
Spectrum Noir: LV1, LG5, OR1, TB3, DR1, GB4
Hero Arts: White Embossing powder
Versamark watermark ink

Stamp Set:
Gerda Steiner Designs – Moody Unicorns

Birthday Cards – Candy Dispensing Card

I had spotted this design on Instagram. It was a card that actually worked to dispense candy! I knew I had to make one for myself. It is such a great idea to give to a kid, or just to someone who enjoys candy!

I checked out her youtube video (Tutorial), tweaked a few things, and created my version of it. I hate when dimensional cards leave you with the foam tape peeking out on the sides so the simple solution was to use washi tape to hide it. The added touch really helps finish the card. Pretty fun…

13879288_185545058531049_1686366509006711633_n

It works the same way as the tutorial. The only swaps I made was using craft foam instead of foam tape, and lining the edge of the card with washi instead of leaving it bare. It’s so exciting to see it work out successfully.

Items used:

  • Penny Black Stamps – Buddy & Duck
  • Paper Smooches – Clouds
  • Mini M&Ms
  • Daiso – Washi Tape

Coloring:

  • Ranger Distress Inks
  • Crayola colored pencils