Pink & Main – 5th Birthday Blog Hop

Hi everyone! It’s Pink & Main‘s 5th birthday and it’s definitely worth celebrating with a blog hop. There will be FIVE random winners chosen from the comments left on our blogs. The winners will each win a $50 store credit. You will have to comment on all blog stops for a chance to win! Hop around and be inspired!

Today I’m using some new release items which center around this birthday celebration!

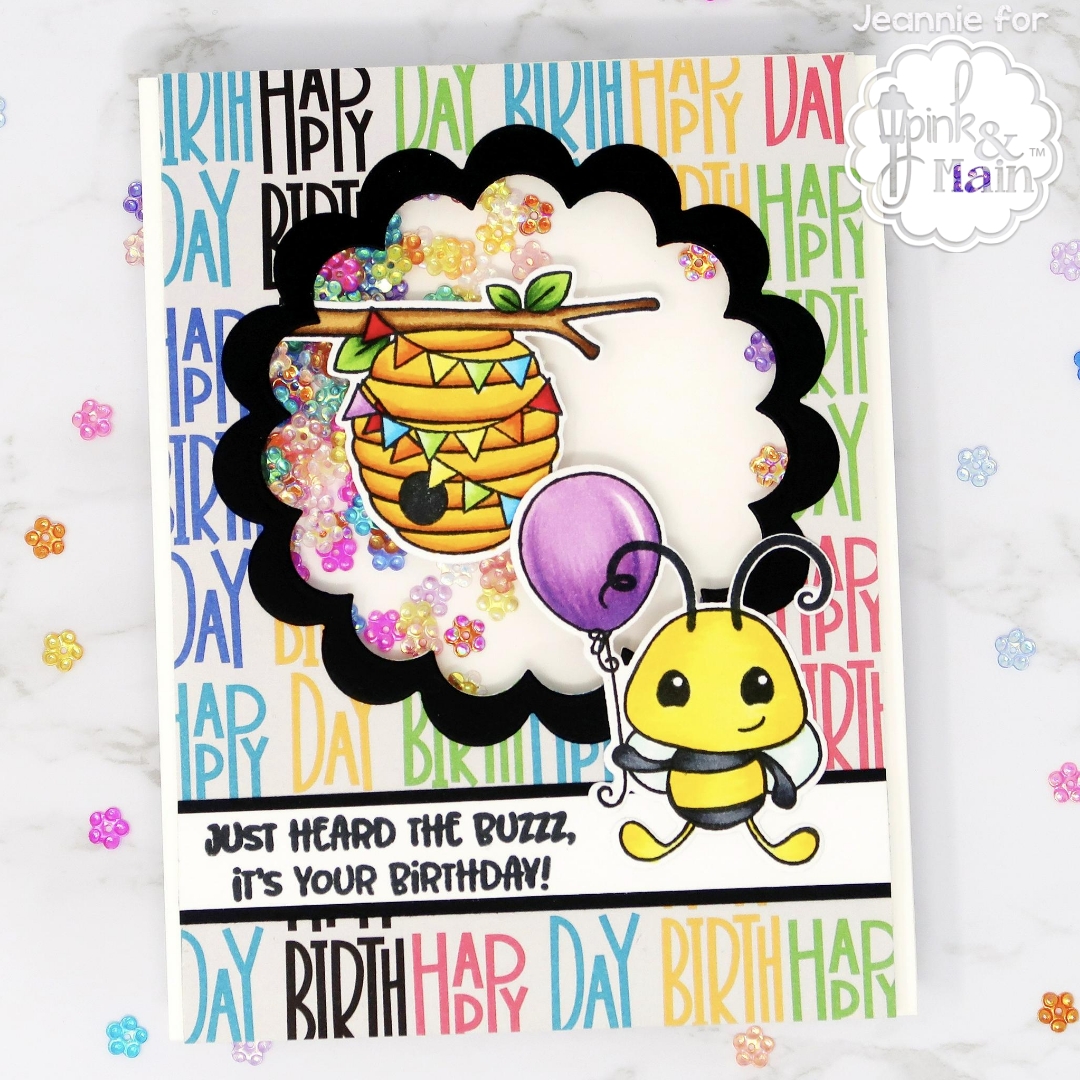
I am loving the new paper pad, It’s A Party; there are so many fun, celebratory designs. I was drawn to the Happy Birthday sentiment all over as patterned paper and wanted to use it. It’s a little busy but I just didn’t care because I just HAD to use it.

I wanted to use the hive and one of the cute bees from the Bee Day stamp set so I stamped and cut these using the coordinating dies. I didn’t need anything else since these images were a good size for my A2 card panel.

If it wasn’t busy enough, I still wanted to add another fun element to this card. I used one of the Scallop Circle dies to create a shaker window, lining it with acetate. I added the hive right on top of the cutout and added the bee at the lower bottom right. Even though the card was covered in the background sentiment, I wanted to use one of the sentiments from the set. I stamped it on a piece of white cardstock and matted it on black. The black breaks up the background and pulls your focus to the words.

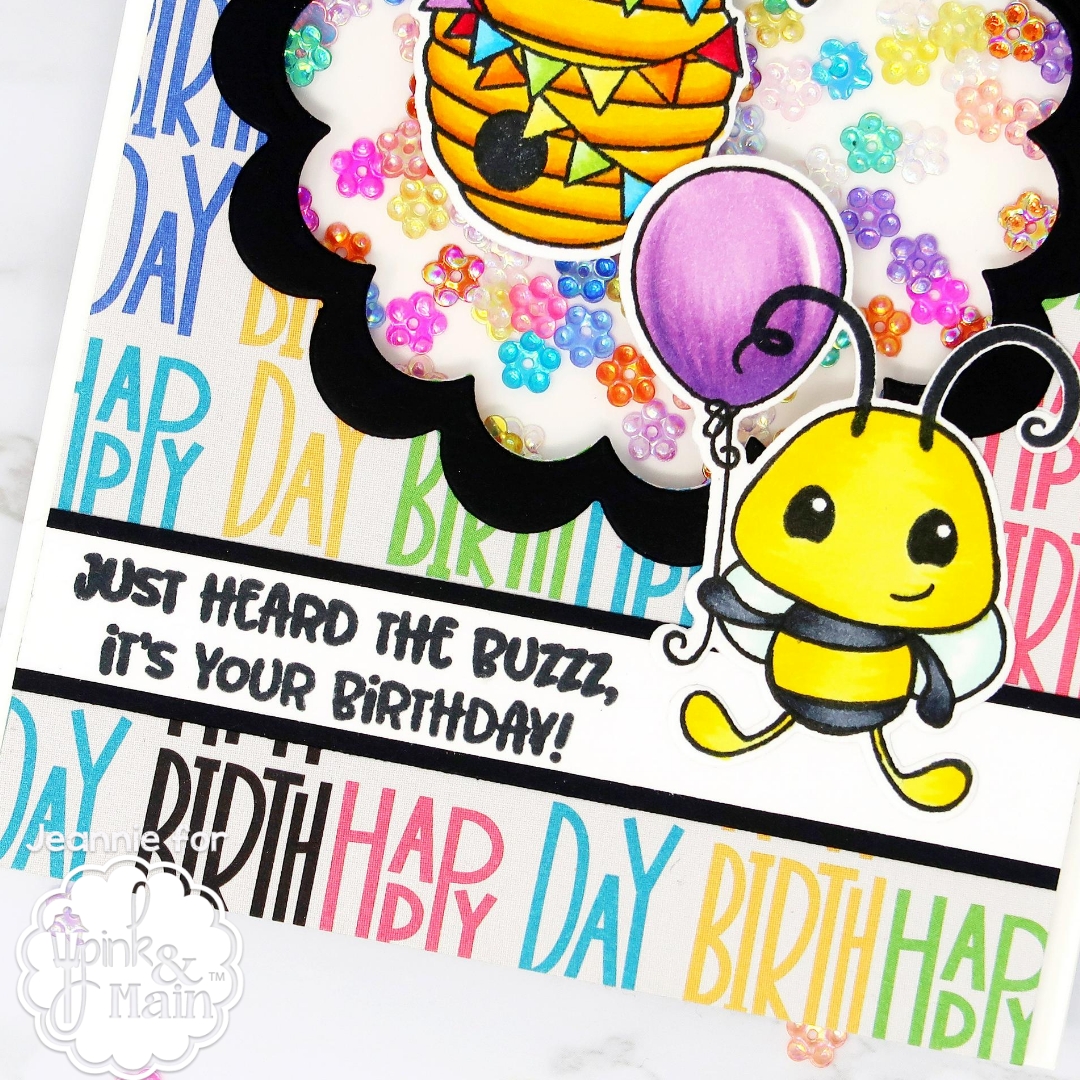
For the shaker bits, I generously used the new Flower sequins. I love the mix of colors and it matched with the patterned paper. I used two layers of foam tape and it allowed the sequins to move around freely.

After the card was put together, I decided that I needed to add a border around the shaker to break up the background and pull your focus to the middle of the card as well. Everything was a bit busy so I used the same technique for the sentiment and cut out a scallop border using black cardstock and two of the scallop circle dies. This worked really well and it really finished off the card.

Thanks for stopping by and celebrating along with us! See you next time!

Pink & Main Blog
Zsofia M.
Amy R.
Annette A.
Ardyth P.
Ashley T.
Amy Y.
Dana J.
Caly P.
Dana P.
Cassie T.
Donna L.
Jennifer M.
Jeannie L. (You are here!)
Leanne W.
Ilina C.
Laura V.
Laurie C.
Lynnea H.
Mindy P.
Kathy S.
Tracy F.
Xenia R.
Yolie B.

→ SUPPLIES USED ←
Items marked with an asterisk (*) were provided by a store or the manufacturer for review and use. All other items were personally purchased. Affiliate links may be used at no cost to you.
STAMP SET(S): *Bee Day
DIES: *Bee Day
INK: Memento Tuxedo Black ink
MISCELLANEOUS: *It’s A Party paper pad, *Flower Sequin mix

→ TO SEE MORE ←
FACEBOOK: https://www.facebook.com/Insideoutjeans/
INSTAGRAM: https://www.instagram.com/insideoutjeans/
YOUTUBE: https://www.youtube.com/c/insideoutjeans

9 Quick & Easy Cards Gift Set

Hi everyone! I’m back today using Pink and Main’s new release with the amazing stamp set named, Breakfast Fun.

I love the idea of card sets as gifts and when a set like this comes along, it’s the first thing to come to mind. Breakfast Fun is perfect for it. It has images that go with each sentiment in the set so I’m able to use every single thing in this stamp set at once.

I also created a video to go with these cards so please check it out if you’re interested in how these all come together.

Here’s all nine of them! I was able to utilize the entire stamps set along with the sentiments and I think that’s amazing to do.

Thanks for stopping by! Come back again soon for some more inspiration and ideas!

SUPPLIES
Items marked with an asterisk (*) were provided by a store or the manufacturer. All other items were personally purchased.

DISCLAIMER
Some products are provided by manufacturers for review and use. Affiliate links may be used at no cost to you.

→ TO SEE MORE ←
FACEBOOK: https://www.facebook.com/Insideoutjeans/
INSTAGRAM: https://www.instagram.com/insideoutjeans/
YOUTUBE: https://www.youtube.com/c/insideoutjeans

25 Days of Christmas Tags

Hello there! Thanks for stopping by and checking out the tags I created for the 25 Days of Christmas Tags.

For me, I love creating multiple tags at the same time and make them a little different from each other with similar aspects. I decided to use Scalloped Circle Dies as a base for my tags. The shape generally looks like a wreath so this was perfect. First, I used two different patterned papers from the Sunrise paper pad to die cut a larger shape and die cut a smaller piece using white cardstock.

I wanted a bow and although the stamp set, Bowtiful, would be perfect for this, I really wanted to use the bow die from the Winter Wreath Decor dies. I cut out two using white cardstock and colored them in using alcohol markers, adding the look of dimension to them.

IMG_6867

I love the layers of the patterns and colors, making the holiday tags look really pretty adn detailed. As a final touch, I took one of the sentiments from Bowtiful that has the “To” and “From”, that finishes off a vital part of a Christmas tag.

IMG_6866

Hope you enjoyed the tags here and check out all the other tags created for 25 Days of Christmas Tags.

IMG_6865

Have a great day!

Pink & Main – WOW Blog Hop

Hello there! Thanks for joining me today in Pink & Main’s blog hop collab with WOW! Embossing Powder. I actually did a 1 for 2 card to share today.

42090699_10156971156679683_5272965803526848512_n

My focus is using the Basket Cover die for today’s two cards. The intricateness of this card is amazing and it allows you to create a background easily. You can always die cut out a piece of paper in multiple colors to use it. However, for today, I decided to mix this with heat embossing powders to create a different effect.

First of all, I die cut a white piece of cardstock using the Basket Cover die. Taking that die cut, I placed it over another piece of white cardstock and pressed my Versamark ink all over. This way, I could add both Metallic Gold Rich Pale and Aztec Glintz to the negative space of the die cut. IMG_5135.JPG

Once I finished adding the embossing powder, I heat set it. This was a perfect background for my first card, paired with the Season of Change stamp set. I trimmed down my card panel and added it to a dark brown cardstock. I added the images and a strip of brown for the sentiment to the front panel and my card is done. I love the subtle glimmer from the embossing power.

IMG_5325.JPG

Since I used the die cut for the first background and already added Versamark ink to it, I decided not to waste it and added the same two embossing powders on it. Once I finished, I heat set and it works perfectly for a second background.

IMG_5324.JPG

For this second card, I also used the Season of Change stamp set. I decided to cut two of scalloped circles from the Scallop Circle die set out of a piece of Kraft and Dark Brown cardstock. These two scalloped circles help the focus go to the image instead of the background and I think it turned out pretty simple and cute.

IMG_5323.JPG

Thanks for stopping by the blog to check out these two cards using Pink & Main stamps and dies along with WOW! Embossing powder. Be sure to stop by the rest of the blog hop and comment for a chance to win!

WOW! Embossing Powder
Pink & Main
Andrea
Ankita
Dana
Donna
Jackie 
Jaine 
Jeannie  <— You are here!
Jo  
Julie  
Kathy 
Kimberly
Laurie 
Lynnea 
Michelle
Olga
Raluca
Riikka
Tracy 
Yasmin
Zsofia 

41755206_10156971157699683_2514852339928530944_n.jpg

Pink and Main & Glue Dots Blog Hop

Hi there! Thanks for stopping by my blog for the Glue Dots and Pink & Main Blog Hop collaboration, where you can win a $25 gift card just for leaving a comment. Winners will be announced on Wednesday, September 26, 2018 at 6am.

For today’s card, I decided to use the new stamp set from this month, Eskimo Kisses, and its coordinating dies. I stamped this out on white cardstock and used the dies to cut easily cut all these images out.

IMG_4393

After I colored all the images I cut out, I decided that I wanted to use the Box Card die, which made creating an interactive card extra easy!

IMG_4394

Once I cut out the box card pieces, I used Glue Dot’s glue lines to put everything together. These glue lines are perfect for the tabs that make the box card. Two work perfectly for the side tabs.

IMG_4395

For the inner part of the box, I used Bristol Smooth paper and created a Northern Sky look using distress inks and white splatter. I truly believe that white splatter makes anything into a galaxy or a star filled sky. For the outer part of the card, I die cut out blue paper to mimic ice. Once, I did that I used the Glue Dot’s glue runner to tape all these pieces to the box card.

IMG_4396

I was able to use various Glue Dots adhesive to add the stamped and die cut images to the box. It works really well since Glue Dots has a variety of sizes so it could be added to the nooks and crannies of the images. In particular, the mini dots are a favorite for box cards. Look at the little girl’s feet! They are so small but the mini dots fit perfectly on behind each shoe.

IMG_4397

To finish off this card, I stamped out the sentiment on the matching blue on the interior of the card. I loved how this card turned out and can’t wait to give this away! I hope you enjoyed it and the blog hop. All the other participants are listed below… and remember to comment for a chance to win! Enjoy!

IMG_4398

BLOG HOP LINEUP
Glue Dots 
Tracy 

Robyn
Lynnea 
Amanda
Ilina
Samantha
Zsofia
Dawn
Jeannie — You are here!
Melanie
Jackie 
Grace
Andrea
Danielle
Pink and Main

42165854_10156971014979683_8580890254163050496_n

Pink & Main – Catitude

I’m so excited to post my first design team card for Pink & Main. I adore their stamps and I love this July release so much!

The first set I played with was Catitude. If you love cats, you’ll adore this set. I love the variety of cats within this set and I wanted to use them all. I almost did!

I decided to use four of them. Three repeated twice and one was a very subtle one in the middle of my card. I also to add some action to this so I created a simple spinning card. I have a similar card with a video tutorial here.

On a piece of 5.5 x 5.5 paper from the Shades of Spring paper pack, I stamped out three kitties on top of a circle and repeated it on the mirror side. I’ll fussy cut out these images adding a circle to connect them all. I decided to make things super simple and used a piece from the Shades of Spring paper pack as my background. For the middle part, I stamped one of the images using a lighter grey ink and added the sentiment in black. The technical details can be seen in the video, but the idea is that the kitties will be spinning around in a circle. It’s sooooo adorable.

IMG_2935 (1)

Hope you enjoyed today’s card and hope you’ll be back for more of my projects.