Pawsome background!

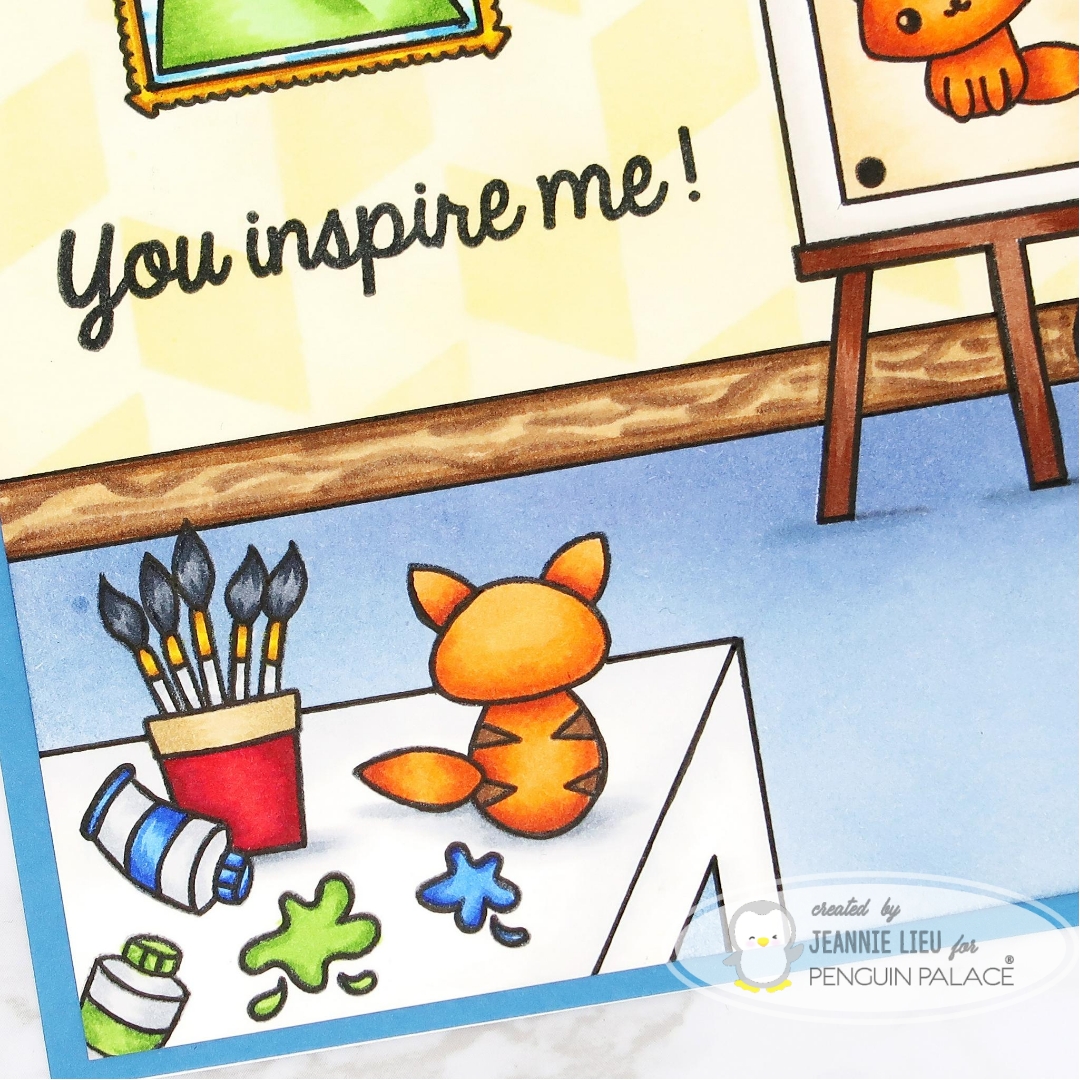
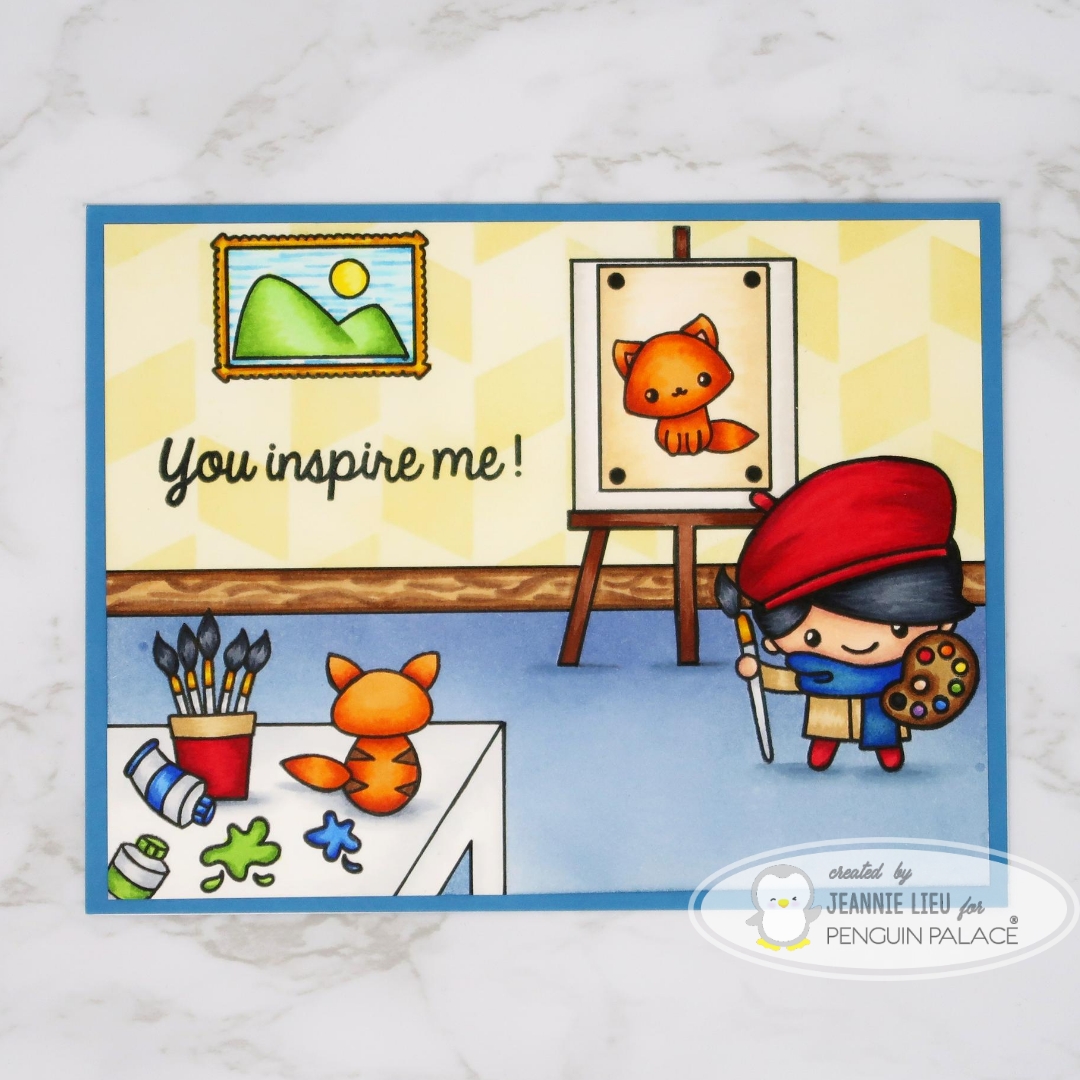
Hi everyone! I’m back today to share a new card using one of the newest standalone die backgrounds from Penguin Palace, called Pawsome Background.

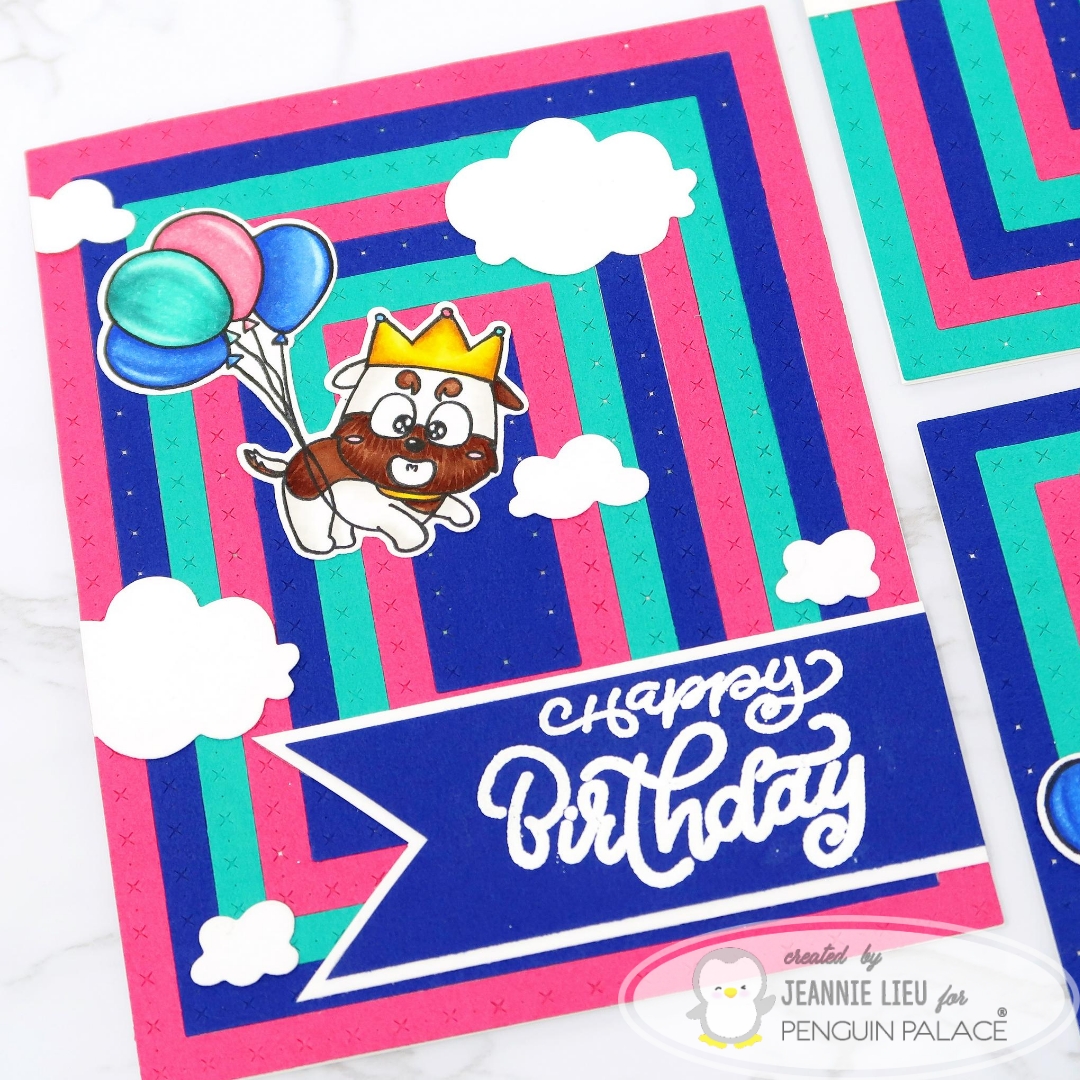
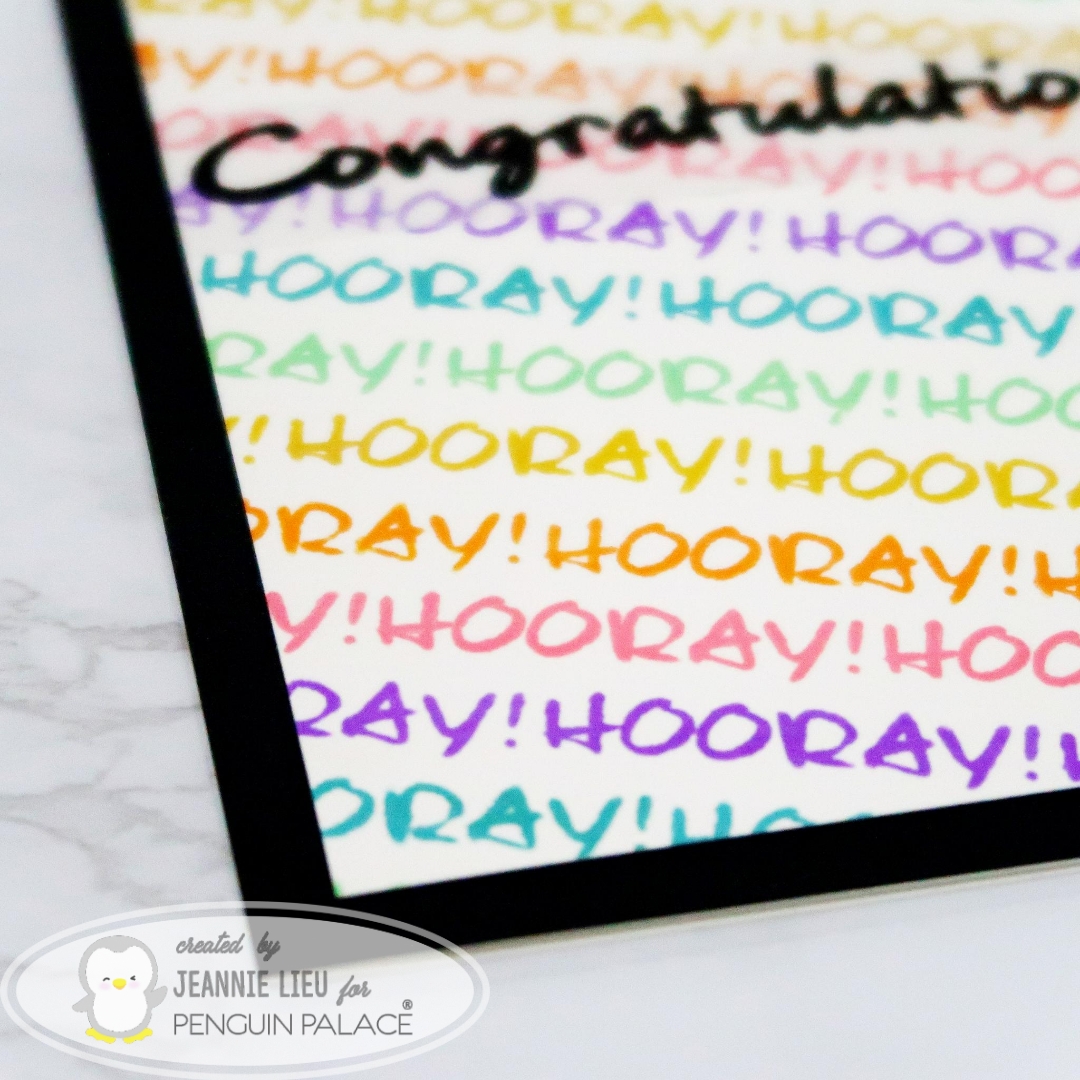
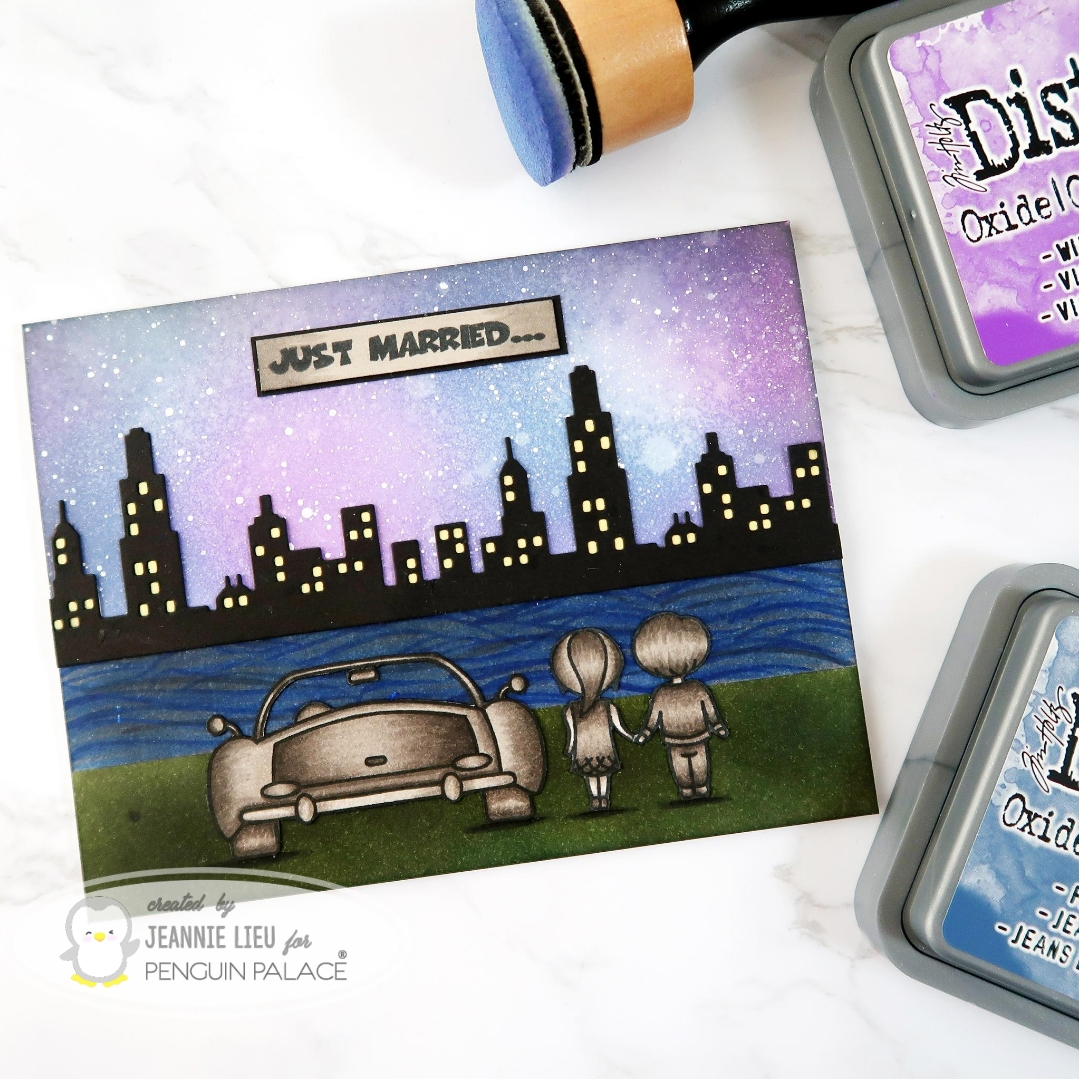
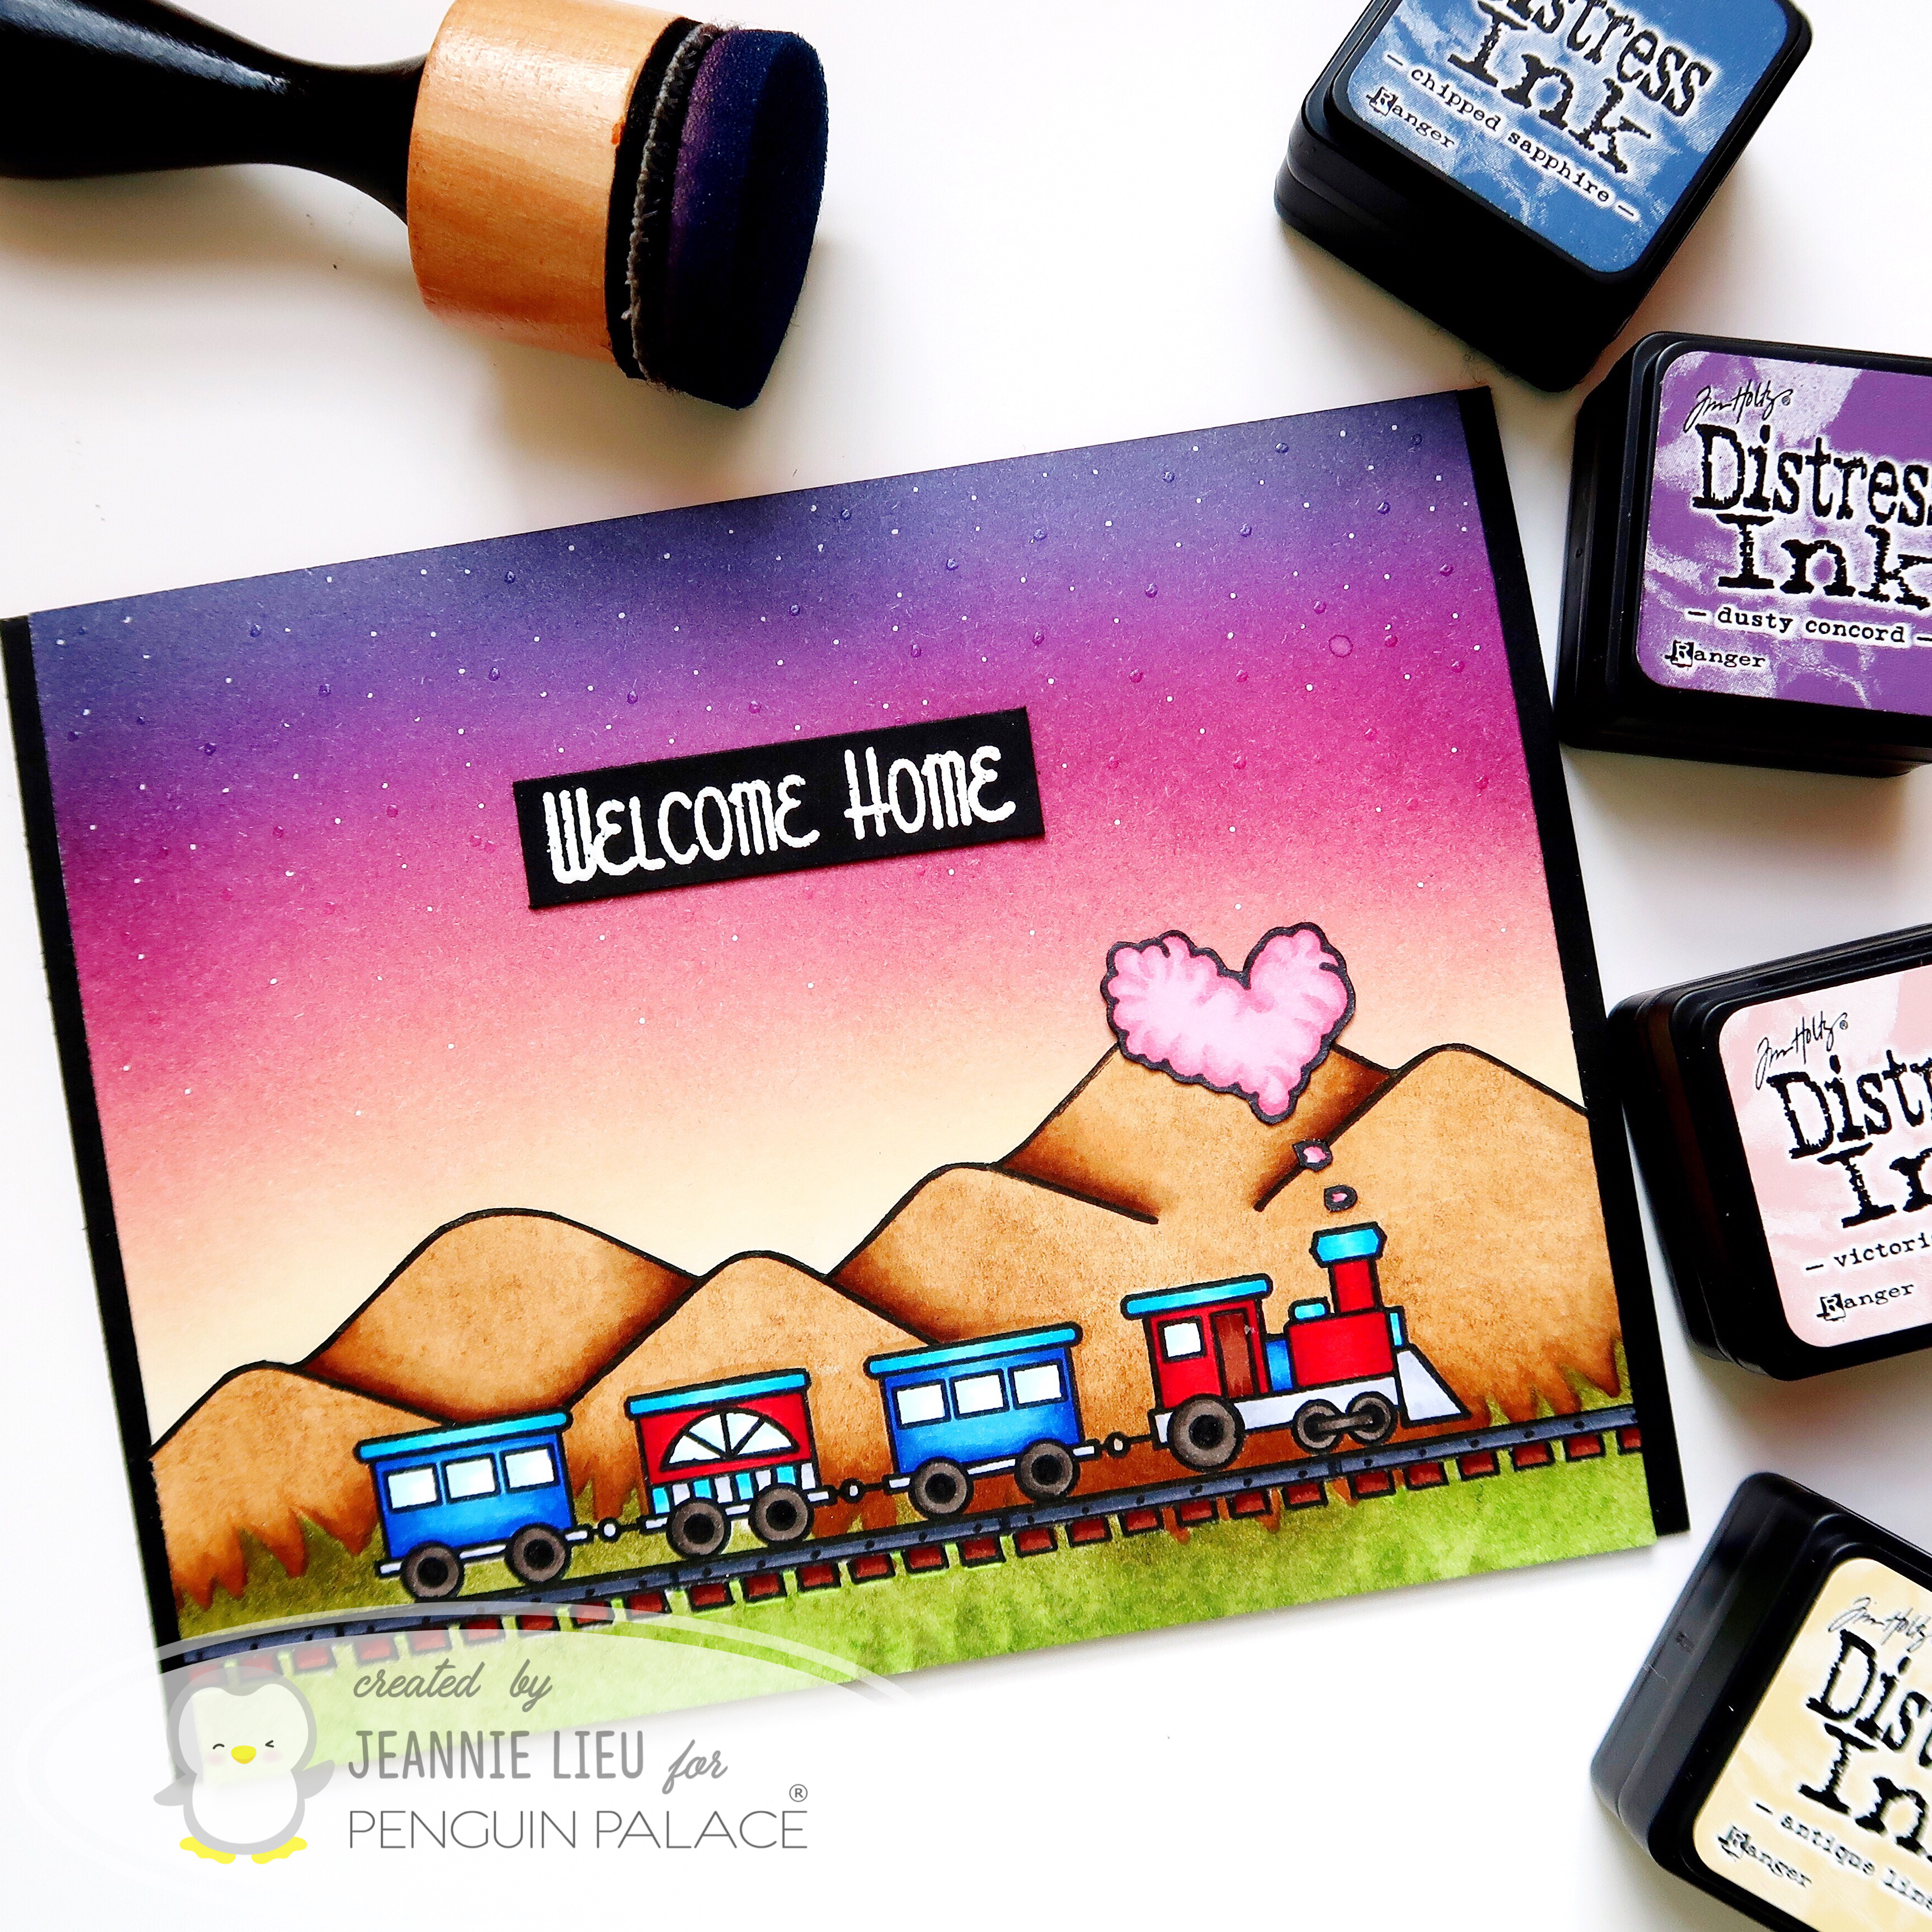
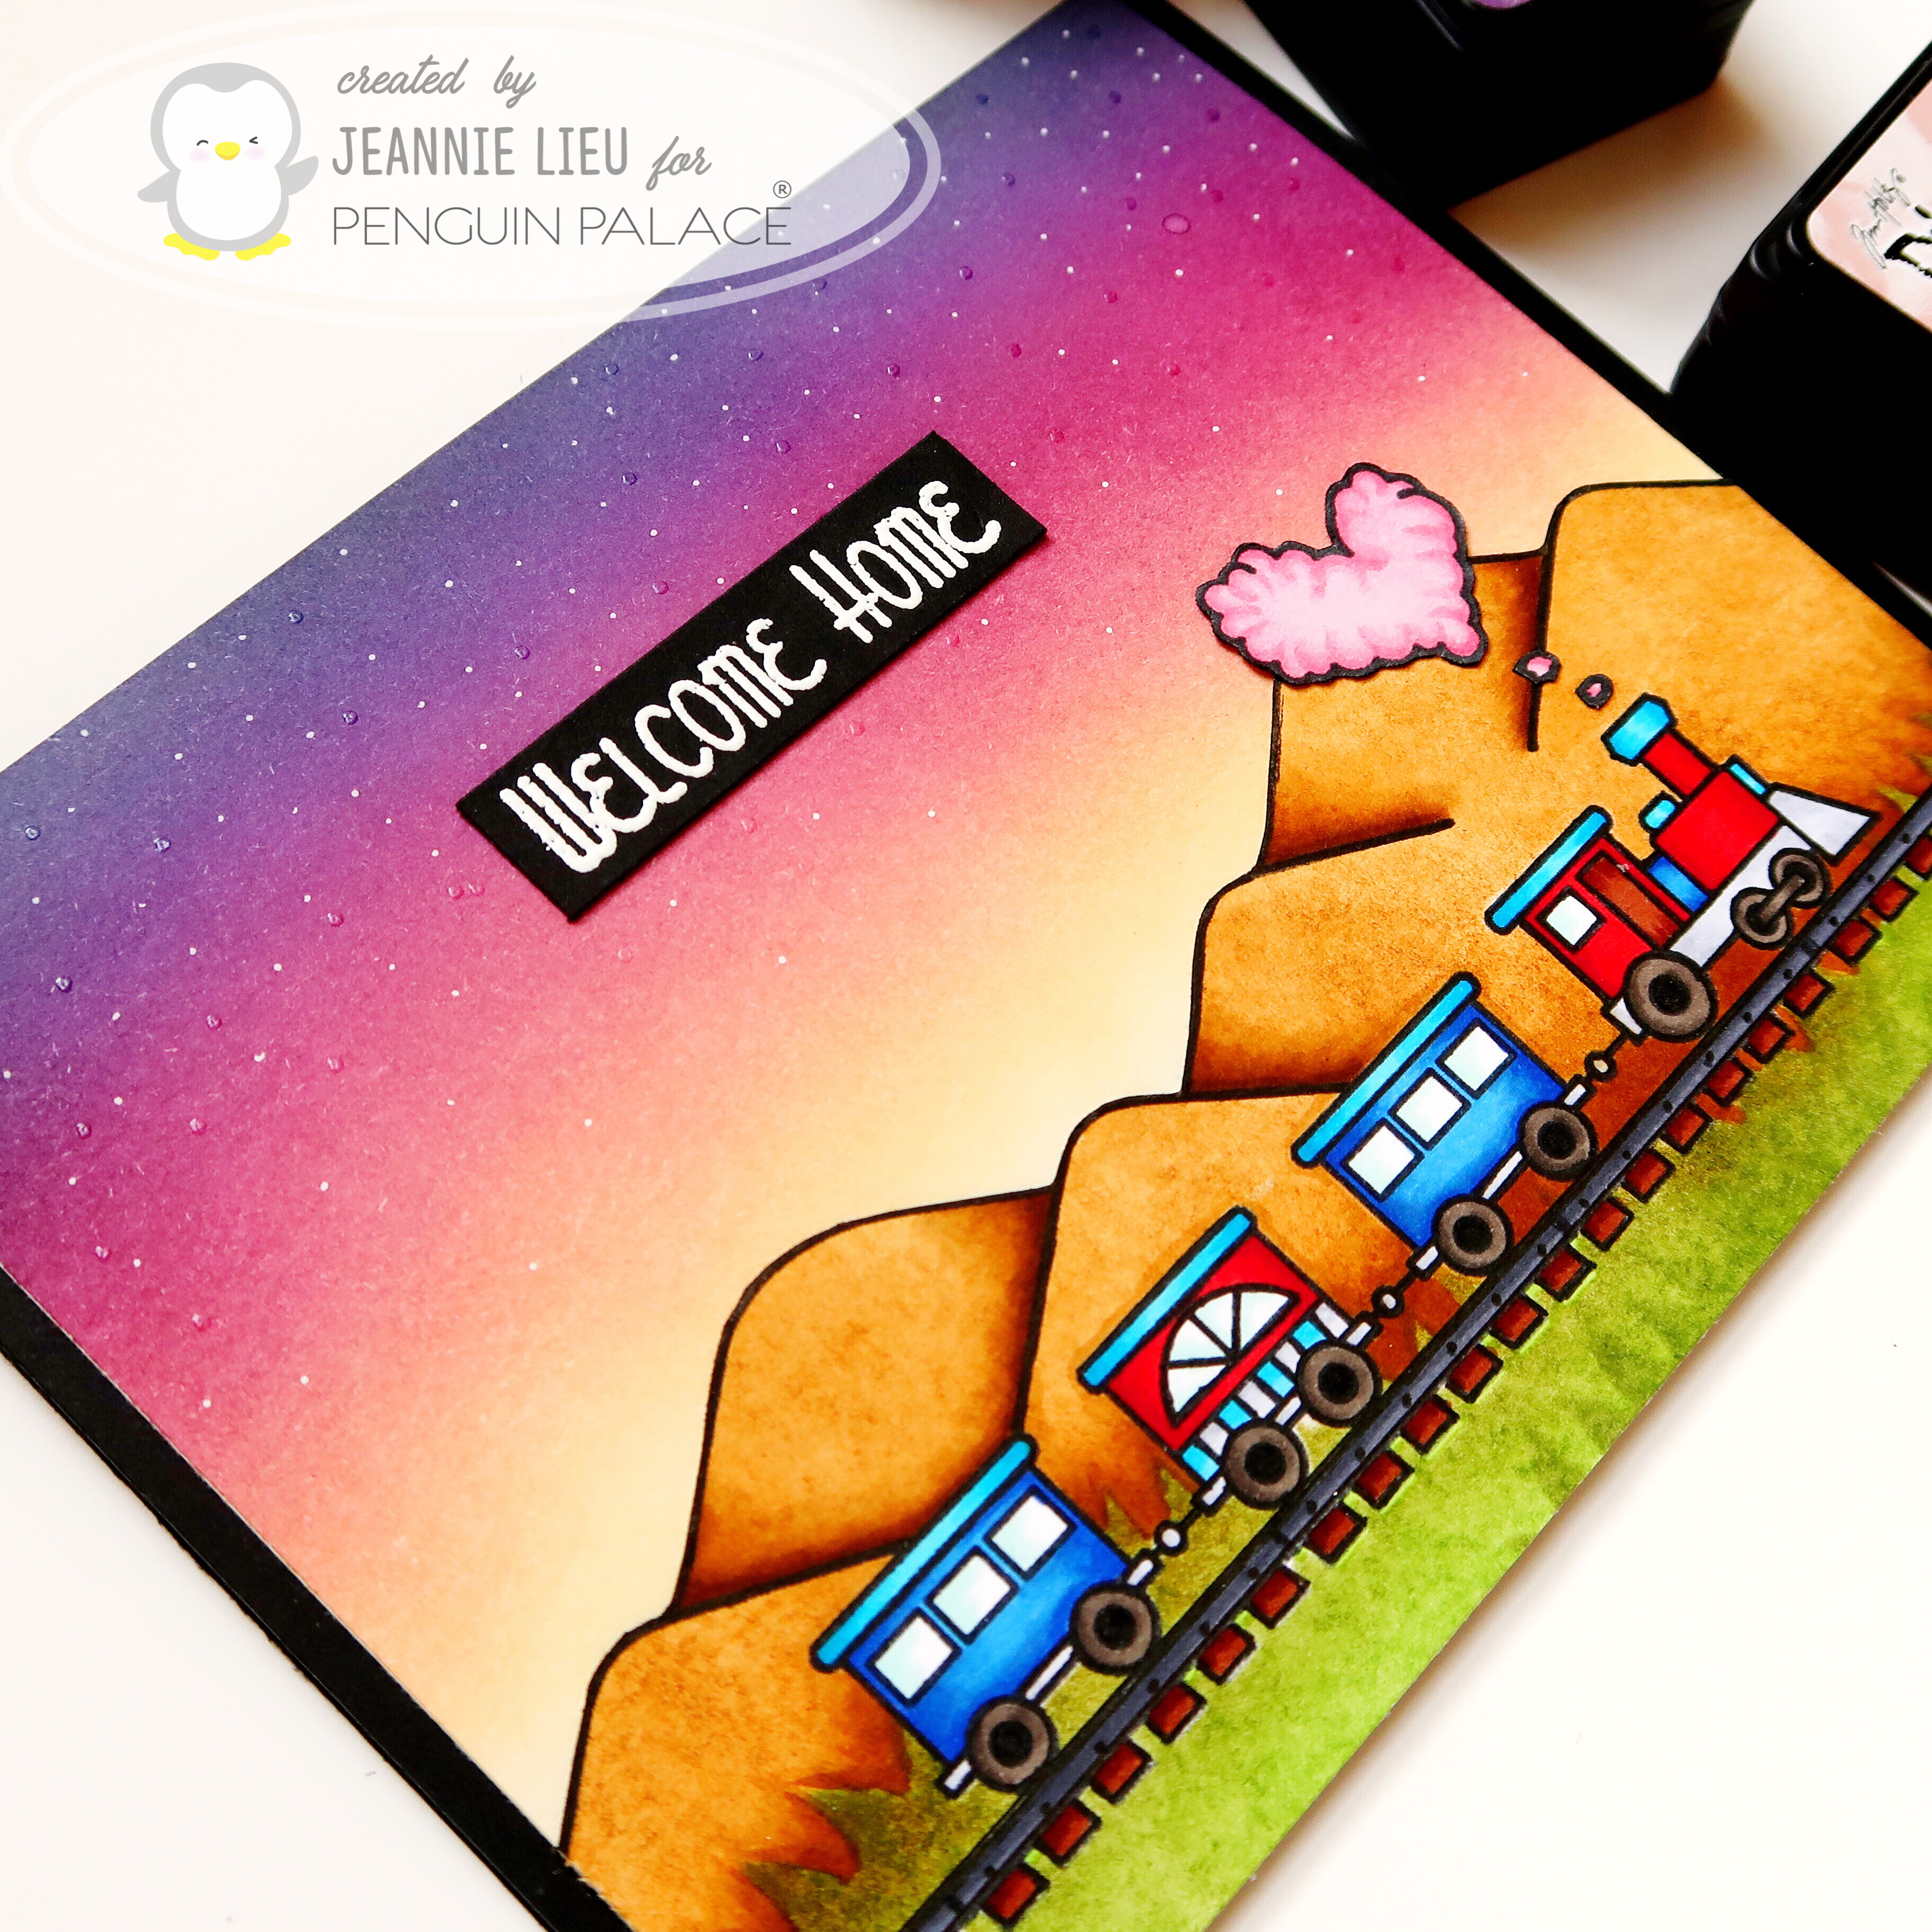
I was in a rainbow kind of mood, so I grabbed a piece of Bristol Smooth cardstock and my distress oxide inks: Worn Lipstick, Spiced Marmalade, Squeezed Lemonade, Cracked Pistachio, Mermaid Lagoon, Wilted Violet. These worked perfectly to create the rainbow effect I was looking for.

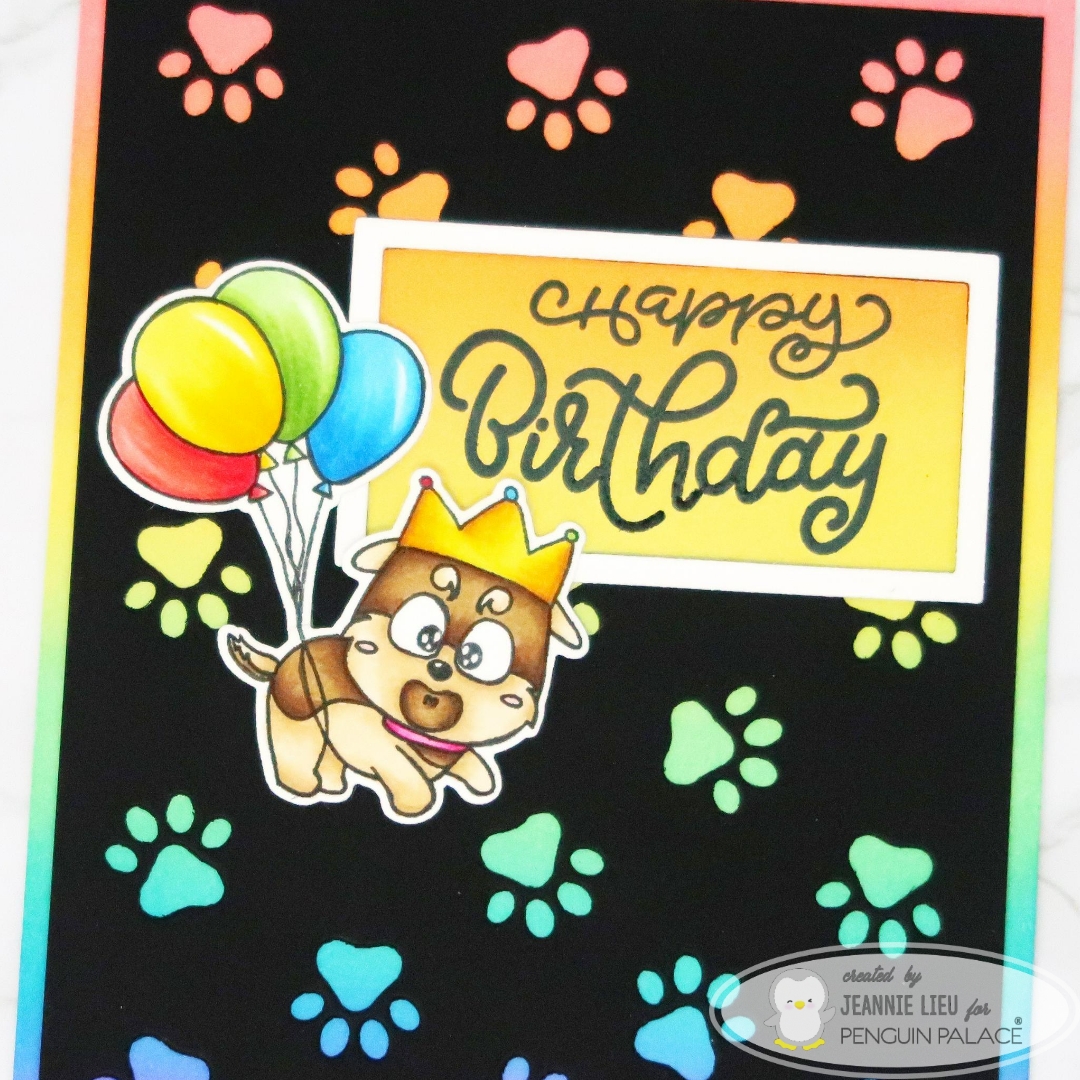
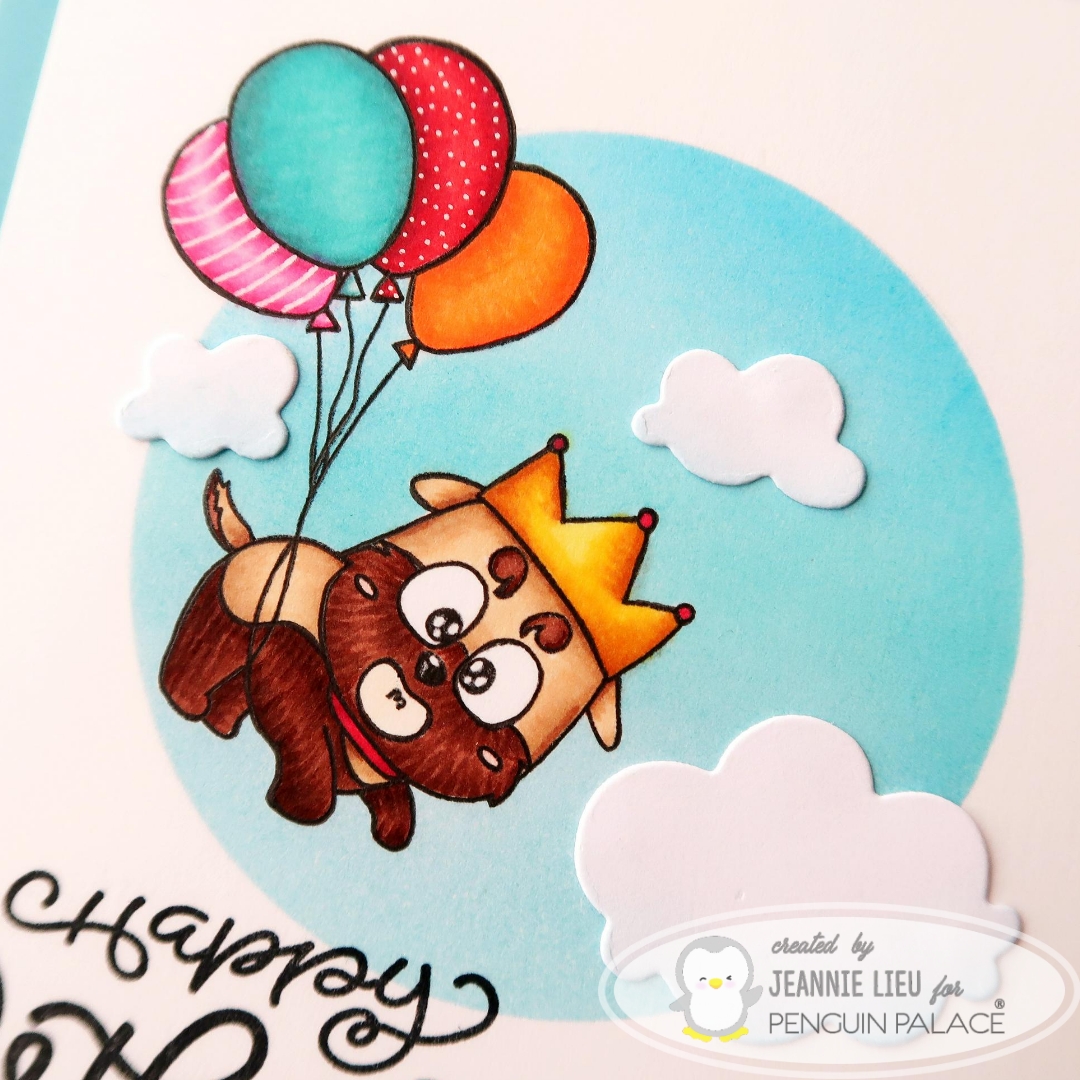
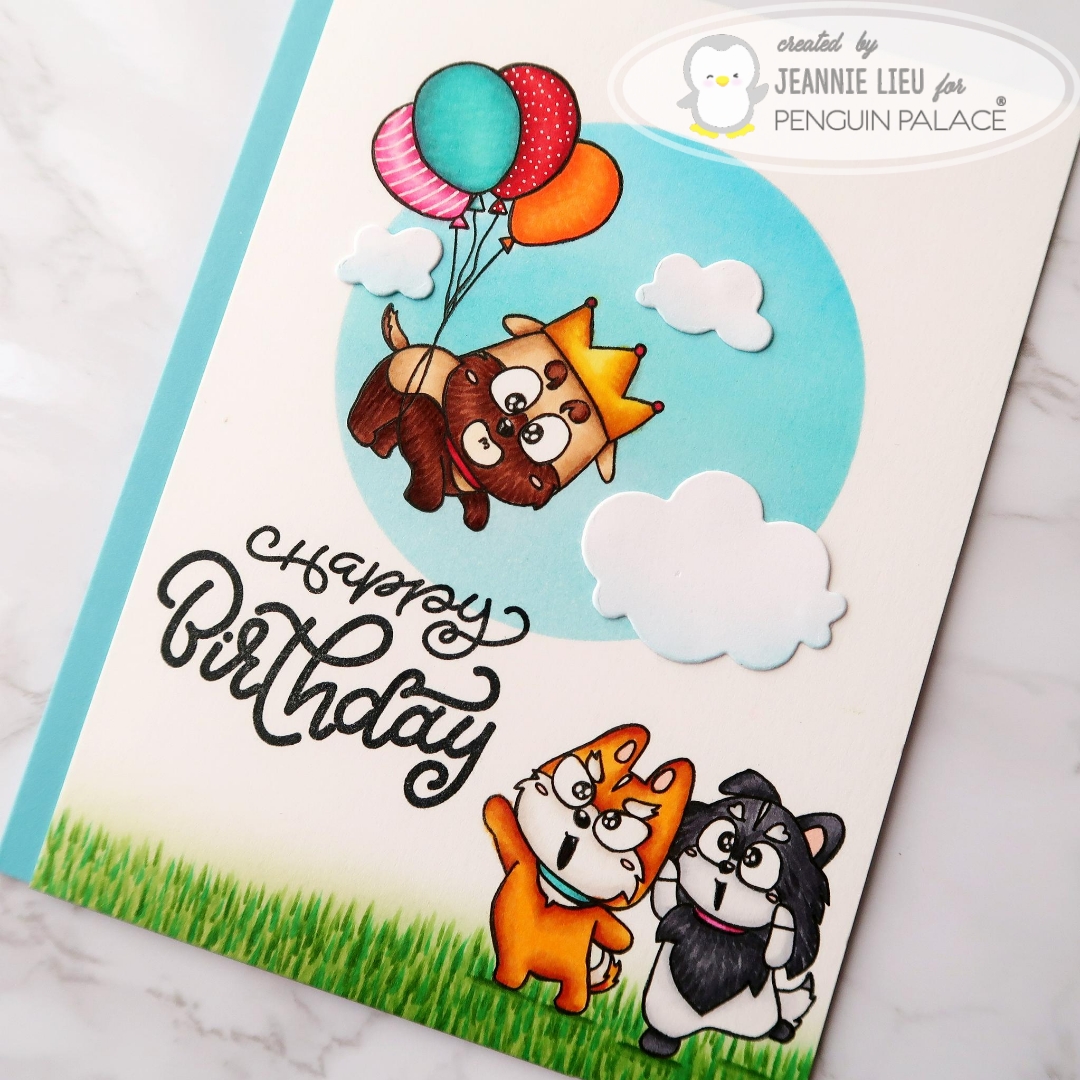
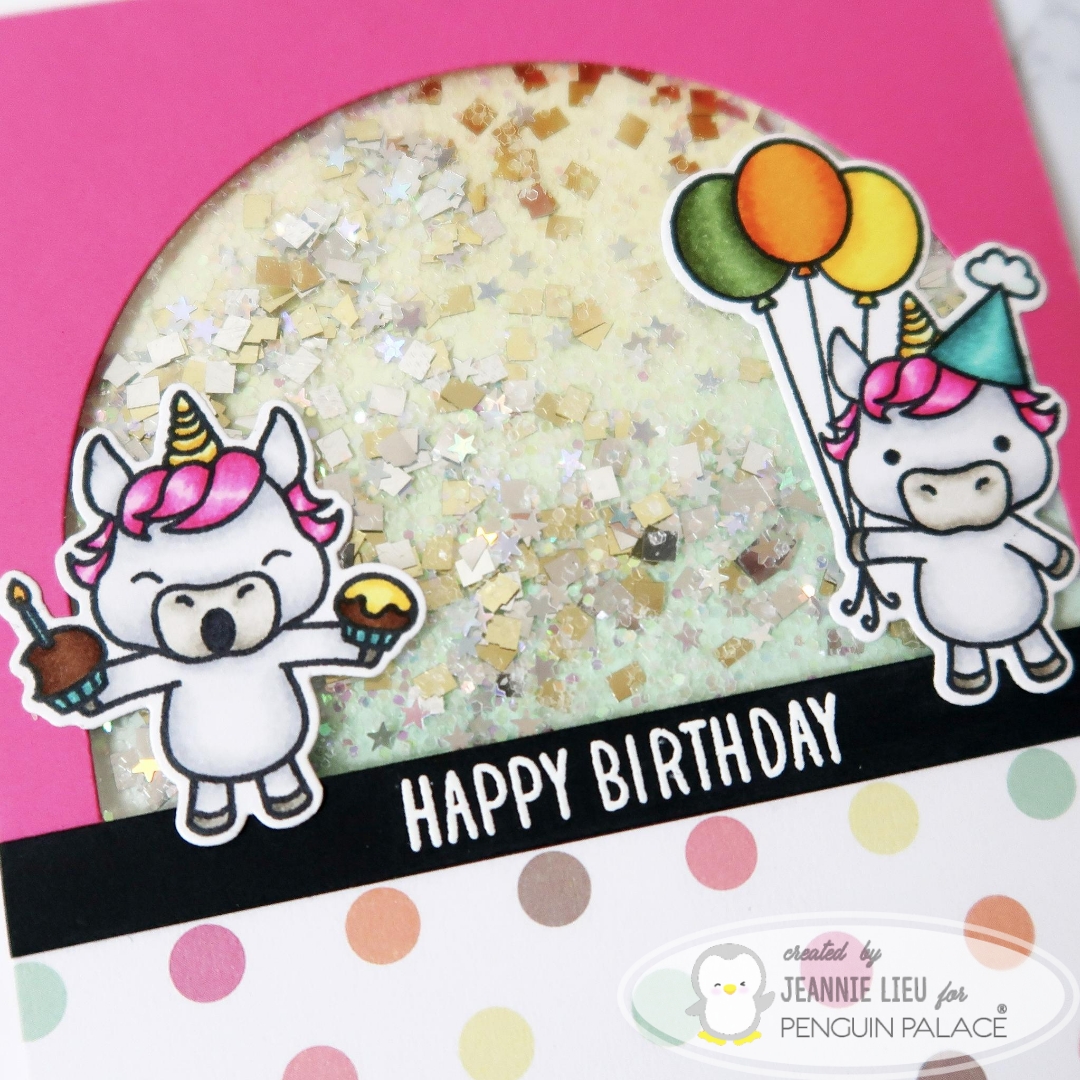
I used the Pawsome Background on black cardstock and because it’s black, the rainbow colors really popped through the die cut pattern. Since the pattern is very concentrated, I decided to also die cut a little rectangle to allow room for the sentiment. While doing so, I used two rectangle die cuts to create a little frame around the sentiment so it popped a little more. I stamped the Happy Birthday sentiment from the stamp set, My Best Pal. Additionally, I just had to add one of the doggie images to the card, so I chose the one with the balloons. I stamped and die cut it using the coordinating dies.

This worked perfectly to go with the sentiment and the background. I loved how this card turned out. It makes for such a wonderful and cherry look so I hope you enjoyed it too.

Thanks for stopping by! Come back again soon for some more inspiration and ideas!

→ SUPPLIES USED ← Items marked with an asterisk (*) were provided by a store or the manufacturer for review and use. All other items were personally purchased. Affiliate links may be used at no cost to you.

STAMP SET(S): My Best Pal*
DIES: Pawsome Background*, My Best Pal*
INK: Worn Lipstick, Spiced Marmalade, Squeezed Lemonade, Cracked Pistachio, Mermaid Lagoon, Wilted Violet, Memento Tuxedo Black Ink
TOOLS: Sizzix Big Shot
MISCELLANEOUS: Bristol Smooth Paper

→ TO SEE MORE ←
FACEBOOK: https://www.facebook.com/Insideoutjeans/
INSTAGRAM: https://www.instagram.com/insideoutjeans/
YOUTUBE: https://www.youtube.com/c/insideoutjeans

Scene Card | Penguin Palace

Hi everyone! It’s Jeannie (InsideoutJeans) on the blog today to share a card I created using the newly released Penguin Palace’s stamp set named, Let’s Get Crafty. This set definitely screams for a scene card and so I wanted to put one together.

I needed to create a space for this little artist to paint his painting so I set him up in a studio. Before I stamped out my final product, I actually stamped everything on a scrap piece of paper to see how the scene would look. This helped me figure out which masks I needed to stamp and cut out. There actually wasn’t too much and it was mainly on the table. However, I didn’t want to color the entire background using alcohol markers so I had to create masks for everything so I could use distress inks to help me color the background.

The desk scene was really cute because the set included the back of the little kitty the artist was drawing. The table was something that I had to draw in but if you looked at it closely, it’s just a few lines.

The scene itself is really cute and once I added the portrait, the only place to add a sentiment was right below and I think it was perfect.

I just loved how it turned out and I really adore this stamp set. It’s pretty versatile.

Thanks for stopping by! Come back soon!

→ TO SEE MORE ←
FACEBOOK: https://www.facebook.com/Insideoutjeans/
INSTAGRAM: https://www.instagram.com/insideoutjeans/
YOUTUBE: https://www.youtube.com/c/insideoutjeans

Cross Stitched & Dots

Hi everyone! I’m back this week with sneak peeks for Penguin Palace’s new release focused on standalone dies. The sets I’m focused on today are Cross Stitched & Dots Large Rectangle Overlays and Cross Stitched & Dots Small Rectangle Overlays. Combined, these two sets provide you with a variety of sizes for every 0.25.

Because of this fact, I actually trimmed the Cross Stitched & Dots Small Rectangle Overlays and kept the Cross Stitched & Dots Large Rectangle Overlays intact. I used a bit of purple tape on the back of the larger set, and added in the rectangles from the small set.

Using three different colors of paper, I ran all the die cuts through together. This actually helped me create three different backgrounds. The colors I used are: Precious Gem, Princess Decor, and Navy Seal. These papers are lightweight. For sure, I wouldn’t define them as cardstock. They actually feel like tissue paper but definitely don’t tear as easily.

I combined the three sets in alternating colors and created three backgrounds. Since I have three cards to decorate, I kept everything really simple.

For the first one, I used the Congratulations sentiment from the Congratulations stamp set. I stamped it and heat embossed on vellum, backing it on white cardstock and place it right over the background.

The second, I used the dog with balloons images from My Best Pal along withe the Happy Birthday sentiment. For the sentiment, I heat embossed it on the Navy Seal paper and cut it into a banner. I added some white clouds to the card to give it a little more white space.

The third card, I used both the Birthday Unicorn stamp and die set. I stamped the Happy Birthday sentiment directly on the background, masking off a portion of it. For the rest of the card, I wanted to fill up the space so I used two of the unicorns from the set and die cut a bunch of confetti.

I always love when I can create multiple cards from one project and this came together pretty quickly.

Thanks for stopping by and I hope you enjoyed the sneak peeks. Come back again soon for some more inspiration and ideas!

→ SUPPLIES USED ←
Items marked with an asterisk (*) were provided by a store or the manufacturer for review and use. All other items were personally purchased. Affiliate links may be used at no cost to you.
STAMP SET(S): *Cross Stitched & Dots Large Rectangle Overlays, *Cross Stitched & Dots Small Rectangle Overlays, *Birthday Unicorn, *Birthday Unicorn Dies, *My Best Pal, *My Best Pal Dies, *Congratulations
INK: Memento Tuxedo Ink
TOOLS: Sixxiz Big Shot

→ TO SEE MORE ←
FACEBOOK: https://www.facebook.com/Insideoutjeans/
INSTAGRAM: https://www.instagram.com/insideoutjeans/
YOUTUBE: https://www.youtube.com/c/insideoutjeans

Congratulations

Hi everyone! I’m back today with with a sneak peek for Penguin Palace’s new release stamp set that contains essential sentiments Congratulations.

This is one of those essential stamp sets that you can pair with many images, but I wanted to focus on what you can do with just this set alone. It’s super easy!

I chose a rainbow variety of distress oxide inks and stamped “Hooray” diagonally across. I definitely do not stamp straight without help and I actually just use a pencil to mark off lines in advance so I know where to stamp. Once the ink dries, you can easily erase it. It makes for such a pretty background.

To finish off the card, I stamped the large “Congratulations” on vellum using Versafine ink and heat embossed using clear embossing powder. I ran this through my Xyron sticker marker and trimmed it down. This puts adhesive to the back of the vellum and you won’t notice it. The vellum softens the background so your focus is to the sentiment.

Thanks for stopping by and I hope you enjoyed the sneak peeks. Come back again soon for some more inspiration and ideas!

→ SUPPLIES USED ←
Items marked with an asterisk (*) were provided by a store or the manufacturer for review and use. All other items were personally purchased. Affiliate links may be used at no cost to you.
STAMP SET(S): Congratulations
INK:
Distress Oxide – Worn Lipstick, Fossilized Amber, Carved Pumpkin, Cracked Pistachio, Broken China, Wilted Violet
Versafine Ink, Versamark Ink
TOOLS: Pink and Main Acrylic Block
MISCELLANEOUS: Wagner Heat Tool, Anti-Static Powder, Clear Embossing powder

→ TO SEE MORE ←
FACEBOOK: https://www.facebook.com/Insideoutjeans/
INSTAGRAM: https://www.instagram.com/insideoutjeans/
YOUTUBE: https://www.youtube.com/c/insideoutjeans

It’s Your Day!

Hi everyone! It’s Jeannie (InsideoutJeans) on the blog today with a sneak peek for Penguin Palace’s new release with another adorable set named, It’s Your Day.

In this set, there’s a variety of images but I focused on two of the characters and two accessory items. I wanted to create a small storyline of someone enjoying a glamorous day.

I stamped out the images I wanted to use on rectangles and I masked them off so I could use distress oxide inks to color up the background. I added both water and silver paint splatter to them for a bit more interest.

After coloring up the images, I lined the rectangle edges with a black pen creating a frame. I really loved how these came out. I wanted them to be the main focus but needed to add the sentiment for the card. I chose a piece of Smokey Eyes card stock and it has this really fine, pretty sandstone texture to it. It was a bit hard to picture, but you can notice it in the picture above. If you haven’t tried the cardstock from the store, I highly recommend it. I am really enjoying the subtle texture on the card stock that provides a little interest in the background but not deterring away from your main focus of the card.

I stamped the sentiments directly on the card stock, having no issues even with the texture and trimmed the card panel so I could mat it on black cardstock. I wanted to tie the black color back to the lined rectangles.

That’s it for today’s card. I really like the colors that pop against the neutral grey and I hope you enjoyed it too!

Thanks for stopping by and I hope you enjoyed the sneak peeks. Come back again soon for some more inspiration and ideas!

→ SUPPLIES USED ←
Items marked with an asterisk (*) were provided by a store or the manufacturer for review and use. All other items were personally purchased. Affiliate links may be used at no cost to you.
STAMP SET(S): *It’s Your Day
INK: Distress Oxide Ink – Squeezed Lemonade, Picked Raspberries, Wilted Violet Versafine Ink
COLORING:

TOOLS: Misti, Tim Holtz Comfort Trimmer
MISCELLANEOUS: Smokey Eyes card stock*

→ TO SEE MORE ←
FACEBOOK: https://www.facebook.com/Insideoutjeans/
INSTAGRAM: https://www.instagram.com/insideoutjeans/
YOUTUBE: https://www.youtube.com/c/insideoutjeans

My Best Pal

Hello everyone! Here is a sneak peek for Penguin Palace’s new release with the awesome stamp set named, My Best Pal. This is releasing March 20th, so get ready!

I love the three doggies in this stamp set so I wanted to use all three of them. I didn’t want to create a full scene yet still have one. Sounds weird right?

To start off, I stamped out the two doggies in the set looking up. I masked one of them so it looked like one was standing behind the other.

Next, I stamped and masked the doggie with balloons on the top portion of the card. Using masking paper, I masked a circular area where the dog will be. With distress inks, I blended a few colors to create a nice background.

Using a few cloud die cuts, I added them to the circular area to add interest.

For the rest of the card, I just colored in the doggies and added some grass to the bottom. I trimmed the entire panel on the side by a quarter of an inch and mounted this one a blue card base.

Aren’t they all super cute? I can’t wait for you to see the rest of the items releasing!

Thanks for stopping by and I hope you enjoyed the sneak peeks. Come back again soon for some more inspiration and ideas!

Scene Card | Sweet Ride

Hi everyone! It’s Jeannie (InsideoutJeans) on the blog today to share a card I created using Penguin Palace’s stamp set named, Sweet Ride.

I’ve had this set for awhile now and I had a vision for this card but never had a chance to create it…. until now so I hope you get inspired to create!

I wanted a silhouette of the car and the couple watching a sunset or enjoying some kind of view. This card accomplishes this because the stamp set includes the front and back of both the car and people. I stamped them out and colored them in a greys to create a monotone feel.

I also created a blue and purple sky background along with using glimmer spray and white opaque paint to add texture. I added a cityscape over the sky so the couple could be peering at the city lights.

To ground the couple, I wanted them to be peering at the skyline from a distance so I added some water between the city and added grass for them to stand on.

Thanks for stopping by! Come back soon!

→ SUPPLIES USED ←
Items marked with an asterisk (*) were provided by a store or the manufacturer for review and use. All other items were personally purchased. Affiliate links may be used at no cost to you.

STAMP SET(S): Penguin Palace Sweet Ride
DIES: Clearly Besotted Cityscape (retired)
INK: Memento Tuxedo Black Ink
COLORING:
Distress Oxide Ink: Wilted Violet, Faded Jeans, Black Soot
Copic Sketch: http://shrsl.com/17yds , W6, W8
TOOLS: Distress Ink Blending Tool
MISCELLANEOUS:

→ TO SEE MORE ←
FACEBOOK: https://www.facebook.com/Insideoutjeans/
INSTAGRAM: https://www.instagram.com/insideoutjeans/
YOUTUBE: https://www.youtube.com/c/insideoutjeans

Get Well Soon | Penguin Palace

Hi everyone! Today I wanted to share a card I created using Penguin Palace’s stamp set named, Get Well Soon. This is a smaller stamp set but a perfect one to wish someone good thoughts. I previously did a flip card that showed the sick mermaid and then flipped to a happy, healthy mermaid.

Today, I wanted to share this peek-a-boo card that is essentially the same idea just one step up from a flip card. There are a ton of tutorials for this type of card and this set is perfect for it. The front of the card will feature the sick mermaid and then when you open it, it’ll feature a healthy mermaid.

I used pink cardstock and used the top two hearts from the bubbles to stamp all over, creating my own patterned paper for the front and inside of the card. For the frame, I used Mama Elephant’s Union Square and Sizzix’s Square Framelits to create the window. I chose Penguin Palace’s Mysterious Galaxy cardstock for this because it has this gorgeous glitter on it. I love how it’s super smooth and not grainy. I was able to die cut using the paper easily. 

For the background of the mermaid, I used three distress oxide ink colors, sprayed it with Hero Art’s Shimmer Spray, and used a paper towel to pick up the splatters creating a watery effect.

I really like how this card came out and I hope you did too!

Thanks for stopping by! Come back soon!

→ SUPPLIES USED ←
Items marked with an asterisk (*) were provided by a store or the manufacturer for review and use. All other items were personally purchased. Affiliate links may be used at no cost to you.

STAMP SET(S): Penguin Palace Get Well Soon
DIES: Mama Elephant Union Square, Sizzix Square Framelits
INK: Picked Raspberries, Broken China, Cracked Pistachio, Faded Jeans, Memento Tuxedo Black
COLORING:
Copic Sketch C1, C3, R20, R83, R85, E00, E04, E11, E25, E27, E29, YR24, BV00, BV04, BV13, BV17
PAPER: Penguin Palace Mysterious Galaxy
MISCELLANEOUS: Hero Art’s Shimmer Spray

→ TO SEE MORE ←
FACEBOOK: https://www.facebook.com/Insideoutjeans/
INSTAGRAM: https://www.instagram.com/insideoutjeans/
YOUTUBE: https://www.youtube.com/c/insideoutjeans

Birthday Unicorn Shaker

Hi everyone! I’m back to share a card I created using Penguin Palace’s stamp set named, Birthday Unicorn.

I’ve already created some cards using this set because it’s so easy to work with and super versatile. However, I really wanted to do something bright, fun, and pink.

I wanted to create a shaker card for today. I used one of the Stitched Dome STAX Die-namics for my opening because I wanted something different from a circle, square or rectangle. Since I decided to use a pink background, I wanted to break up the color by using a piece of fun patterned paper for the bottom portion of the card. I added the sentiment using Versamark ink and Hero Art’s white embossing powder to a strip of black cardstock.

I added acetate to the die cut opening, placing foam tape around the dome area and around the card panel. Adding bits of glitter and shaker bits, I completed the shaker portion of this card.

I originally used one of the unicorn images but adding it to the card, it looked really empty so I stamped, colored and die cut another one. It really helped fill out the card and I totally love it!

Thanks for stopping by! Come back soon!

→ SUPPLIES USED ←
Items marked with an asterisk (*) were provided by a store or the manufacturer for review and use. All other items were personally purchased. Affiliate links may be used at no cost to you.

STAMP SET(S): Penguin Palace – Birthday Unicorn
DIES: Penguin Palace Perfect Cuts – Birthday Unicorn, Stitched Dome STAX Die-namics
INK: Memento Tuxedo Black Ink
TOOLS: Misti, Wagner Heat Gun, Versamark Ink, Anti-Static Powder Pouch
MISCELLANEOUS: Hero Arts – White Embossing Powder, 3M Foam tape, Acetate:

→ TO SEE MORE ←
FACEBOOK: https://www.facebook.com/Insideoutjeans/
INSTAGRAM: https://www.instagram.com/insideoutjeans/
YOUTUBE: https://www.youtube.com/c/insideoutjeans

Love Train

Hi there! Today I’m sharing another card using Penguin Palace’s Love Train stamp set. I used the same concept as one of my previous cards (Spinning Bunnies). It has a hidden spinning mechanism.


The only difference with this card compared to my previous card is that I stamped the trains individually around a circle. I wanted variation among the trains.

I kept everything really simple. I used a clouds stencil and some distress inks for the background. For the front portion of the card, I stamped some of the landscape images in grey so it doesn’t distract from the spinning trains.

For the idea behind the concept, check out the corresponding video that explains the mechanism. It’s really simple.

Thanks for stopping by to check out this card. See you next time!

Love Train | Penguin Palace

Hi everyone! I hope you have enjoyed Thanksgiving and had a lot of family time, which is what I did. Now, it’s Monday and back to reality.

Today I’m sharing another card using a stamp set from Penguin Palace, Love Train. It’s a super cute set that has buildable train sections so you can customize one as you please.

I decided that for this card, I wanted to mask and build a semi-one layer card. For the bottom portion of the card, I stamped out the train, the railroad, and the mountains. I was able to mask all of this off and use distress inks for the grass and mountains. I did use some Copics to enhance the shading and give the mountains some dimension.

The sky at dusk is the star of the card though. I used a variety of distress inks to blend out the sky and I loved how it turned out. I also used a white glaze pen and a clear glaze pen to add little stars to the sky, adding a bit of interest to the card generally. I definitely love how this turned out.

If you haven’t already, you should check out Penguin Palace stamps and use “GRANDOPEN” for a 20% off all the items in the store.

Have a great day!

Bee Happy | Penguin Palace

Hi there! I’m so excited to share my first card as a design team member for Penguin Palace. It’s a new stamp company with some super cute stamp sets! Sharon, the owner of Penguin Palace, is kicking off the grand opening of her company by offering a 20% discount (Code: GRANDOPEN) so go check it out!

My card for today showcases one of her cute stamp sets, Bee Happy. This set is extremely adorable with little images to create a great scene. I decided however to focus on the smaller floral images to create a nice frame.

IMG_6978

I also decided to use a hexagon stencil (since this set includes bees) for the background so I could mimic honeycombs.

IMG_6954

Hope you check out the new stamps from this brand new company and take advantage of the discount!

IMG_6979

Thanks for stopping by!