All my supplies for creating this card will be listed down below (with multiple sources when available) for your curiosity and convenience. Affiliate links used when possible.
I know that we were all about the holiday cards but now we’re still in winter (in fact, it just started this week) and winter cards are definitely perfect for light up cards too!
All my supplies for creating this card will be listed down below (with multiple sources when available) for your curiosity and convenience. Affiliate links used when possible.
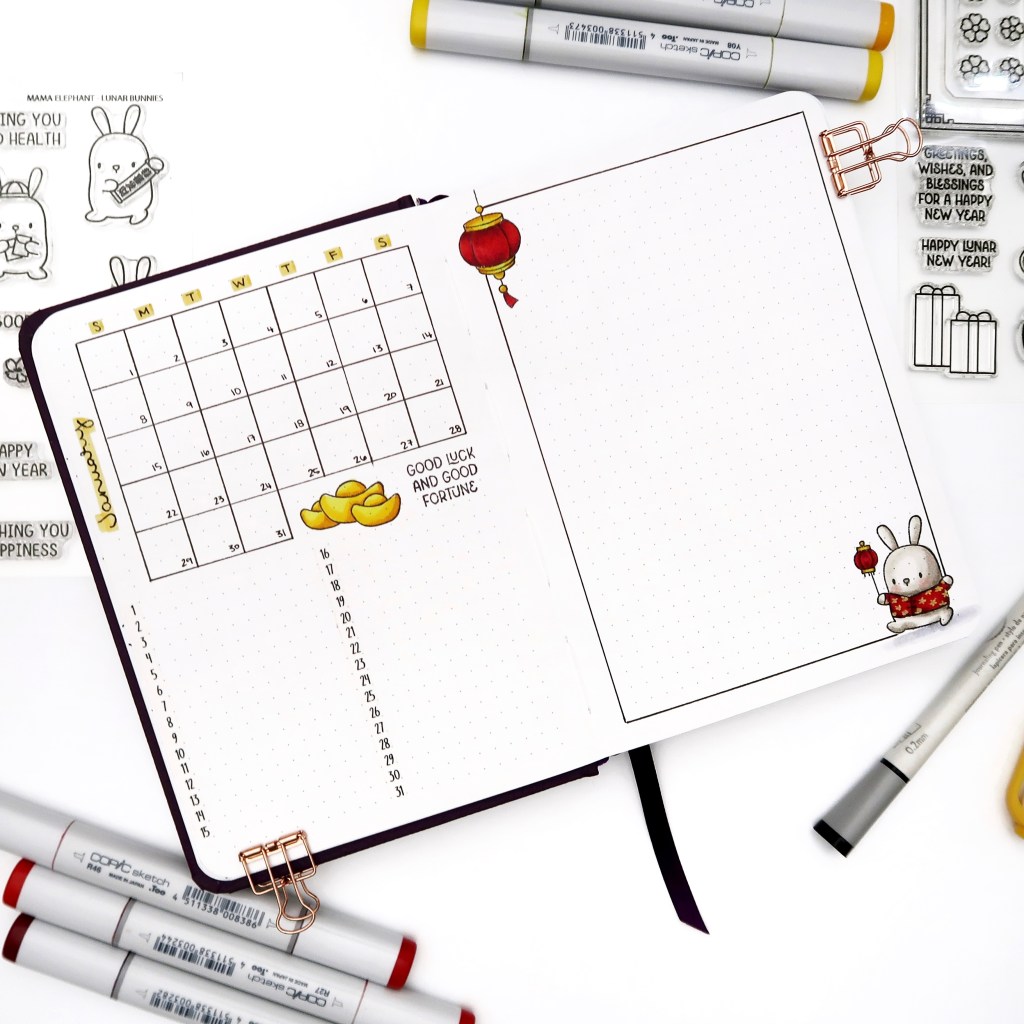
Lunar New Year is coming up and I always pull out these sets to create a set of custom red envelopes. You can just swap out the animal of the year (this year being the Year of the Dragon) and you’re set for a cute little red envelope to share a bit of luck walking in the new year.
All my supplies for creating this card will be listed down below (with multiple sources when available) for your curiosity and convenience. Affiliate links used when possible.
I struggled thinking about my theme this month and I settled on this one because I wanted to motivate myself into reading a bit more. I’ve been reading but I want to do so more.
Be sure to come back weekly to check out how I set up my planner spread for each week… I use the same stamps but it’s a different layout.
WEEK 23
All my supplies for creating this card will be listed down below (with multiple sources when available) for your curiosity and convenience. Affiliate links used when possible.
I wanted to make this card since this Mama Elephant set came out but never had the time. I finally was able to make the time and I was so happy with how it turned out. Of course, what’s making a card without some hiccups? I didn’t realize the die for the house cut out the windows as well. Don’t worry! I figured it out!
All my supplies for creating this card will be listed down below (with multiple sources when available) for your curiosity and convenience. Affiliate links used when possible.
I’ve always been the type of person to write things down – I just remember them better. I have been pretty consistent using a planner over the past few years and searching for this thing called planner peace. For me, a dotted notebook is the best choice because I can customize it however I want. Yes, it definitely takes a bit of effort to set it up but I have all these stationary and cardmaking supplies that help me along the way.
This year, I chose the Sassy Dots notebook — this B6 sized notebook is a smaller size than my normal A6 but I think it works really well since sometimes I feel like I just don’t fill up all my pages (and honestly, you don’t have to). BUT the best part of this notebook is that it is copic friendly — yep, you read that right. You can use your copic markers and there’s absolutely no bleed through!
This isn’t a traditional monthly spread but it’s what I think will work for me and as always, I can tweak it as the year goes on since every month is a fresh blank page.
I’ll be sharing my weekly spreads here, each week for the month of January and I hope you enjoy it!
Ever play Craft Roulette? It’s a show that is over on YouTube every Friday night, where the parameters for a card are determined by a wheel. I’ve been on the show twice (you can find it here or here) but this is the first time I played along live since my friend, Shanna, was on the show this past Friday. The four parameters were 1) Coral and cool colors 2) pocket 3) 4×6 card 4) pocket. It was pretty fun playing live without having the pressure of being on camera and I was done creating shortly after they were done too. I love how it came out and find it so cute … I definitely wouldn’t have created this card without the parameters so if you’re every stumped — check out the show and play along on Fridays!
All my supplies for creating this card will be listed down below (with multiple sources when available) for your curiosity and convenience. Affiliate links used when possible.
Hi crafty friends! Today, I’m sharing a card a couple crafty items for this clean card.
I stamped my image from Mama Elephant’s Pix’s Favorites stamp set using Ink on 3’s Fadeout Ink. I colored it up using copics markers for a no-line image.
For my background, I used Trinity Stamps A2 Foundation Rectangle Stencil for a focal point in the middle of my card panel. I blended the panel using Ink on 3’s Atelier Inks: Twiggy Brown, Marilyn Red, Marigold Orange and Bee Sting Yellow. Using Ink on 3’s Leafy Forest stencil on top of Trinity Stamps A2 Foundation Rectangle Stencil, I went over the panel again with the same colors to create a tone of tone pattern
Thanks for stopping by and I hope you got some inspiration to create! Happy Crafting!
→ SUPPLIES USED ← Some products are provided by manufacturers for review and use. Affiliate links may be used at no cost to you.
Happy New Year! Can you believe it’s a start of a new decade!? Time has flown by so quickly! One of my new years resolutions is to create more for myself. I have design teams and deadlines but I realized that I need to create for myself and that’s exactly what I’m going to do. Do you have any crafty resolutions for the new year?
Today, I wanted to create a card using I’m sharing a card featuring these critters I colored up for fun. I always revert back to Mama Elephant’s Party Animal stamp set at the beginning of the year since it’s so perfect to kick off the new year.
I stamped out these images using Ink on 3’s Fadeout Ink, which is perfect for no line coloring. I used a combination of Copic markers (colors listed below) to color everything.
I definitely knew I wanted to use Trinity Stamps’ Layered Fireworks stencils for the background but was worried it’d be too busy. I went for it anyway and stepped a bit out of my comfort zone. I gathered a ton of different embossing powders to help create this firework lit sky. Using Juicy Ink, I pressed on the stencil to get the ink on my cardstock and then used all the different embossing powders to fill up the sky.
I used My Favorite Things Stamps – Snow Drifts to cut out some masking paper so I could use distress inks for the sky and the grass. The embossing powder resists all the ink so once I was finished with the sky, I just wiped it down with a dry paper towel and all the colors were perfect for fireworks.
I went ahead and added all the colored critters to the card panel and added the Cheers sentiment from My Favorite Things Stamps. This finished off my card and I love how it turned out. It looks a bit busy but you know what, the more fireworks, the better.
Thanks for stopping by! Come back soon!
→ SUPPLIES USED ←
Items marked with an asterisk (*) were provided by a store or the manufacturer for review and use. All other items were personally purchased. Affiliate links may be used at no cost to you.