Colorful Sentiment Stacks!

Hi everyone! Today is one of the two days of LDRS Creative features over on the LDRS Blog. We’re doing something new and showcasing a ton of projects featuring the new release by the design team compressed into two blog posts each month!

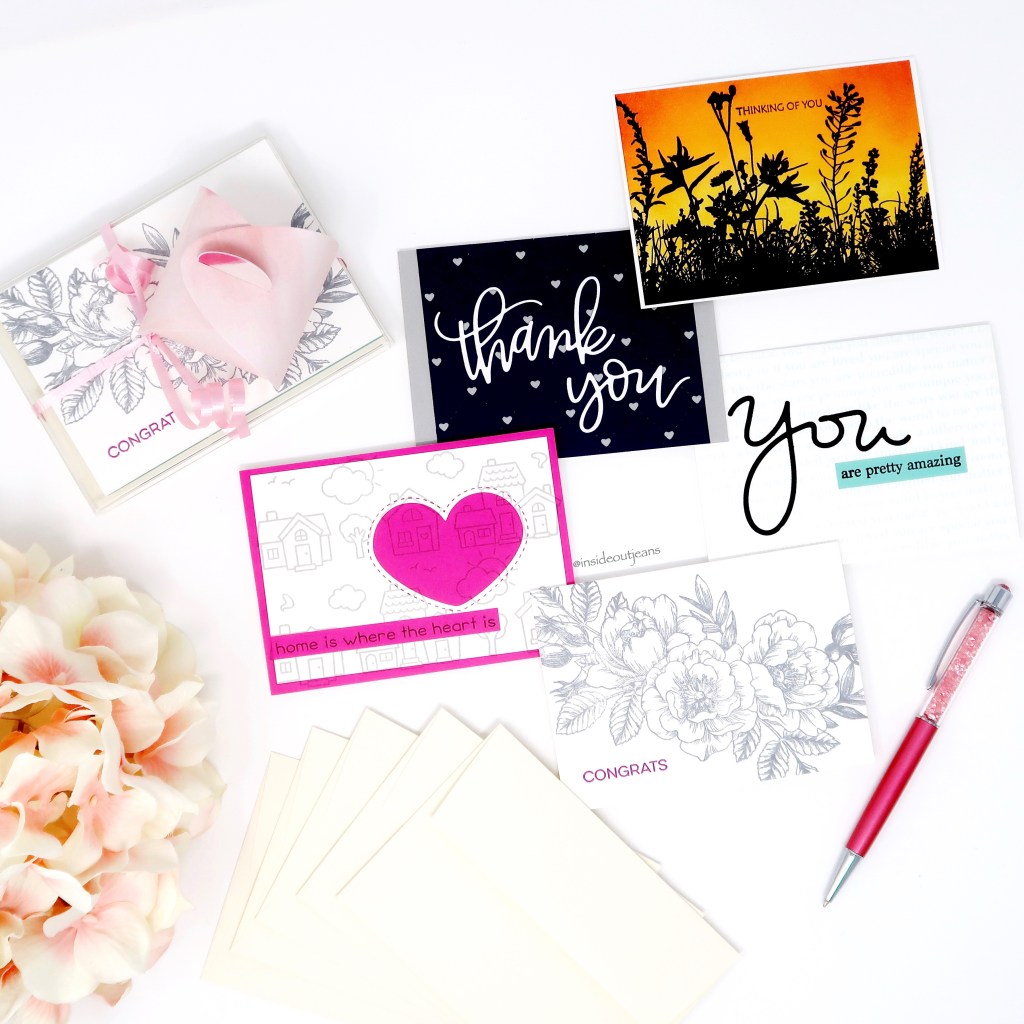
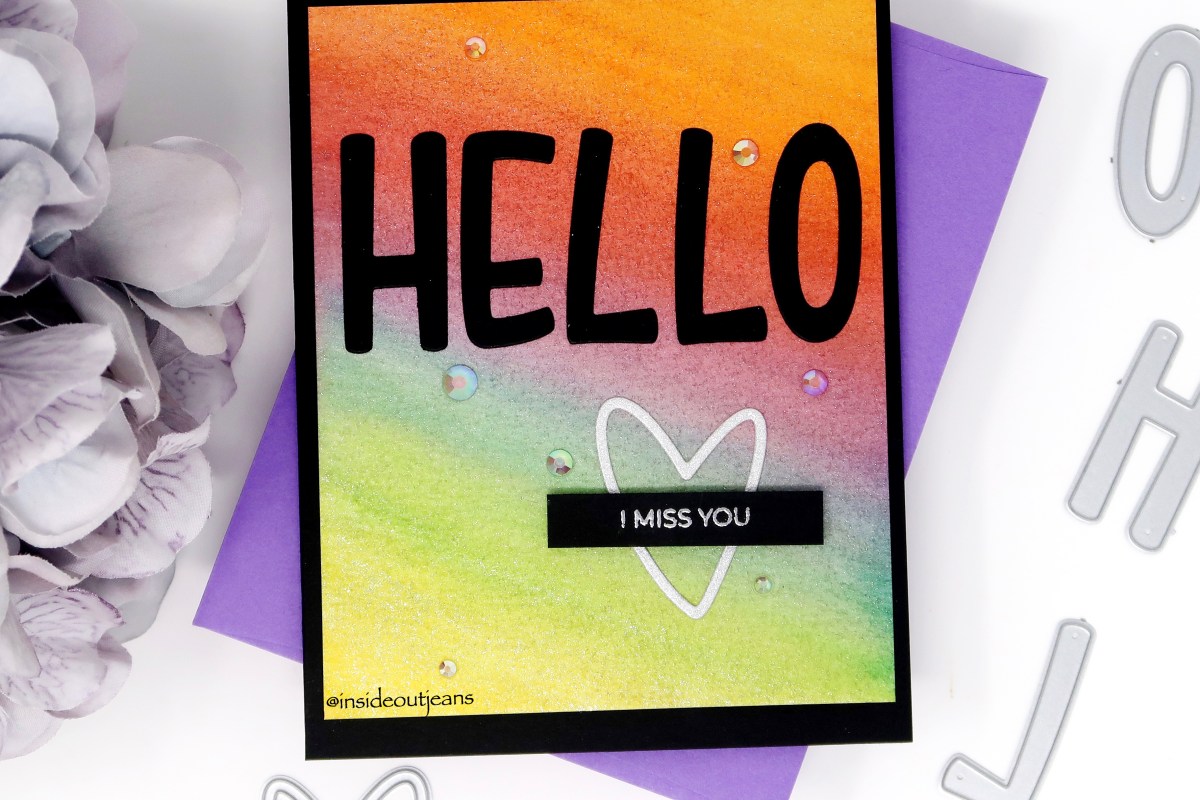
I wanted to share this blog post of this fun card surrounding the new die, Sentiment Stack. I tend to love sentiment sets such as the Anytime Stack or the Love Stack but I forget about them because they don’t have images.

For today’s card, I wanted to use as many of the sentiments as I could. I stamped them out using Raven hybrid ink and die cut them. It works so well since the stamp is just one large stamp and the Sentiment Stack die lines up perfectly!

I arranged a mix of the sentiments from the Anytime Stack and the Love Stack, and pre-arranged them randomly. Once I had them in order, I pulled out the LDRS Creative inks: Lipstick Jungle, In Your Face Orange, Dan-D-Lion, Key Lime Pie, Swimming Hole, La La Lavender to use them in rainbow order.

Once I was done, I adhered them against black cardstock and finished off the card. Since the card panel was all sentiments, I didn’t need a main sentiment. I adore how this turned out!

I hope you get inspired to create! Thanks for stopping by! Come back soon! 

→ SUPPLIES USED ← 
Items marked with an asterisk (*) were provided by a store or the manufacturer for review and use. All other items were personally purchased. Affiliate links may be used at no cost to you. 
STAMP SET(S)
LDRS Creative – Anytime Stack: http://shrsl.com/2328k 
LDRS Creative – Love Stack: http://shrsl.com/2328m
DIES
LDRS Creative – Sentiment Stack: http://shrsl.com/2328o
INK
LDRS Creative – Lipstick Jungle: http://shrsl.com/232a1
LDRS Creative – In Your Face Orange: http://shrsl.com/2329z 
LDRS Creative – Dan-D-Lion: http://shrsl.com/232a0
LDRS Creative – Key Lime Pie: http://shrsl.com/2329v 
LDRS Creative – Swimming Hole: http://shrsl.com/2329w
LDRS Creative – La La Lavender: http://shrsl.com/2329u 

→ TO SEE MORE ← 
FACEBOOK: https://www.facebook.com/Insideoutjeans/ 
INSTAGRAM: https://www.instagram.com/insideoutjeans/ 
YOUTUBE: https://www.youtube.com/c/insideoutjeans

Trinity Stamps New Release Blog Hop

Happy Friday! Today is the launch of Trinity Stamps‘ new release and boy, it’s an amazing one!

We will be giving away 3 prizes! 2 $15 Gift Certs to Trinity shop and 1 $25 gift certificate to the Trinity shop. To be eligible, hoppers must comment on all stops. Comments are due by 2/7/20 at 11:59 PM PST. Winner will be announced on the Trinity Blog on 2/10. So, be sure to check back! US & International!

My card that I’m sharing today stems from this one episode of Sex and the City (yes, I love this show and still watch re-runs!) and it was the one where Charlotte goes to a workshop about positive affirmations for love. I saw these five 3×4 stamp sets and knew I had to somehow incorporate all of them into one card.

To do that and make it fit on an A2 Panel card, I had to layer them up and mask. I made each individual stamp into a card and it worked out perfectly. I started out with my favorite one, Amazing Human, and built everything else behind it.

In addition to Amazing Human, I used A Better Place, Folded Hug, Love & Happy Thoughts, and Not Alone. I’m telling you, I just HAD to use all of them in some way or another.

Once I finished coloring everything up, I added a bit of shadow to look like cards just on top of each other. I just love how this turned out. It’s so fun, and I’m thinking of stamping a ton of these out just to hand out as a random act of kindness. They all spread such a positive message and could brighten up someone’s day, don’t you think?

Here is the hop lineup. It’s a combination of blogs, instagram, YouTube so you’ll get a huge variety of different projects using the New Release! Be sure to leave a comment for a chance to win!
Adelina Starce
Amanda Wilcox
Arjita Singh
Brenda Noelke
Dani Bourdant
Ashley Hughes
Christine Burillo-Kirch
Davina Cantrell
Dana Kirby
Elyse Robinson
Emily Mydlowski
Emelie Hessler
Jeannie Lieu – YOU ARE HERE
Jenny Hall
Julianne Foyil
Katie Brooks
Jess Francisco
Malgorzata “Goga” Kalbarczyk-Leonczuk
Mirella Rogan
Kelly Butler-Fusco
Nicole Martel
Shanna Slater
Lisa Mensing
Silvia Galloni
Sabrina Leavell
Maria Russell
Trinity Stamps

Thanks for stopping by! Happy Crafting! 

BASIC SUPPLIES USED:
MISTI Stamping Tool
Tonic Comfort 8.5 Inch Guillotine Paper Trimmer
Tonic Glass Media Mat
Memento Ink Pad, Tuxedo Black

STAMP SETS:
Trinity Stamps – Amazing Human: http://shrsl.com/22tf9
Trinity Stamps – Better Place: http://shrsl.com/22tfc
Trinity Stamps – Folded Hug: http://shrsl.com/22tey
Trinity Stamps – Love & Happy Thoughts: http://shrsl.com/22tfe
Trinity Stamps – Not Alone: http://shrsl.com/22tff

Hey Gorgeous | Ink on 3

Hi everyone! It’s Jeannie (InsideoutJeans) on the blog today with Ink on 3’s newest stamp set debuted at Creativation called Hey Gorgeous. It’s such a pretty stamp set that speaks to me! The main image from this set is obviously this gorgeous girl, which I decided to no-line color using Fadeout ink with copic markers.

There’s no coordinating dies for this set but it’s large enough for me to fussy cut quite easily. Then I had to figure out what to do with it. I pulled out the Atelier inks to help me create a fun background. First, I used three Atelier re-inkers to watercolor a card panel. I used Marilyn Red, Marigold Orange, and Bee Sting Yellow

Once the watercolored panel was created, I splattered water all over since these inks are water-reactive. I also splattered some of the ink using all three colors: Marilyn Red, Marigold Orange, and Bee Sting Yellow

To finish off the background, I stamped out the floral images randomly using the Marilyn Red ink pad. 

For the sentiment, I stamped Hey Gorgeous using Blackout ink. I just quickly fussy cut out the larger sentiment and added the “hey” using a strip. 

I’m loving how this all came together and I’m so excited to use these inks more! They are so versatile and fun. Have you tried them? 

Thanks for stopping by today and I hope you get inspired to create. Come back again soon for more inspiration and ideas! Happy Crafting! 

You are Loved!

Hi everyone! I’m off to Creativation for the weekend but I wanted to share this fun card with you today. I actually starting making this card with an idea in mind, however, that didn’t work out and I ended up with this instead. Sometimes (a lot of times) this happens and I figured it out regardless.

I was inspired by Simon Says Stamp’s instagram challenge of “something new” and I went with new techniques along with new items in my crafty stash.

I’ve play with alcohol markers before but I never really got the foiling to work for me. I wanted to try it again after seeing a few photos on instagram, I was inspired.

I used a piece of yupo paper along with a few alcohol inks. I wanted to go with monotone colors around pink and red since I had stamp images that were Valentine-esque. I used the following colors: Pink Sherbet, Purple Twilight, and the Pearl alcohol ink, Intrique, along with the Ink Blending Solution.

Let me say this outright: I am never happy with how the alcohol inks turn out. NEVER. I will keep playing with it again and again until I’m semi-satisfied. Even with this piece, I was not particularly stunned by it at all and I only stopped playing with it because I didn’t want to overwork it.

After a little bit of time, I added some Minc rose gold foil to the yupo paper. The foil stuck with the wet areas of the alcohol inks and this is where the magical happens. My panel that I was not so happy with, was gorgeous! Of course, there are some pieces that I wish stuck with foil but I was pretty happy with it. The only problem with this was that the original images that I planned to use with it, would not work with it because the background was too bold and busy.

I dug further into my recent purchases and remembered I had the Simon Says Stamp You are Loved die and this was perfect for it. I die cut the image out three times and stacked them. Additionally, I die cut the border image out of vellum so the sentiment would be the focal point. This worked out perfectly so I placed it on the bottom left hand corner and finished it off with some embellishments.

I hope you get inspired to create! 

Thanks for stopping by! Come back soon! 

→ SUPPLIES USED ← 
Items marked with an asterisk (*) were provided by a store or the manufacturer for review and use. All other items were personally purchased. Affiliate links may be used at no cost to you. 

DIES: Simon Says Stamp – You are Loved: http://bit.ly/384gIpf
INK: Tim Holtz Alcohol Inks: Pink Sherbet, Purple Twilight; Tim Holtz Alcohol Pearl Inks: Intrigue
MISCELLANEOUS: Heidi Swapp – Minc Rose Gold Foil: http://shrsl.com/228oq

→ TO SEE MORE ← 
FACEBOOK: https://www.facebook.com/Insideoutjeans/ 
INSTAGRAM: https://www.instagram.com/insideoutjeans/ 
YOUTUBE: https://www.youtube.com/c/insideoutjeans 

Screen Time | Lawn Fawn

Hi everyone! Today I’m sharing a card featuring Lawn Fawn’s stamp set named, Screen Time

I created this card originally for my brother’s birthday and realized it’s such a relatable card that I made it again for another birthday. Who doesn’t sit in bed texting or playing video games?

I originally had seen this floating around on social media using a cut file, but I figured that I could pull the card together using items from my crafty stash. I’m a big fan of creating interactive cards without using specific dies. It takes a bit of work but you’re able to customize it to make it your own.

The card is relatively simple to put together once you have the coloring done and the box set up.

The dimensions for this particular shadow box are as follows:
Front of Bed: 1.75” x 7.5” (Score at 0.5, 1.5, 6, 7 inches)
Back of Bed: 4.5” x 4”
Inserts (Blankets): 4.5 x 2.5 (back of bed); 2” x 6” (score at 0.5, 5.5)

Along with this blog post, here is my process video to show you the details of how this card came to be.

Everything that I’m using to create the card will be listed down below for your curiosity and convenience. 

Thanks for stopping by! Happy Crafting! 

→ SUPPLIES USED ← 
Items marked with an asterisk (*) were provided by a store or the manufacturer for review and use. All other items were personally purchased. Affiliate links may be used at no cost to you.

→ TO SEE MORE ← 
FACEBOOK: https://www.facebook.com/Insideoutjeans/ 
INSTAGRAM: https://www.instagram.com/insideoutjeans/ 
YOUTUBE: https://www.youtube.com/c/insideoutjeans 

Gnome Treat Bags

Hi everyone! Yes, I know it’s almost Christmas but I wanted to share this easy treat bag for Christmas. Every year, my family has a Secret Santa gift exchange and I like to create little treat bags for the event.

The easiest way to create treat bags is by using dies, when producing in mass and when you just don’t have time to color.

Gnomes have been such a big hit this season and I also fell into the trend. I actually ordered the Simon Says Stamp Large Gnome die when I saw a gnome in their card kit. I didn’t actually realize there was a smaller one as well but I was perfectly content with the one I got (I might even get the smaller one for next year).

I did a bunch of die cutting 12 gnomes using random Christmas pattern paper I have that I only can use up once a year to create the gnomes. I also did do a bunch of cutting out of white cardstock. For the gnome, I colored up his nose and his beard so the coloring is definitely at a minimum.

Once I was done with the gnomes, I moved on to my treat bag topper using My Favorite Things Stamps’ Treat Bag die. I cut out 12 of these and went ahead to stamp using Lawn Fawn – Let it Snow stamp set to give the topper a snowy background.

For my main sentiment, I used Trinity Stamps’ Merry Christmas stamp set. I only could use the large Merry sentiment paired with the smaller Christmas font.

Once the gnomes and treat bag toppers were completed, it was assembly time and this part went really quickly to create 12 goodie bags for my Secret Santa event.

I know Christmas is basically here, but I hope it gives you inspiration for an easy goodie bag in the future or for any fun occasion!

Thanks for stopping by! Come back soon! 

→ SUPPLIES USED ← 
Items marked with an asterisk (*) were provided by a store or the manufacturer for review and use. All other items were personally purchased. Affiliate links may be used at no cost to you. 

STAMP SET(S)
Trinity Stamps – Merry Christmas Senti-mini:  http://shrsl.com/20zfz
Lawn Fawn – Snowy Backdrop: http://shrsl.com/20zg0
DIES
Simon Says Stamp – Large Gnome: http://bit.ly/2Mh6Y2O
My Favorite Things Stamp – Treat Bag: http://shrsl.com/20zg1
INK
Memento Tuxedo Black Ink: http://shrsl.com/1eonc 
COLORING
Copic Sketch – E00: http://shrsl.com/1729l 
Copic Sketch – E02: http://shrsl.com/20y5e
Spectrum Noir Illustrator – IG01
Spectrum Noir Illustrator – IG02
MISCELLANEOUS
My Favorite Things Stamp – Gusset Treat Bag: http://shrsl.com/20zg2

→ TO SEE MORE ← 
FACEBOOK: https://www.facebook.com/Insideoutjeans/ 
INSTAGRAM: https://www.instagram.com/insideoutjeans/ 
YOUTUBE: https://www.youtube.com/c/insideoutjeans 

I Like Naps | Lawn Fawn

Hi everyone! Today I’m sharing a card featuring the freebie I received with purchase on Black Friday from Lawn Fawn. It’s the stamp set called I Like Naps. It’s not available for purchase right now but it probably will be later on. They do have a coordinating stamp set called Hang in There and I think I might have to pick it up too.

I stamped the image using Ink on 3’s Fadeout Ink and colored it up using Copic markers. I knew I wanted him to be the centerpiece of the card I created. Usually, I would do something like a distress ink back ground with splatter, but I thought that the Trinity Stamps Catching Some Rays stencil would be perfect. It’s a layering stencil that has two parts.

Using distress oxide inks for the first layer, I blended three different colors: Squeezed Lemonade, Wild Honey, Fossilized Amber. Then with the second stencil, I used Distress Ink in Squeezed Lemonade with some Nuvo Moonstone Glimmer paste. I love using the Moonstone color because I can mix it with inks to create the color I need.

Finally, I heat embossed the sentiment using white embossing powder on brown cardstock. This finished off the card!

Thanks for stopping by! Come back soon! 

→ SUPPLIES USED ← 
Items marked with an asterisk (*) were provided by a store or the manufacturer for review and use. All other items were personally purchased. Affiliate links may be used at no cost to you. 

STAMP SET(S)
Lawn Fawn – I Like Naps
STENCILS: 
*Trinity Stamps – Catching Some Rays: http://shrsl.com/20shs
INK
*Ink on 3 – Fadeout Ink:  http://bit.ly/2RulfMP
Mini Distress Ink – Squeezed Lemonade: http://shrsl.com/1epki
Distress Oxide Ink – Fossilized Amber: http://shrsl.com/1gsjd
Distress Oxide Ink – Squeezed Lemonade: http://shrsl.com/1gsiu
Distress Oxide Ink – Wild Honey: http://shrsl.com/20si7
COLORING
Copic Sketch – W02: http://shrsl.com/17ydr 
Copic Sketch – W04: http://shrsl.com/17yds  
Copic Sketch – W06: http://shrsl.com/1ex4i 
Copic Sketch – W08: http://shrsl.com/1fd7c 
Copic Sketch – E50: http://shrsl.com/1fbxs 
Copic Sketch – E53: http://shrsl.com/1ah34 
Copic Sketch – E55: http://shrsl.com/1ah36   
Copic Sketch – E57: http://shrsl.com/1ah37   
Copic Sketch – E59: http://shrsl.com/1ah38  
Copic Sketch – YG03: http://shrsl.com/1ah3d 
Copic Sketch – YG11: http://shrsl.com/1ex4g 
Copic Sketch – YG13: http://shrsl.com/1ah3f 
Copic Sketch – YG17: http://shrsl.com/1erwt 
Copic Sketch – YG25: http://shrsl.com/1erwu 
Copic Sketch – YG67: http://shrsl.com/1ah3h
HEAT EMBOSSING
Wagner Heat Gun: http://shrsl.com/1esm6 
Anti-Static Powder pouch: http://shrsl.com/1ev6k 
Versamark Ink: http://shrsl.com/1eone 
Hero Arts – White Embossing Powder: http://shrsl.com/1ev6t 
MISCELLANEOUS:
Nuvo Glimmer Paste – Moonstone: http://shrsl.com/20sib

→ TO SEE MORE ← 
FACEBOOK: https://www.facebook.com/Insideoutjeans/ 
INSTAGRAM: https://www.instagram.com/insideoutjeans/ 
YOUTUBE: https://www.youtube.com/c/insideoutjeans 

No Line Coloring | The Gray Muse

Hi everyone! Today I’m sharing a card featuring The Gray Muse’s stamp set named, Hugs. If you’re part of the crafty community, you know that enamel pins are the hot items to collect and they are so fun. I personally first was introduced to The Gray Muse by spotting some of her pins. My favorite is “You Can Google That”.

One of my favorite things to do lately has been no line coloring and I received the Hugs stamp set for my birthday and knew I just had to color it up.

Don’t get me wrong, I love doing no line coloring but realistically, it takes longer than most and for this particular card, I spent quite a few days working on it because my attention span worked on parts of this card at a time.

I truly find this super relaxing and this set was just gorgeous and perfect. The image is perfect for an A2 card so this was the main focal point. I actually stamped out a second image in black ink and colored only the letters in black. I added them right on top of the stamp set and add a little bit of glitter.

To finish off this card, I add a ton of gems around to border the stamp image and I just love how it turned out.

Thanks for stopping by! Come back soon! 

→ SUPPLIES USED ← 
Items marked with an asterisk (*) were provided by a store or the manufacturer for review and use. All other items were personally purchased. Affiliate links may be used at no cost to you. 

STAMP SET(S)
The Gray Muse – Hugs:
INK
Ink on 3 – Fadeout Ink:  http://bit.ly/2RulfMP 
Memento – Tuxedo Black Ink: http://shrsl.com/1eonc
COLORING
Copic Sketch – E23: http://shrsl.com/1wqi6 
Copic Sketch – E25: http://shrsl.com/172a2 
Copic Sketch – R81: http://shrsl.com/17yeg 
Copic Sketch – R83: http://shrsl.com/17yeh 
Copic Sketch – R85: http://shrsl.com/17yei
Copic Sketch – V12: http://shrsl.com/17yeb 
Copic Sketch – V15: http://shrsl.com/17yec 
Copic Sketch – V17: http://shrsl.com/17yee 
Copic Sketch – G05: http://shrsl.com/1szhc 
Copic Sketch – G17: http://shrsl.com/1szhg 
Copic Sketch – G28: http://shrsl.com/1erwv  
Copic Sketch – YG03: http://shrsl.com/1ah3d 
Copic Sketch – YG17: http://shrsl.com/1erwt 
Copic Sketch – YG67: http://shrsl.com/1ah3h

→ TO SEE MORE ← 
FACEBOOK: https://www.facebook.com/Insideoutjeans/ 
INSTAGRAM: https://www.instagram.com/insideoutjeans/ 
YOUTUBE: https://www.youtube.com/c/insideoutjeans 

Group Hugs | Waffle Flower

Hi everyone! Today I’m sharing a card featuring Waffle Flower‘s stamp set named, Group Hug. I’ve always eyed this set because it’s a fun one to stamp and color up. Lately, if you haven’t noticed, I’ve been really into no line coloring and enjoying it so much!

To start off, I use Ink on 3‘s Fadeout ink, which is an ink that is formulated specifically for no line coloring because it take on the color you lay on top of it. I love it!

This is definitely an easy card to make since the stamp image is so large. The set includes random accessories but I really just wanted to use the image in its original form.

Together with Copic markers, I colored this in. I definitely took my time with this one and took multiple breaks in between. No line coloring has been really challenging and also totally rewarding. I just love the finished product.

Once I finished coloring the image, I trimmed it down with a slight white border. On a piece of Bristol Smooth cardstock, I decided to use two distress oxide inks: Pickled Raspberries with Wilted Violet on the edges. It turned out to be so soft and pretty! To finish it off, I used a bit of metallic white watercolor to splatter on the background.

For the sentiment, I stamped the word “Hugs” directly onto my background and then heat embossed the rest of it using white embossing powder on black cardstock. I trimmed the embossed sentiments down to strips.

Since the image is so large, the only space I had was the top left corner (which I noticed is a popular chosen spot for most of the cards using this set).

I love how this turned out and am excited to see how many other ways I can use this set. It’s such a fun one to coloring and I can’t wait to ink it up again!

Thanks for stopping by! Come back soon! 

→ SUPPLIES USED ← 
Items marked with an asterisk (*) were provided by a store or the manufacturer for review and use. All other items were personally purchased. Affiliate links may be used at no cost to you. 

STAMP SET(S):
Waffle Flower – Group Hug

INK: 
Ink on 3 Fadeout Ink
Mini Distress Ink – Picked Raspberries
Mini Distress Ink – Wilted Violet

TOOLS: 
Wagner Heat Gun
Anti-Static Powder pouch
Versamark Ink
Hero Arts – White Embossing Powder

→ TO SEE MORE ← 
FACEBOOK: https://www.facebook.com/Insideoutjeans/ 
INSTAGRAM: https://www.instagram.com/insideoutjeans/ 
YOUTUBE: https://www.youtube.com/c/insideoutjeans

Not 2 Shabby | Warm & Cozy

Hi everyone! Lately, I’ve been obsessed with no line coloring. I just love how soft and fun it looks. It’s also been a bit challenging to get down the shadows to achieve the right look. Today, I’m sharing a card featuring Not 2 Shabby‘s stamp set named, Warm & Cozy.

I wanted to feature the cute penguin in this Warm & Cozy set so I stamped it out using Ink on 3‘s Fadeout Ink. I went ahead and colored using copic markers with a mix of blue and purples. I just adore how this turned out.

I wanted to feature him since I spent the time coloring it but I also wanted a fun background. In the same Warm & Cozy set, there’s this large snowflake that I decided to stamp using Ink on 3‘s Juicy ink along with Artic White embossing powder. I did this all on Canson XL watercolor paper so I could do a soft watercolor background.

For the background, I used two Ink on 3 Atelier Inks: Peacock Blue and My Jam Purple. I smooshed them on my glass mat and mixed in a bit of water. I added the colors to the background and it came together beautifully.

To finish this off, I stamped and heat embossed the sentiment on black cardstock using Juicy ink and Artic White embossing powder. The sentiment strip was the perfect place to have the penguin sit on top of.

I hope you enjoyed this card and get inspired to create! 

Thanks for stopping by! Come back soon! 

→ TO SEE MORE ← 

FACEBOOK: https://www.facebook.com/Insideoutjeans/ 
INSTAGRAM: https://www.instagram.com/insideoutjeans/ 
YOUTUBE: https://www.youtube.com/c/insideoutjeans

Thanksgiving Crafty Sales

Happy Thanksgiving everyone!!! I hope everyone’s having a family-filled and food-filled day. It’s one of my favorite holidays of the year and it’s all filled with sales too! I’ve already taken advantage of a ton and I’m sure there’s more coming.

Here are a few I know about that I personally have taken advantage of:

  • Trinity Stamps
    – 25% off the entire store automatically
    – with a purchase of $50, you’ll receive the Snow Mole-bile stamp (I’m featuring a project using it today below).
    – with a purchase of $75, you’ll receive the Snow Mole-bile stamp AND die
    – Valid until December 2, 2019
  • Ink on 3
    – Use code THANKS35 for 35% off your entire order
    – Valid until December 3, 2019
  • LDRS Creative
    – Use code BLACKFRIDAY40 for 40% off your entire order
    – Valid until December 1, 2019
  • My Favorite Things Stamp
    – Use code THANKS for 35% off your entire order
    – Valid until December 2, 2019
  • Pink & Main
    – Use code BLACK2019 for 25% off your entire order
    – Valid until December 2, 2019
  • Simon Says Stamp
    – Use code GBLE299 for 30% off Simon Says Stamp brand items
    – Valid until November 28, 2019

Today, I’m sharing a card featuring the freebie Trinity Stamps stamp set named, Snow Mole-bile, which you’ll receive with a purchase with $50. You’ll also get the coordinating die with a purchase of $75 or more.  

I just wanted to create a simple and fun card to feature this little cutie. I’ve been super into no-line coloring, so I decided to do that today. I stamped the Mole using Ink on 3‘s Fadeout ink.

I also used Trinity Stamps’ Slimline Card Series: Scenic Border Die Set to cut out some masks for the snow banks. Once I masked it too, I used the Season Greetings Silhouettes stamp set to add a few trees using Versafine ink and Ink on 3’s Clear Embossing powder. I also decided to stamp out the moon in Ink on 3’s Chrome Embossing powder so it stands out.

After I finished the trees, I used the Blending Buddy with distress inks to create a sky. The colors I used are Stormy Sky, Chipped Sapphire, and Black Soot. For the sky, I had to add stars, so I used Perfect Pearls and Permanent White Gouache to splatter it everywhere.

I colored up the cute little mole using some Copic markers and then stamped out the sentiment from the set. It’s punny!

I hope you get inspired to create and take advantage of the different sales happening for Thanksgiving and Black Friday.

Thanks for stopping by! Come back soon! 

→ TO SEE MORE ← 
FACEBOOK: https://www.facebook.com/Insideoutjeans/ 
INSTAGRAM: https://www.instagram.com/insideoutjeans/ 
YOUTUBE: https://www.youtube.com/c/insideoutjeans

Not 2 Shabby – Happy Halloween

Hi everyone! Today I’m sharing a card featuring Not 2 Shabby‘s stamp set named, Happy Halloween

The witches in this set were too adorable not to color up! I also added some lighting to help create the night time scene and I think it really adds to the effect. What do you think?

Along with this post, here is my process video to show you the details of how this card came to be. 

Everything that I’m using to create the card will be listed down below for your curiosity and convenience. 

Thanks for stopping by! Happy Crafting! 

SUPPLIES ← 

Items marked with an asterisk (*) were provided by a store or the manufacturer. All other items were personally purchased.