Some cards just need a lot of steps. This is one of them but trust me, it really comes together quite easily. My hardest choice here was just the color choices for the palette. I definitely love how this turned out and it’s perfect for Thanksgiving and the fall.
Water based markers like Tombows are really easy to create a quick background. I scribble it on watercolor paper, use a wet pen and move all the colors around. It’s a really fun way to use your markers like watercolors.
All my supplies for creating this card will be listed down below (with multiple sources when available) for your curiosity and convenience. Affiliate links used when possible.
This is one of my favorite hot foil dies for the holiday season and beyond because I think it’ll be pretty versatile. I thought it would be the star of the show, but honestly, I think the Polar Party image stole the spotlight. I no line colored it up with copic markers and die cut it out with the coordinating die because there was no way I would fussy cut this out. I don’t always love that outline around a die cut, so I just used my go to trick to hide it!
Have you tried glittery watercolors? If you haven’t, maybe this card might make you! It’s so freaking pretty and the best part is actually right after you put down the color and right before it dries because the color and glitter moves around with the water — also, it was the PERFECT medium for this gem filled, unique holiday card.
Got medical tape in your stash? I pull this out every Halloween for at least one of my cards — and it’s an easy way to create a fun background for a spooky card. See how I did it below.
All my supplies for creating this card will be listed down below (with multiple sources when available) for your curiosity and convenience. Affiliate links used when possible.
Been in love with ink blending lately so been playing with a lot of color combos — this one is so pretty! I also had to add glittery wings to the fairies and I love how it turned out. So simple, yet so fun!
All my supplies for creating this card will be listed down below (with multiple sources when available) for your curiosity and convenience. Affiliate links used when possible.
The popular Trinity Stamps Shimmering Sea Hot Foilah plate is back in stock and here I’m using it to create the background to a fun die cut card. You can always use your die cuts for a no-line coloring look. The plate itself is only half a card panel but you can stretch your supplies to create that full panel of the gorgeous waves.
All my supplies for creating this card will be listed down below (with multiple sources when available) for your curiosity and convenience. Affiliate links used when possible.
Welcome to the Heffy Doodle and Trinity Stamps Collaboration Blog Hop! Both teams are sharing super fun projects using items from each company. I personally love mix and matching different items for a project. Oh, before I get into it — there’s a giveaway!
To be entered to win the giveaway, all you need to do is comment at each stop along the Blog Hop! Trinity Stamps will be giving away $30 and Heffy Doodle will be giving away £25 to their respective stores! Be sure to comment before 11:59 PM EST on July 22nd to be entered to win!
Each company will post their random winner on July 23rd at 10AM EST! Make sure to check the Heffy Doodle Blog and Trinity Stamps Blog to see if you’re a winner!
The project I’m sharing today is a flat shaker card — these are super fun to make. The Trinity Stamps Shimmer Sea Hot Foil is finally back in stock, and I had to use it for this collab. I went ahead and hot foiled an entire panel of teal green cardstock using Disco Ball foil, but I did trim it down just a bit because I wanted a sky peeking out. To create the sky, I used Blueprint Sketch and Spun Sugar.
I stamped images from Friend Ship, You Go Gull, and Otter Side. They work perfectly together for my little water scene! I colored them up quickly using copic markers.
I used my Xyron sticker maker for the rest of my images, turning them into stickers and decorated the outside of my shaker to finish off this card. I’m so happy to shake, shake, shake this card! I hope you enjoyed this card featuring both Trinity Stamps and Heffy Doodle. Remember to leave a comment for a chance to win our collab giveaway!
Bonus Content: If you want to watch how I put this card together for a visual, check out this short video:
I forget how fun embellishments are! They are the best to decorate your cards or use them in shakers an frankly, sometimes I just forget. I didn’t forget here and used a rainbow array of them to decorate with glossy accents to give this cupcake a realistic look PLUS no calories!
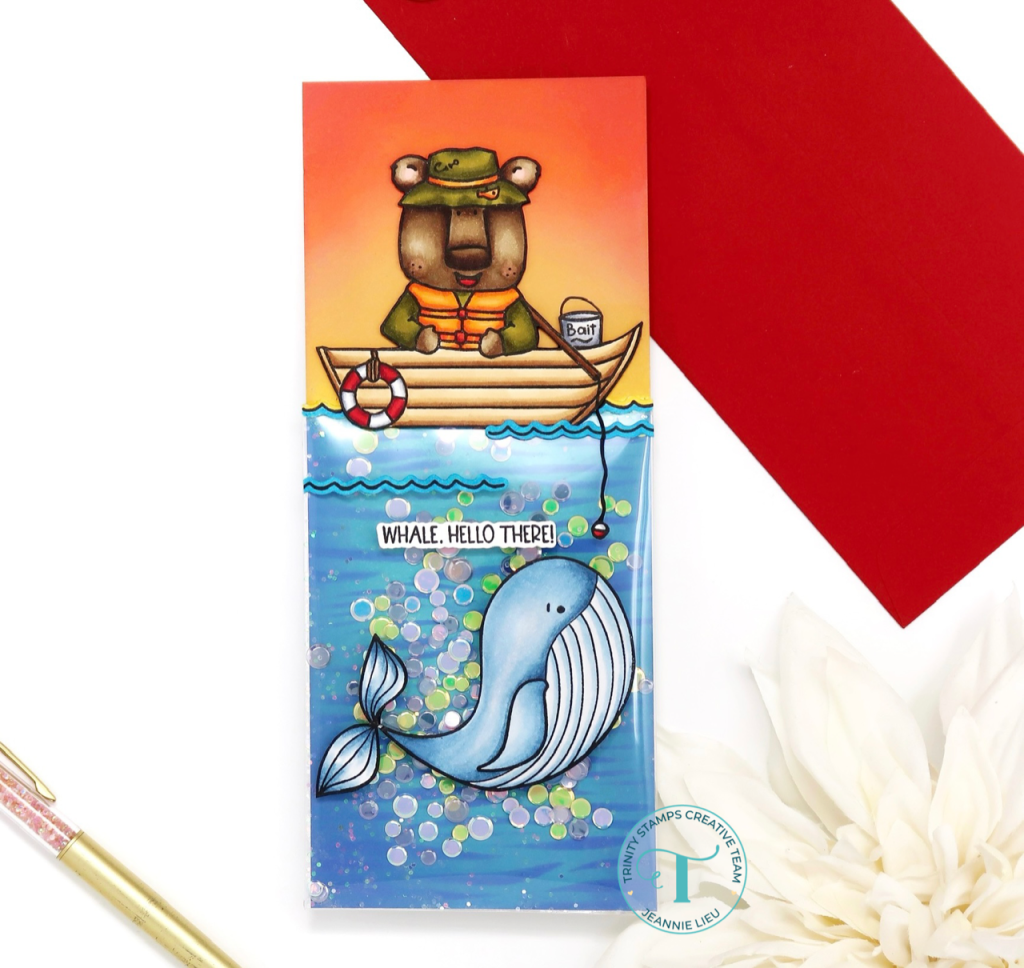
Happy Release Day! Trinity Stamps is celebrating 4 years with the Sweet Summer Celebration release and it’s packed with all things summer. I’m part of their celebration blog hop and YouTube Hop so be sure to hop along here and over on YouTube for tons of crafty inspiration using all the different products from the new release.
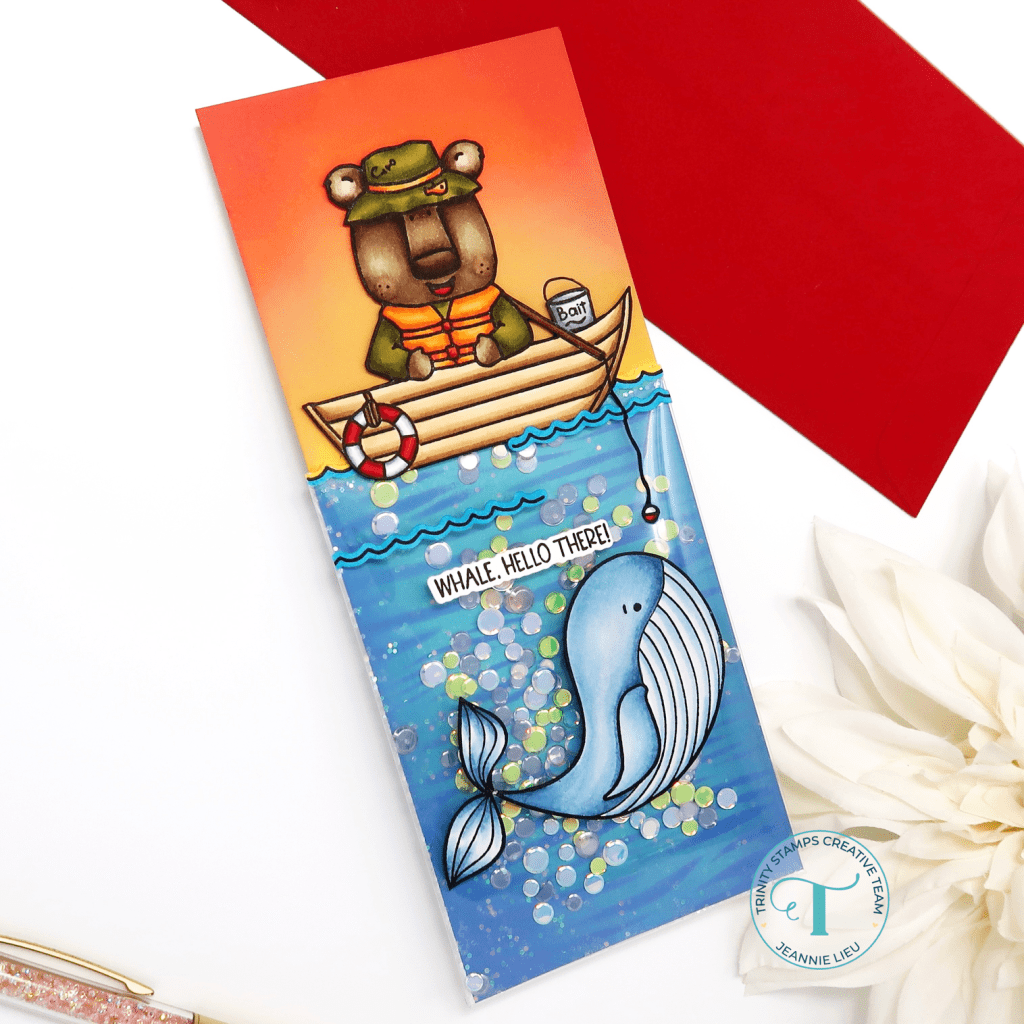
For my card today, I’m sharing a partial shaker card featuring the Cozy Bear Boater and Whale Done Stamp sets. I thought it would be so fun to pair these images together for a slimline scene card. To make it even more interesting, I thought it would be so fun to make it into a partial shaker card for the ocean portion of the card.
I stamped out the Cozy Bear Boater with a bit of masking and fussy cutting. He had a few more steps than the Whale from Whale Done since I just stamped it and cut it out. I ink blended my background and added some texture using the Layered Peninsula stencil for the ocean.
For the shaker part of this card, I use a piece of acetate to create an edgeless shaker around the edge and if you can’t see it in the photo, the top portion of my partial shaker is right underneath the water waters behind the boat. Check out the video for more details on this card!
Thanks for stopping by and remember to check out all the crafty inspiration shared throughout the blog hop!
I don’t always love masking but I like having background colors. This is an easy way to add that extra something behind your image. I ink blended first and then added depth with copic markers.
All my supplies for creating this card will be listed down below (with multiple sources when available) for your curiosity and convenience. Affiliate links used when possible.