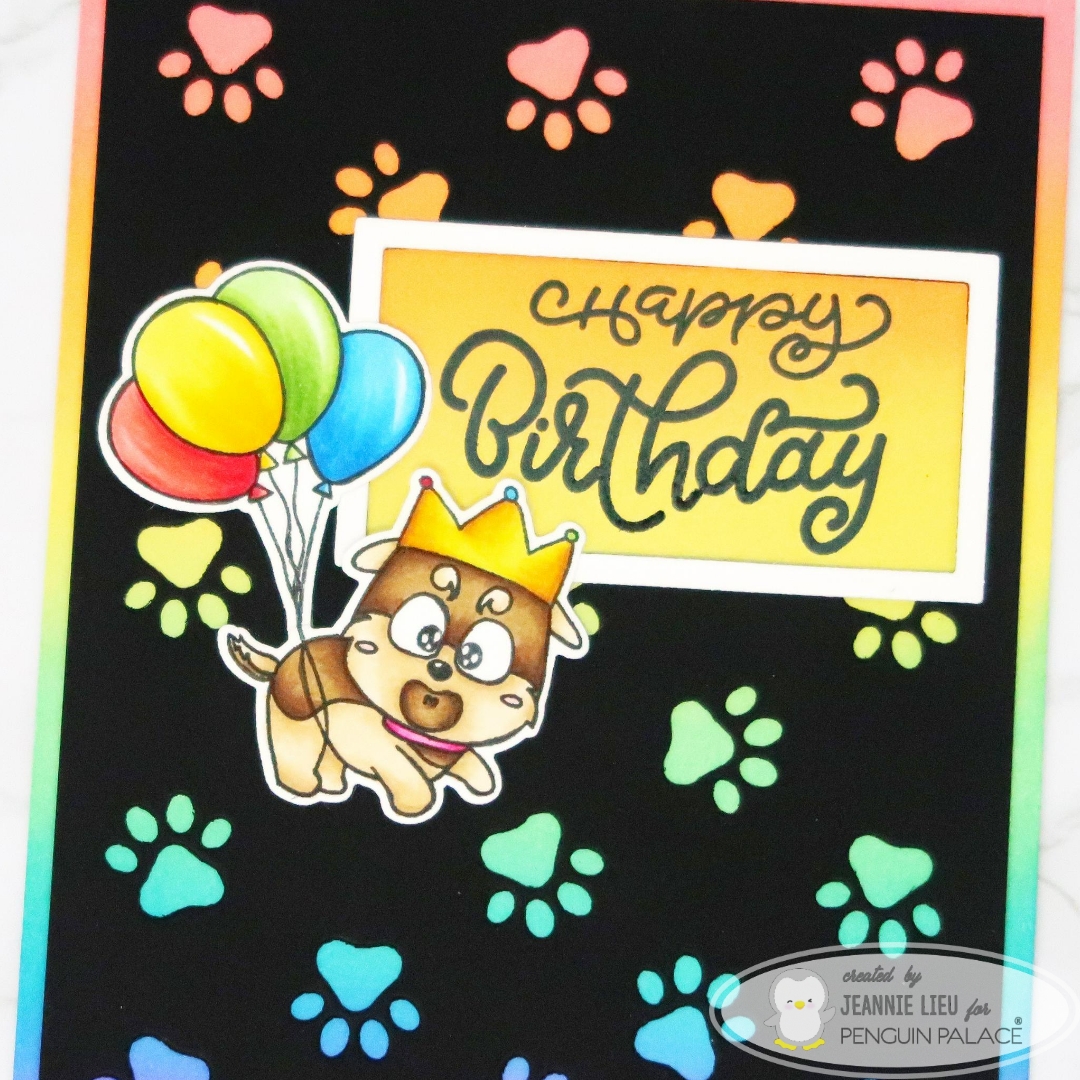
I used the Pawsome Background on black cardstock and because it’s black, the rainbow colors really popped through the die cut pattern. Since the pattern is very concentrated, I decided to also die cut a little rectangle to allow room for the sentiment. While doing so, I used two rectangle die cuts to create a little frame around the sentiment so it popped a little more. I stamped the Happy Birthday sentiment from the stamp set, My Best Pal. Additionally, I just had to add one of the doggie images to the card, so I chose the one with the balloons. I stamped and die cut it using the coordinating dies.
This worked perfectly to go with the sentiment and the background. I loved how this card turned out. It makes for such a wonderful and cherry look so I hope you enjoyed it too.
Thanks for stopping by! Come back again soon for some more inspiration and ideas!
→ SUPPLIES USED ← Items marked with an asterisk (*) were provided by a store or the manufacturer for review and use. All other items were personally purchased. Affiliate links may be used at no cost to you.
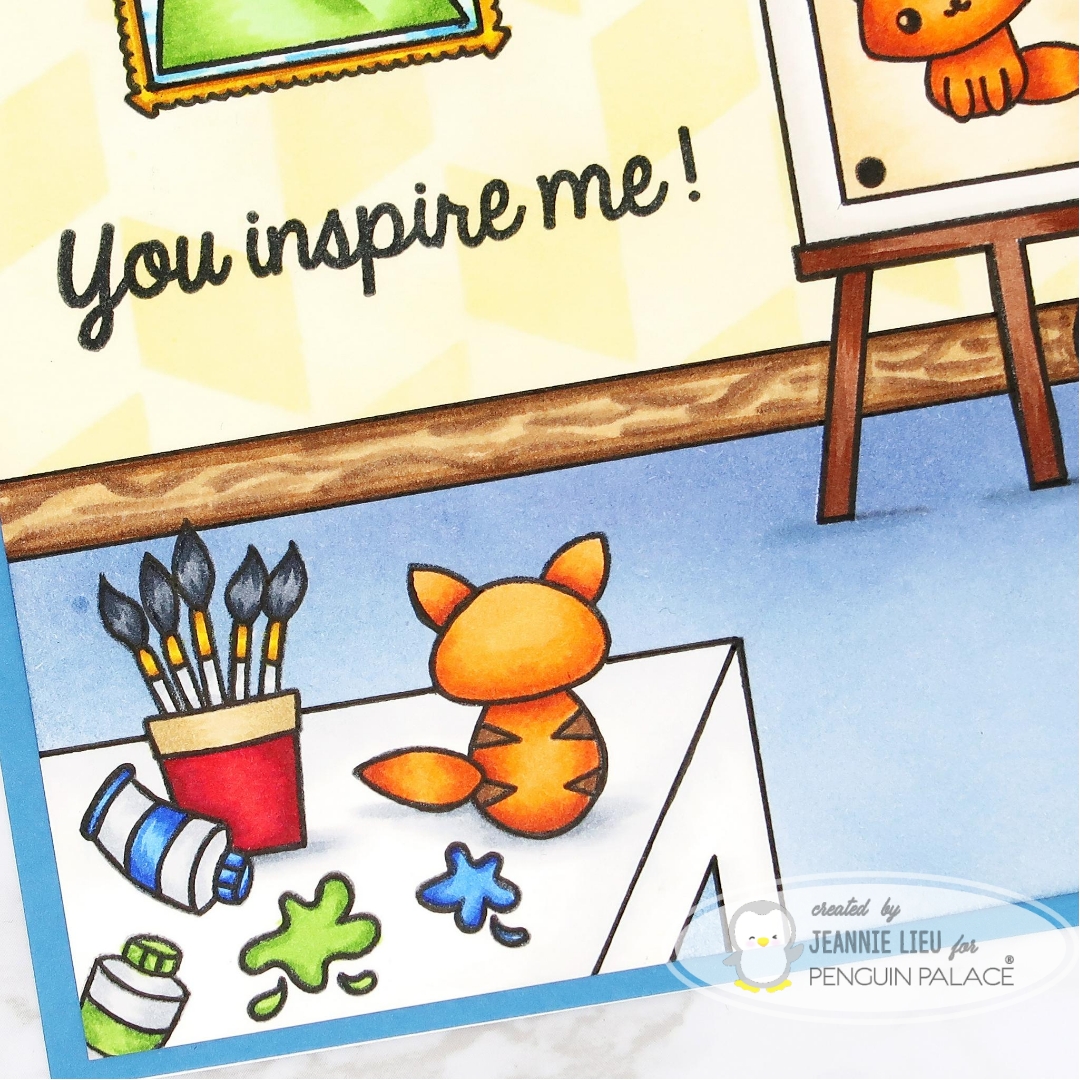
Hi everyone! It’s Jeannie (InsideoutJeans) on the blog today to share a card I created using the newly released Penguin Palace’s stamp set named, Let’s Get Crafty. This set definitely screams for a scene card and so I wanted to put one together.
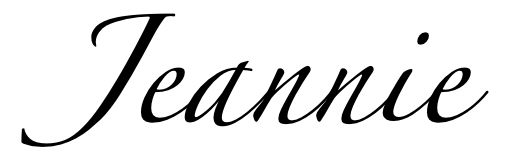
I needed to create a space for this little artist to paint his painting so I set him up in a studio. Before I stamped out my final product, I actually stamped everything on a scrap piece of paper to see how the scene would look. This helped me figure out which masks I needed to stamp and cut out. There actually wasn’t too much and it was mainly on the table. However, I didn’t want to color the entire background using alcohol markers so I had to create masks for everything so I could use distress inks to help me color the background.
The desk scene was really cute because the set included the back of the little kitty the artist was drawing. The table was something that I had to draw in but if you looked at it closely, it’s just a few lines.
The scene itself is really cute and once I added the portrait, the only place to add a sentiment was right below and I think it was perfect.
I just loved how it turned out and I really adore this stamp set. It’s pretty versatile.
Hi everyone! It’s Pink & Main‘s 5th birthday and it’s definitely worth celebrating with a blog hop. There will be FIVE random winners chosen from the comments left on our blogs. The winners will each win a $50 store credit. You will have to comment on all blog stops for a chance to win! Hop around and be inspired!
Today I’m using some new release items which center around this birthday celebration!
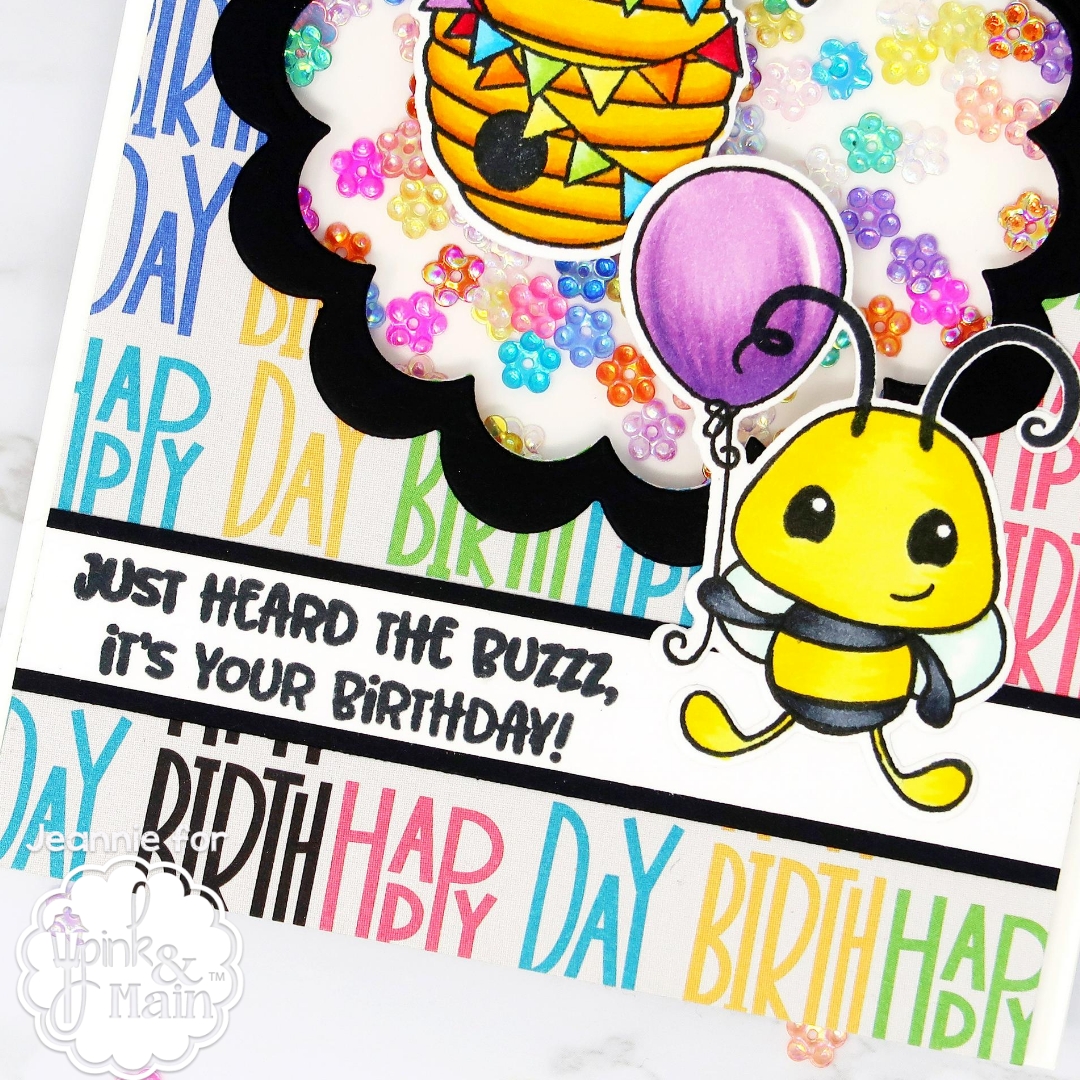
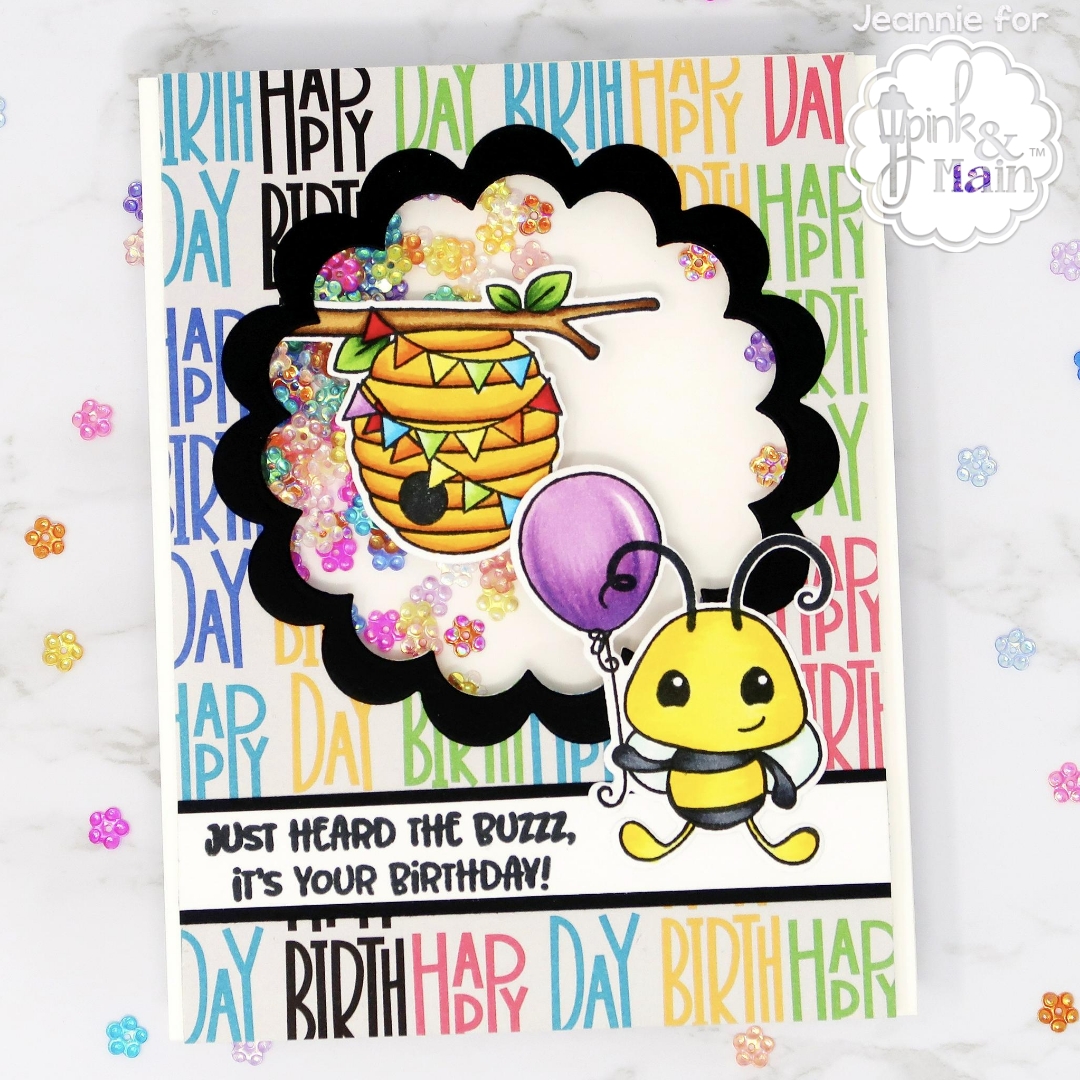
I am loving the new paper pad, It’s A Party; there are so many fun, celebratory designs. I was drawn to the Happy Birthday sentiment all over as patterned paper and wanted to use it. It’s a little busy but I just didn’t care because I just HAD to use it.
I wanted to use the hive and one of the cute bees from the Bee Day stamp set so I stamped and cut these using the coordinating dies. I didn’t need anything else since these images were a good size for my A2 card panel.
If it wasn’t busy enough, I still wanted to add another fun element to this card. I used one of the Scallop Circle dies to create a shaker window, lining it with acetate. I added the hive right on top of the cutout and added the bee at the lower bottom right. Even though the card was covered in the background sentiment, I wanted to use one of the sentiments from the set. I stamped it on a piece of white cardstock and matted it on black. The black breaks up the background and pulls your focus to the words.
For the shaker bits, I generously used the new Flower sequins. I love the mix of colors and it matched with the patterned paper. I used two layers of foam tape and it allowed the sequins to move around freely.
After the card was put together, I decided that I needed to add a border around the shaker to break up the background and pull your focus to the middle of the card as well. Everything was a bit busy so I used the same technique for the sentiment and cut out a scallop border using black cardstock and two of the scallop circle dies. This worked really well and it really finished off the card.
Thanks for stopping by and celebrating along with us! See you next time!
→ SUPPLIES USED ← Items marked with an asterisk (*) were provided by a store or the manufacturer for review and use. All other items were personally purchased. Affiliate links may be used at no cost to you. STAMP SET(S): *Bee Day DIES: *Bee Day INK: Memento Tuxedo Black ink MISCELLANEOUS: *It’s A Party paper pad, *Flower Sequin mix
Hi everyone! My name is Jeannie and I’m soooo excited to join the Trinity team! I’m here to share my first card with you on their blog today. I hope you love it as much as I do and I hope I can inspire you to pull out your sets to use them as well!
Personally, I love when a bunch of sets can be combined together because you are able to mix and match to create a ton of different types of cards. For today’s card, I couldn’t help myself and used four different sets to create a fun scene card.
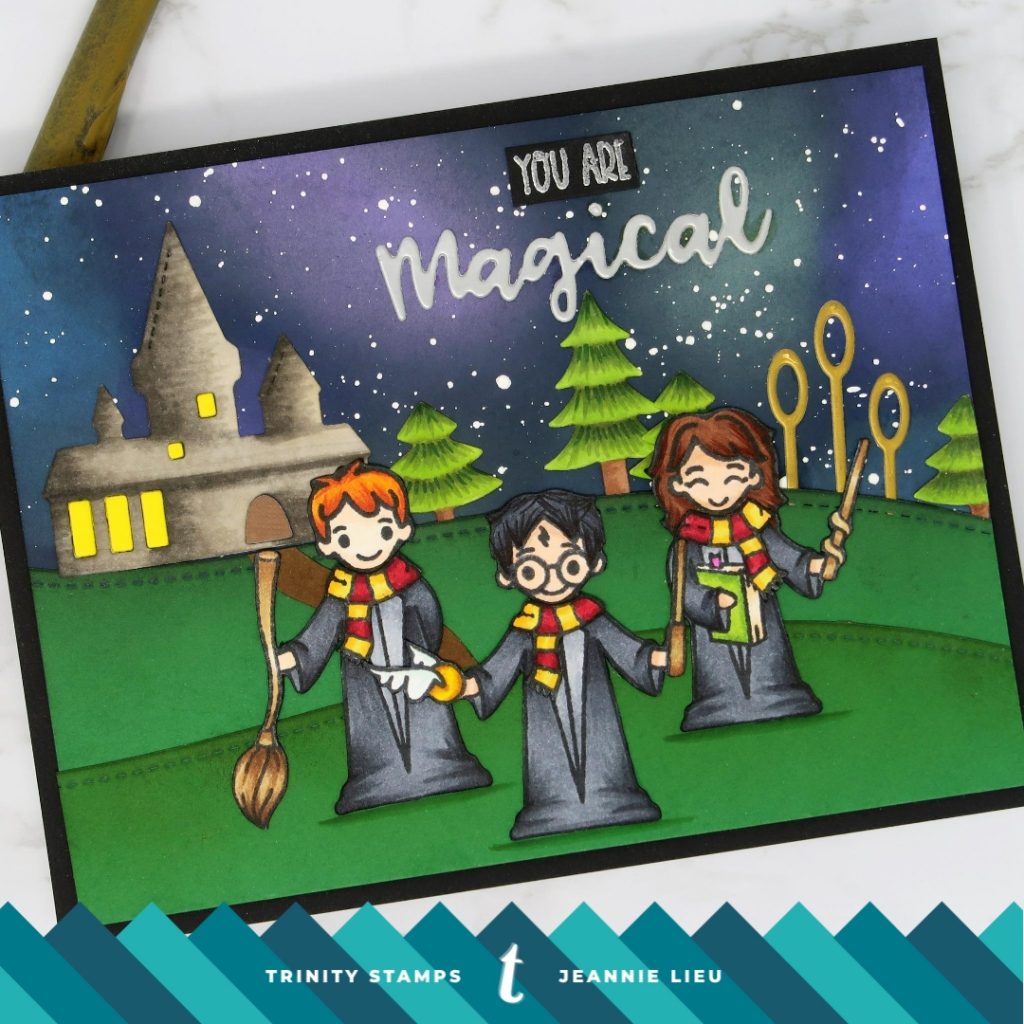
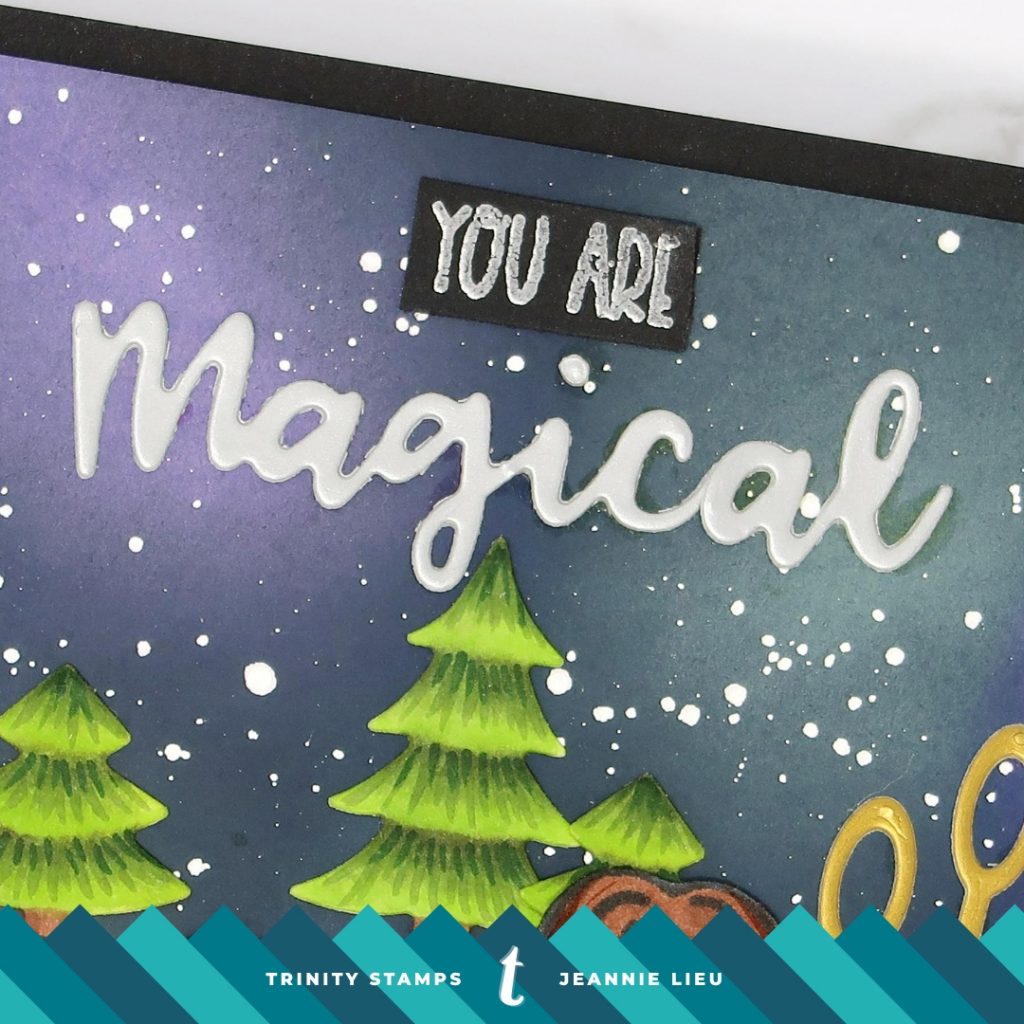
For my background, I used a piece of dark blue cardstock along with three random distress oxides inks to create a galaxy background. You just put splotches of color all over the cardstock and darken up the edges with black. It always looks like such a mess but once you add white splatters (I use Copic Opaque White Ink), everything comes together. Trust me!
Next, I pulled out the Castle Scene Builder Die Set to use for my card. I love this set for the small details in this set and all the pieces can create a great scene. For the die pieces, specifically the castle and trees, I decided to color them up to add details and texture. I used the landscape die to cut out two pieces to create two hills. This comes together to create a gorgeous scene to go along with the galaxy background.
For the magical wizards, I used two sets: Magical Wizards and Wizard Friends. I wanted to dress the trio in robes with the scarves. It took a bit of masking but I just love this set for all the little accessories and details. You can mix and match to create fun outfit changes! I originally didn’t add the scarves, but this is easily fix because I stamped them out, cut them out, and added them right on top.
After I finished coloring them up using alcohol markers, I put this scene together quickly. I just love how the Castle Scene Builder Die Set created such a magical scene!
To finish off the card, I die cut the “Magical” sentiment, from the Magical Sentiments set that has coordinating dies, out of silver cardstock. For the text, I chose “You Are” from the stamp set and heat embossed it using silver embossing powder on black cardstock. I kept it as simple as possible since there was so much happening but I’m loving how this turned out.
I’ll definitely be pulling them out again to share more of my ideas with you!
Thanks for stopping by and I hope you enjoyed this card.
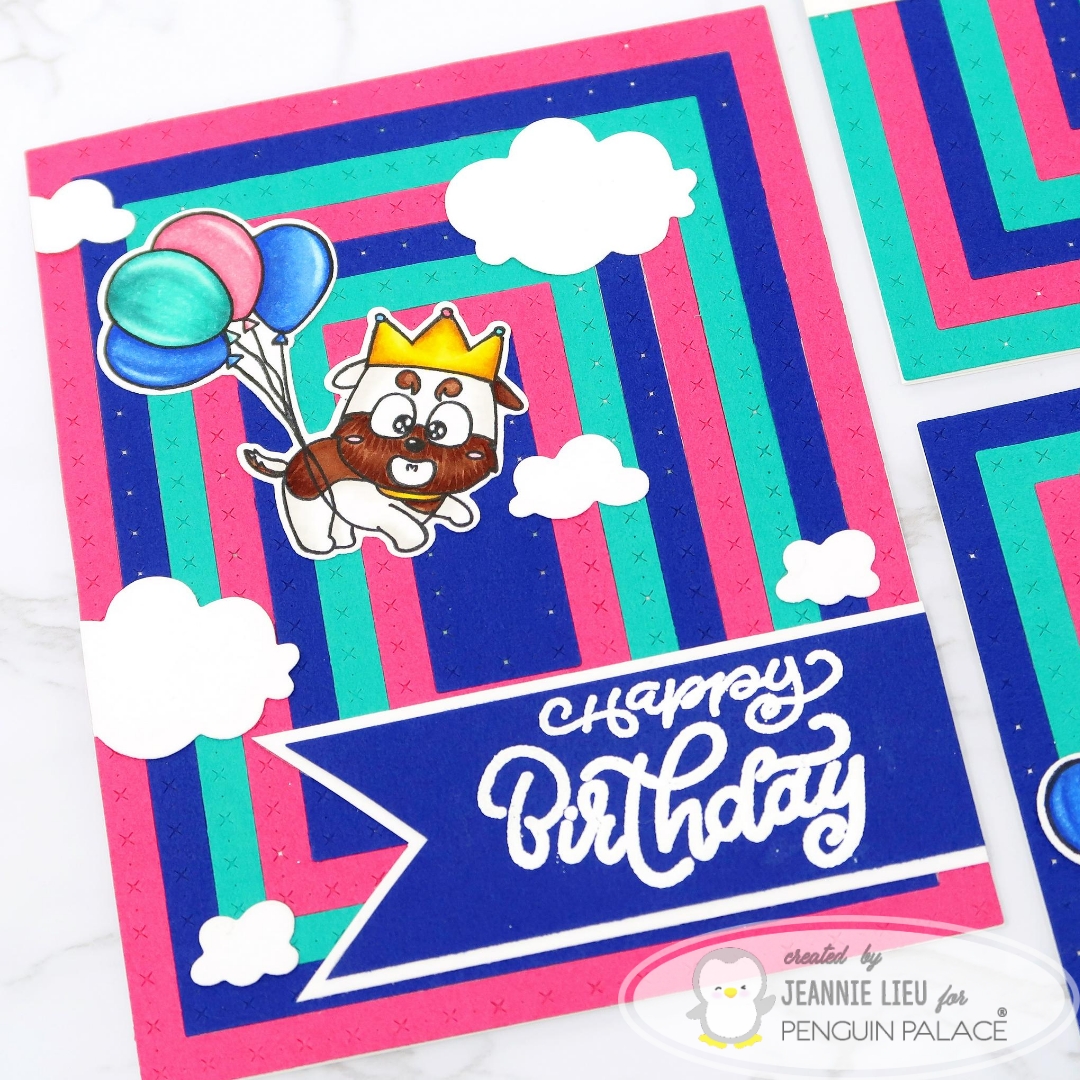
Using three different colors of paper, I ran all the die cuts through together. This actually helped me create three different backgrounds. The colors I used are: Precious Gem, Princess Decor, and Navy Seal. These papers are lightweight. For sure, I wouldn’t define them as cardstock. They actually feel like tissue paper but definitely don’t tear as easily.
I combined the three sets in alternating colors and created three backgrounds. Since I have three cards to decorate, I kept everything really simple.
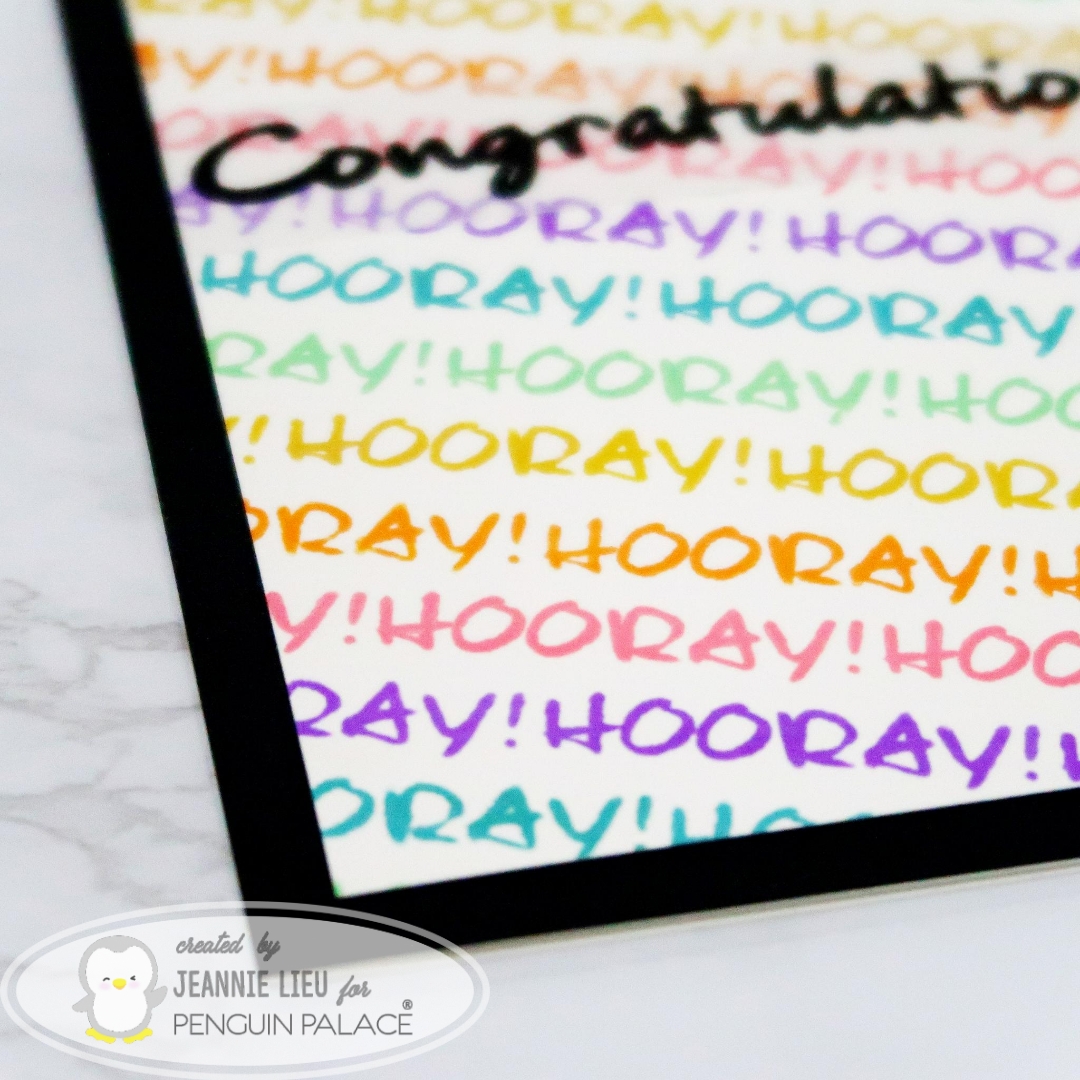
For the first one, I used the Congratulations sentiment from the Congratulations stamp set. I stamped it and heat embossed on vellum, backing it on white cardstock and place it right over the background.
The second, I used the dog with balloons images from My Best Pal along withe the Happy Birthday sentiment. For the sentiment, I heat embossed it on the Navy Seal paper and cut it into a banner. I added some white clouds to the card to give it a little more white space.
The third card, I used both the Birthday Unicorn stamp and die set. I stamped the Happy Birthday sentiment directly on the background, masking off a portion of it. For the rest of the card, I wanted to fill up the space so I used two of the unicorns from the set and die cut a bunch of confetti.
I always love when I can create multiple cards from one project and this came together pretty quickly.
Thanks for stopping by and I hope you enjoyed the sneak peeks. Come back again soon for some more inspiration and ideas!
Hi everyone! I’m back today with with a sneak peek for Penguin Palace’s new release stamp set that contains essential sentiments Congratulations.
This is one of those essential stamp sets that you can pair with many images, but I wanted to focus on what you can do with just this set alone. It’s super easy!
I chose a rainbow variety of distress oxide inks and stamped “Hooray” diagonally across. I definitely do not stamp straight without help and I actually just use a pencil to mark off lines in advance so I know where to stamp. Once the ink dries, you can easily erase it. It makes for such a pretty background.
To finish off the card, I stamped the large “Congratulations” on vellum using Versafine ink and heat embossed using clear embossing powder. I ran this through my Xyron sticker marker and trimmed it down. This puts adhesive to the back of the vellum and you won’t notice it. The vellum softens the background so your focus is to the sentiment.
Thanks for stopping by and I hope you enjoyed the sneak peeks. Come back again soon for some more inspiration and ideas!
In this set, there’s a variety of images but I focused on two of the characters and two accessory items. I wanted to create a small storyline of someone enjoying a glamorous day.
I stamped out the images I wanted to use on rectangles and I masked them off so I could use distress oxide inks to color up the background. I added both water and silver paint splatter to them for a bit more interest.
After coloring up the images, I lined the rectangle edges with a black pen creating a frame. I really loved how these came out. I wanted them to be the main focus but needed to add the sentiment for the card. I chose a piece of Smokey Eyes card stock and it has this really fine, pretty sandstone texture to it. It was a bit hard to picture, but you can notice it in the picture above. If you haven’t tried the cardstock from the store, I highly recommend it. I am really enjoying the subtle texture on the card stock that provides a little interest in the background but not deterring away from your main focus of the card.
I stamped the sentiments directly on the card stock, having no issues even with the texture and trimmed the card panel so I could mat it on black cardstock. I wanted to tie the black color back to the lined rectangles.
That’s it for today’s card. I really like the colors that pop against the neutral grey and I hope you enjoyed it too!
Thanks for stopping by and I hope you enjoyed the sneak peeks. Come back again soon for some more inspiration and ideas!
→ SUPPLIES USED ← Items marked with an asterisk (*) were provided by a store or the manufacturer for review and use. All other items were personally purchased. Affiliate links may be used at no cost to you. STAMP SET(S): *It’s Your Day INK: Distress Oxide Ink – Squeezed Lemonade, Picked Raspberries, Wilted Violet , Versafine Ink COLORING:
Hello everyone! Here is a sneak peek for Penguin Palace’s new release with the awesome stamp set named, My Best Pal. This is releasing March 20th, so get ready!
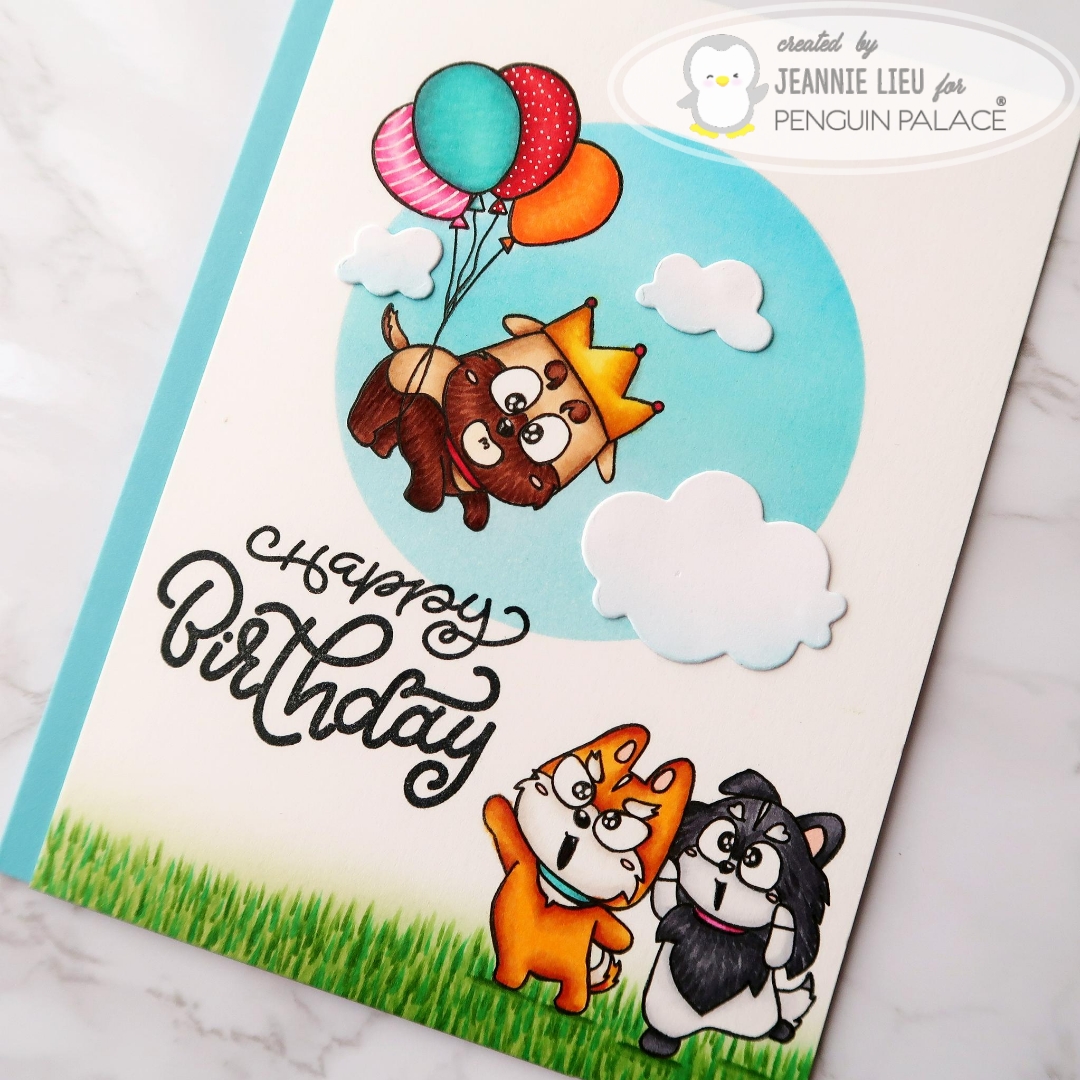
I love the three doggies in this stamp set so I wanted to use all three of them. I didn’t want to create a full scene yet still have one. Sounds weird right?
To start off, I stamped out the two doggies in the set looking up. I masked one of them so it looked like one was standing behind the other.
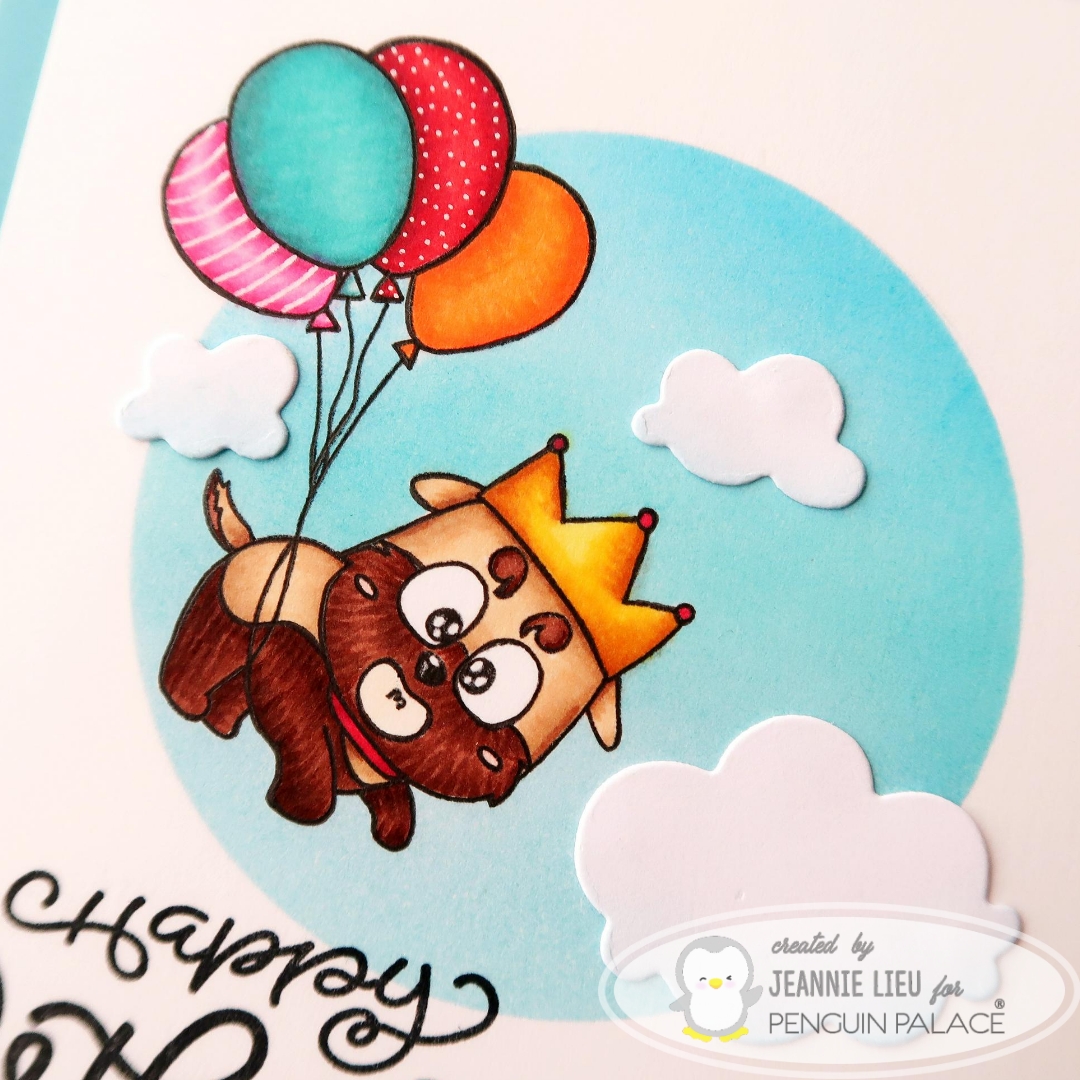
Next, I stamped and masked the doggie with balloons on the top portion of the card. Using masking paper, I masked a circular area where the dog will be. With distress inks, I blended a few colors to create a nice background.
Using a few cloud die cuts, I added them to the circular area to add interest.
For the rest of the card, I just colored in the doggies and added some grass to the bottom. I trimmed the entire panel on the side by a quarter of an inch and mounted this one a blue card base.
Aren’t they all super cute? I can’t wait for you to see the rest of the items releasing!
Thanks for stopping by and I hope you enjoyed the sneak peeks. Come back again soon for some more inspiration and ideas!
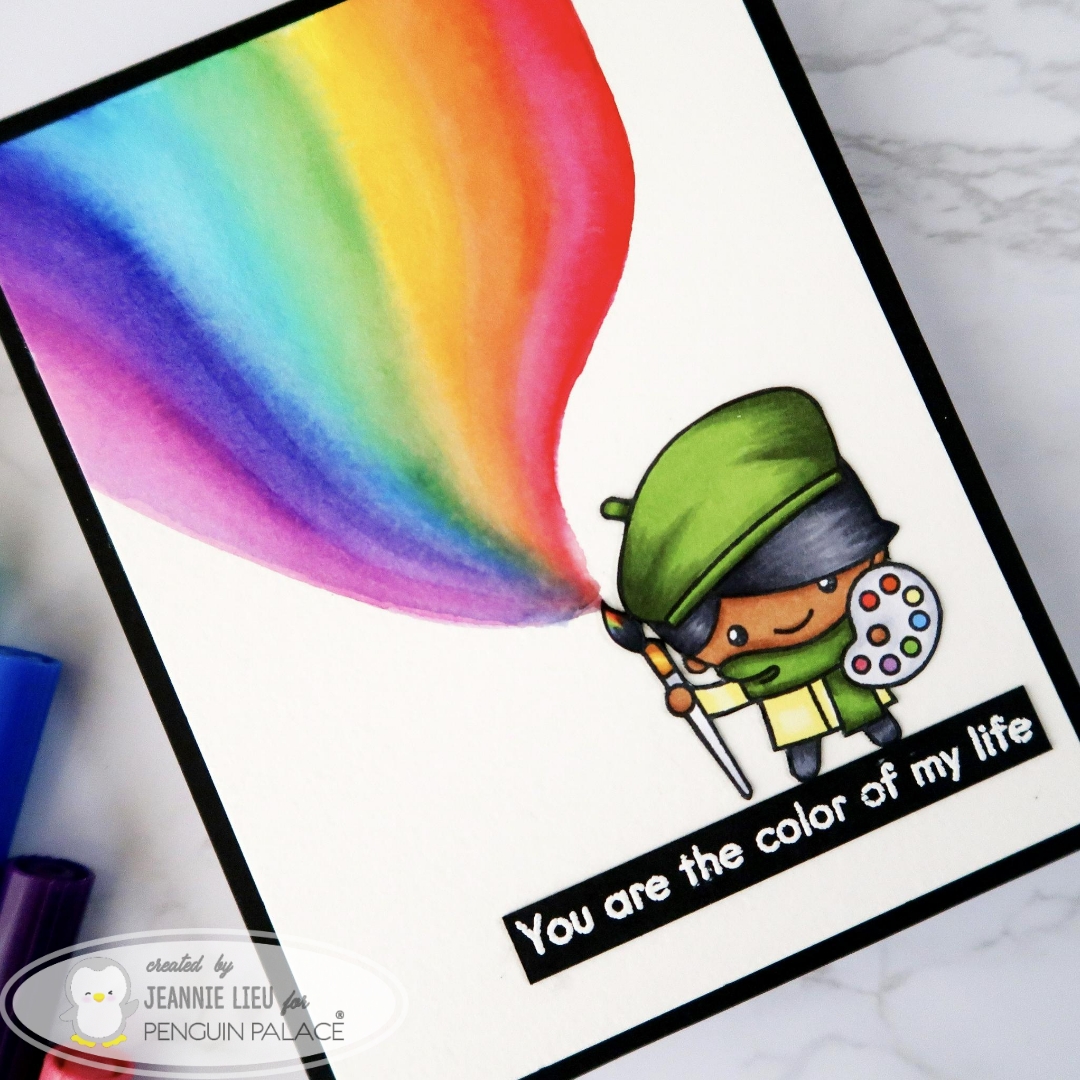
Hi everyone! I’m here to share a sneak peek for Penguin Palace’s new release with the awesome stamp set named, Let’s Get Crafty. If you love crafty and artsy stamp sets, this is perfect for you! This is releasing March 20.
I love the main image in this set and wanted to focus on that today. Since this set revolves around being crafty and color, I definitely wanted to include rainbow colors in this. This crafter’s main tool is a paint brush and I wanted the colors to come out it! For this card, I stamped and fussy cut this image out since I am using watercolor, I didn’t want to have to mask off the image.
For this card panel, I used Tombow markers to create this rainbow by drawing lines of color. To blend this out, I used a waterbrush. Of course, it won’t blend perfectly but art and creativity is not meant to be perfect.
I really like how this card turned out and I’m loving how the rainbow colors pop and really pull this card together. I also created a video so you can check out the full process from start to finish. Check it out!
Thanks for stopping by and I hope you enjoyed the sneak peek. Come back tomorrow to see another sneak peek of a new stamp set. Can’t wait to show you what’s coming up!
Hi everyone! I’ve always been a planner, a list maker, and a person who likes to check things off. After spending last weekend at Plannercon, I’ve been re-inspired to play more in my planners. Yes, plural! However, I also wanted to incorporate it with my cardmaking. There’s a very distinct line between planners and cardmakers but lately, the lines are getting more blurred and I like it.
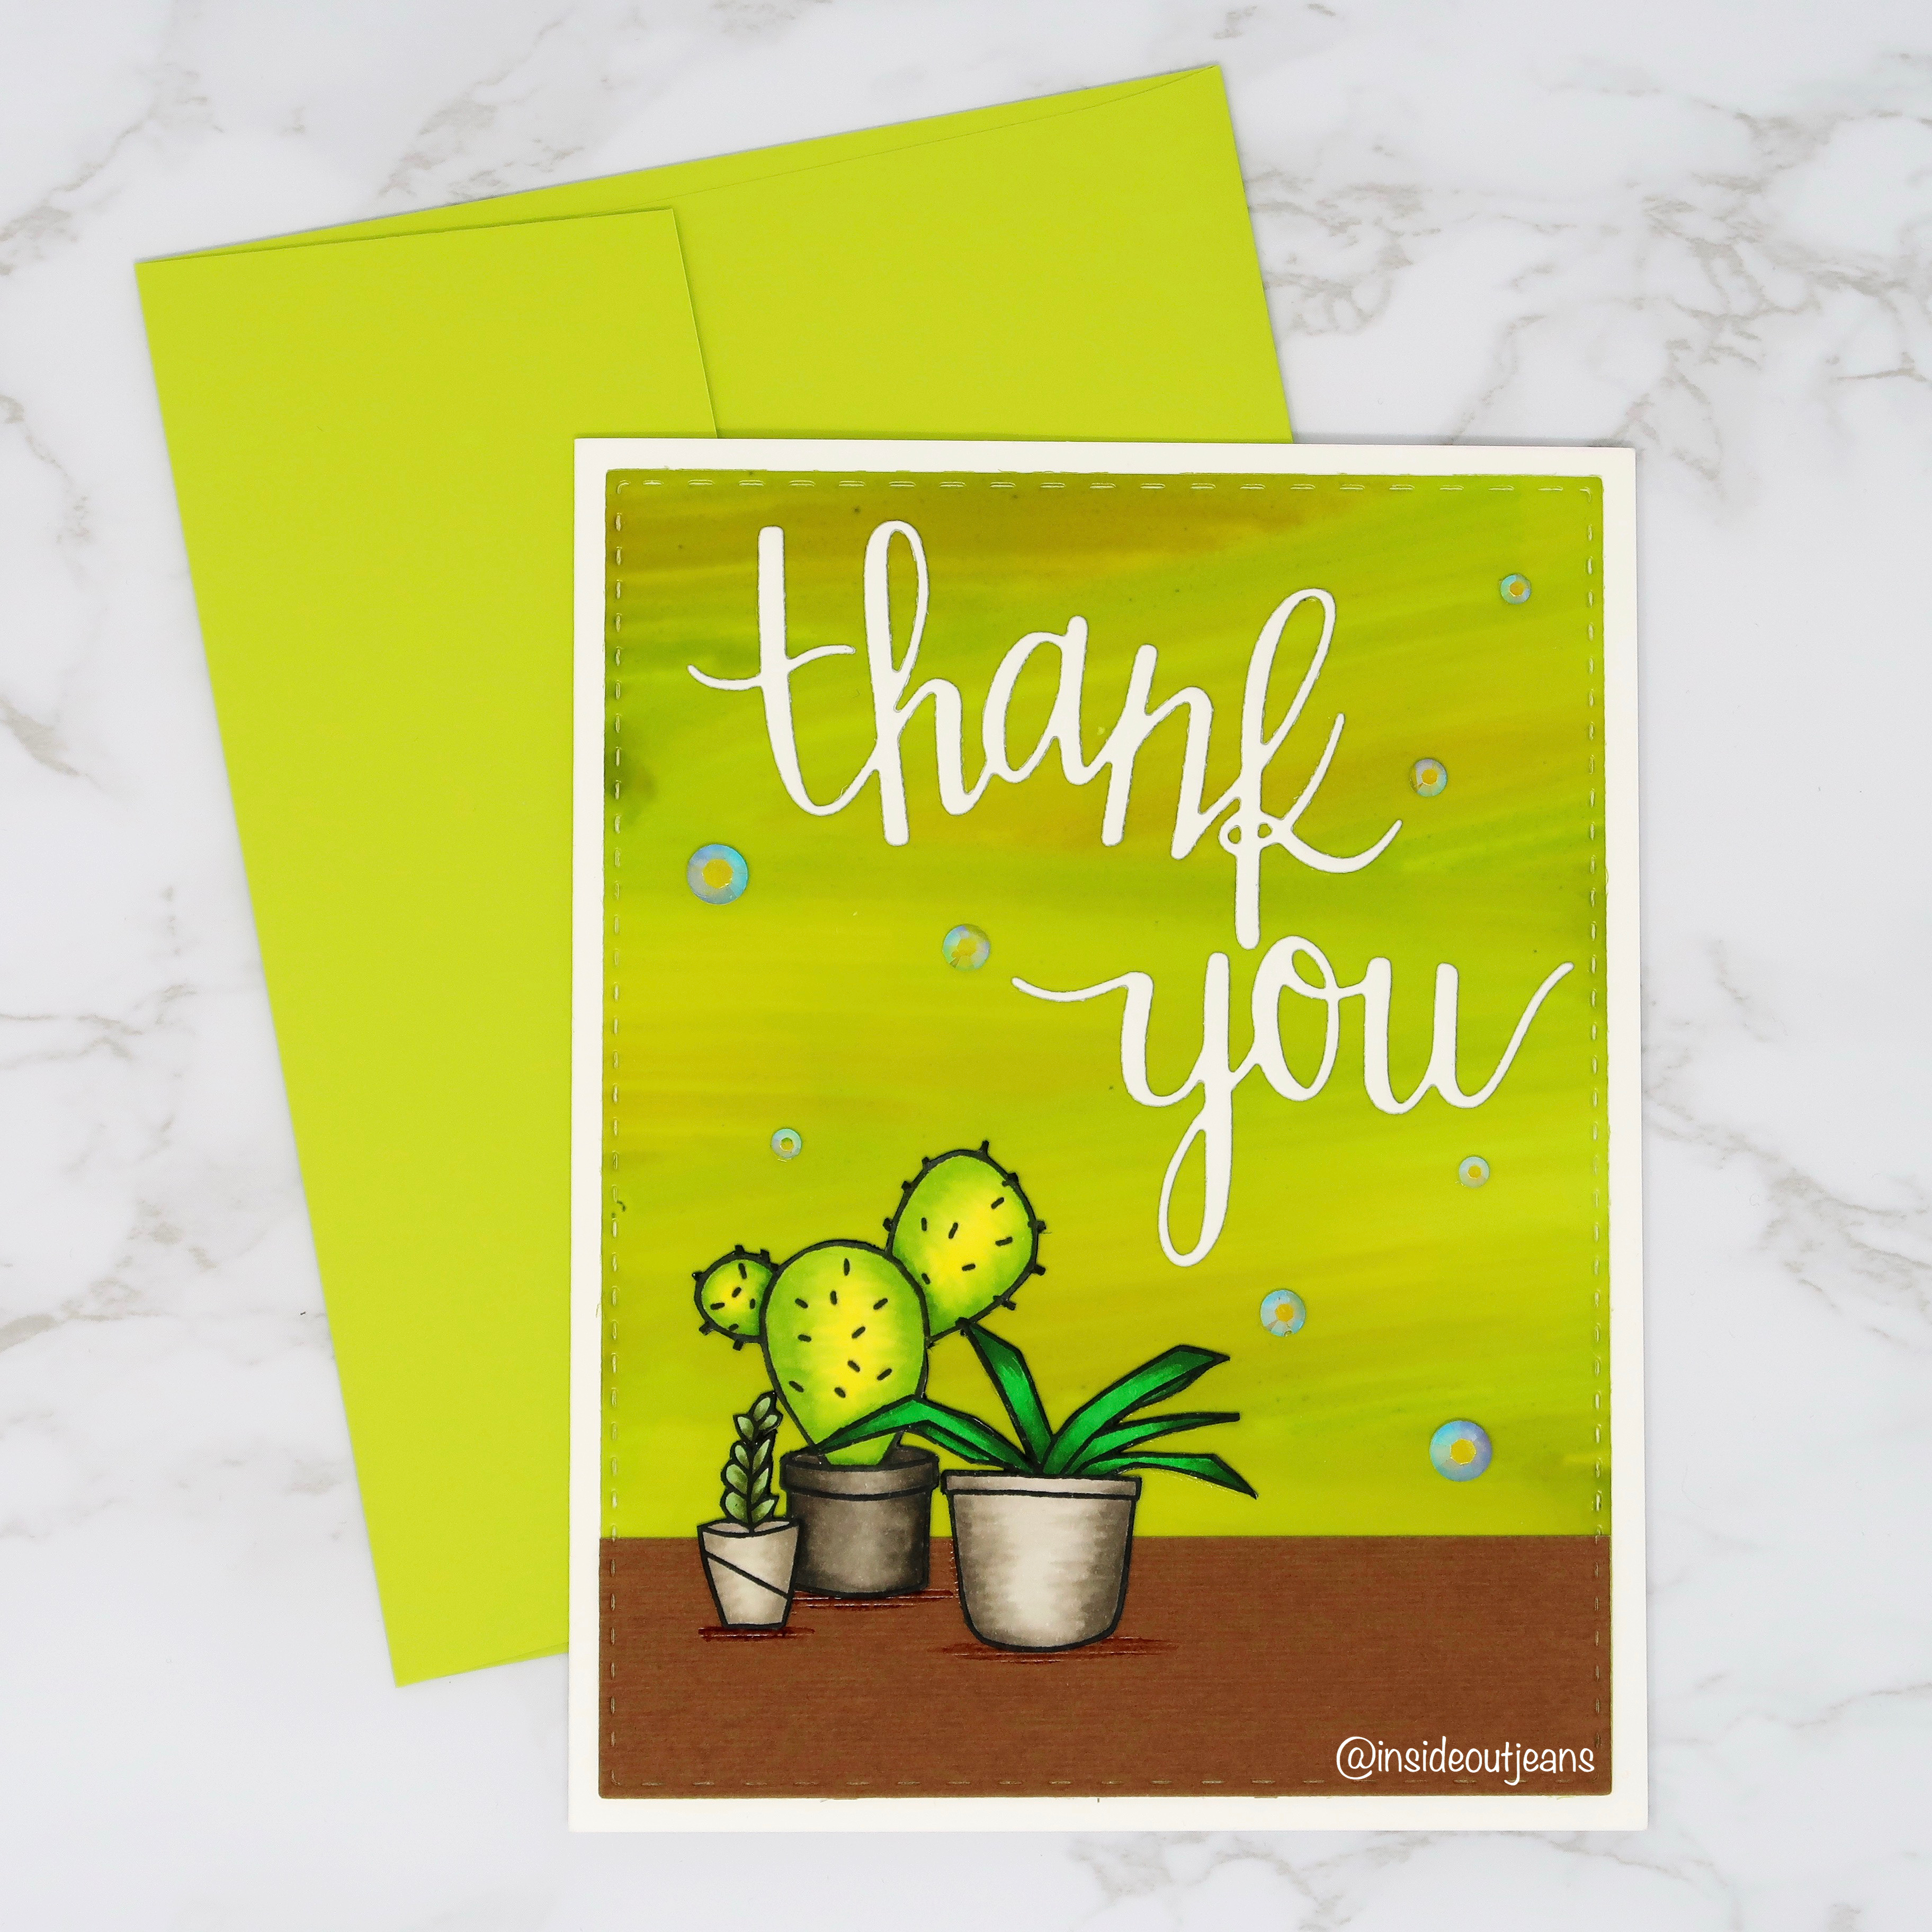
I usually lean towards a simple, clean and minimalistic planner style. When I came across InkByJeng, I found a company that reflected my style but the functional planner stamps can’t easily be incorporated into cardmaking. I was delighted to see that she has some stamp set illustrations that work well for both planners and cardmaking. I picked up the stamp set, Plants.
For my planner layout, I wanted to create windows and shelves for these Plants to sit on. Using the Rows & Columns Stencil from her shop, it made it super easy to plan out this layout. I love coloring with alcohol markers, but it would bleed through the pages, so I stamped all these images on a sheet of Avery Full Sheet Adhesive Label. This creates them into stickers and I can add them to my page where I see fit. I also used the Mama Elephant Sticky Notes sticky note for my main calendar and a cute sticker from Happy Planner for a quote. For the shelves, I just quickly used my Prismacolor colored pencils to color it in while giving it a woodgrain texture.
For the card portion, I found a background I created awhile back while playing with alcohol inks and it was just perfect to go along with the Plants. I colored everything the same way. I used Pink & Main Stitched Rectangles 2 for the yupo background so it can be matted on a white card base. I used the Thank You die from a pretty old Hero Arts My Monthly Hero set. I added brown cardstock to the bottom of the card, making it look like a table for the plants to sit on. To finish off the card, I added some Studio Katia Iridescent Crystals.
I really enjoyed this idea of showing the multiple uses of a stamp set, whether you do it in your planner or in a card. I hope you enjoyed it too and I hope to share more posts like this in the future.
Thank you for joining us on our LDRS Creativeinspiration week blog hop! We are so excited to feature what was showcased at Creativation in January! There are lots of gorgeous projects using products from our new release. You can even see them in action with step-by-step projects by our amazing designers on their blogs and our own LDRS Creative Youtube channel(make sure you subscribe)!
Who’s ready for mini hybrid inks? We are adding the latest two sets of our very popular Hybrid inks in a mini version, perfect for ink blending, stenciling, stamping, colouring and embossing: At The Beach and On The Farm!
Next, we have two new 6″x6″ stencils that are sure to be as popular as the others: Playful Patterns and the Waffle!
Each day we are giving away a $25 LDRS Creative gift card to one lucky hopper! To enter leave a comment on each blog in the hop, plus follow us on Facebook and Instagram. Winners will be announced on the LDRS Creative inspiration blog on March 5th.
AND for the release event we are excited to offer some great savings! Save 15% on the new release*, including already discounted bundles and use code FEB15 (*Coupon valid until midnight EST 3/6/18)
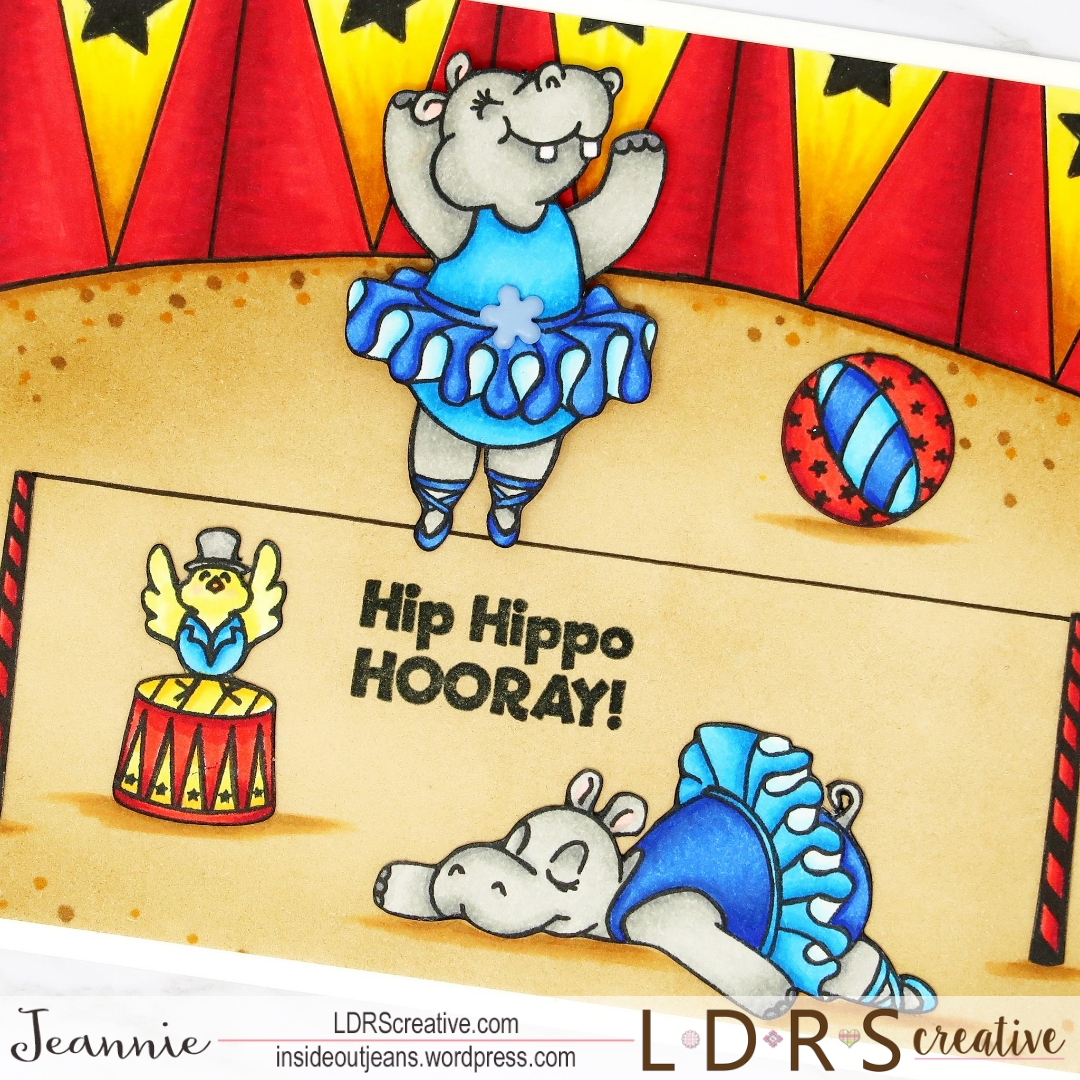
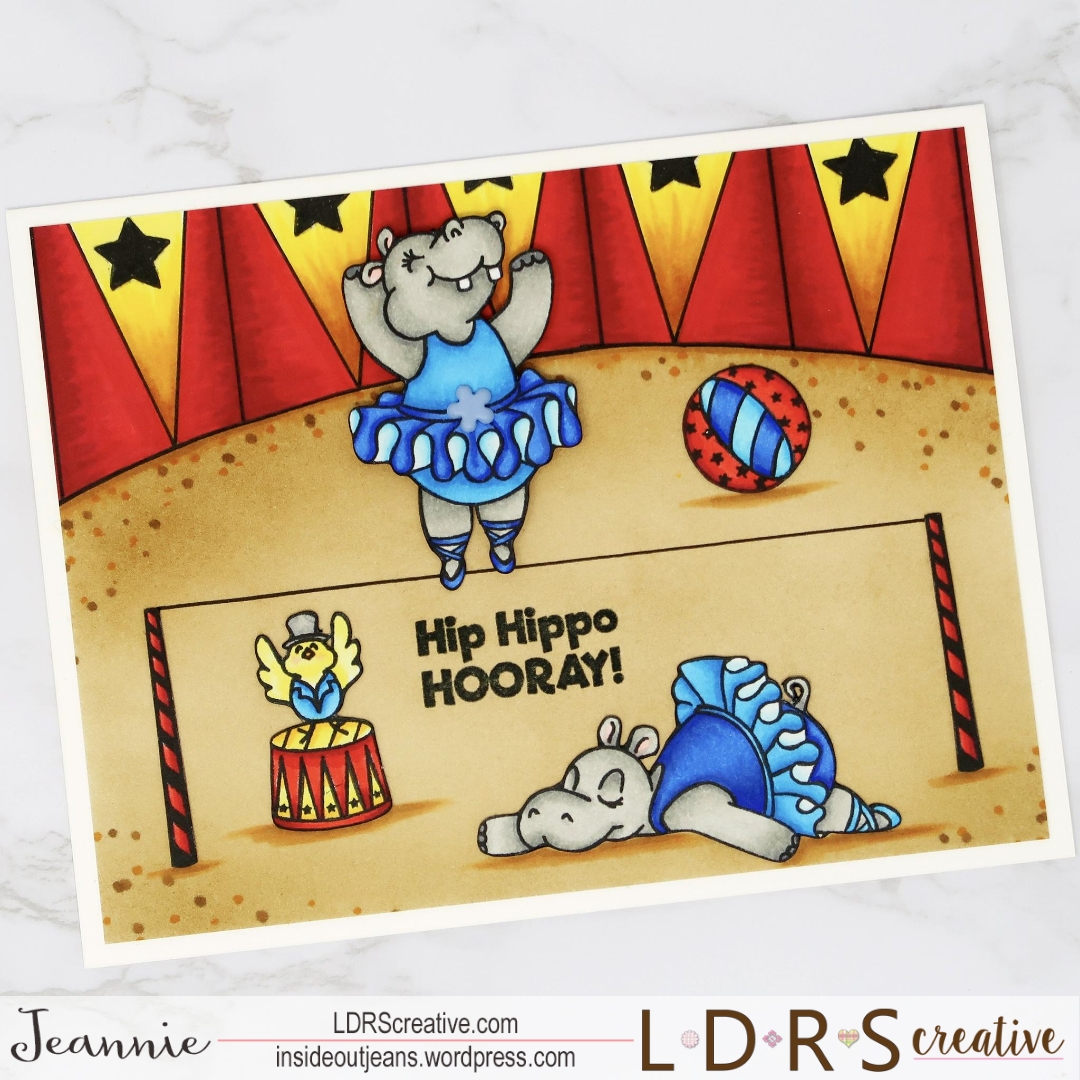
Hi everyone! Thanks for checking out Day 3 of the blog hop for LDRS Creative. I’m sharing a card using one of the sets showcased at Creativation, Hippo Hooray. Similar to Day 1, this set has an interactive image that moves with a brad.
For today’s card, I used a variety of the images. I stamped them out using Raven ink, colored them with alcohol markers, and fussy cut them out. This set doesn’t come with coordinating die because of the nature of the interactive element… It would look odd with the white border a die leaves.
I wanted to create a simple scene for this since I’m using a few images. I just drew in the stage area and used Stamping Mask paper so I could use distress inks to color it quickly. For the stands, I drew in a simple pattern mirroring the stand the little bird is standing on. I also stamped the little star that is in the set to give it a little more decoration.
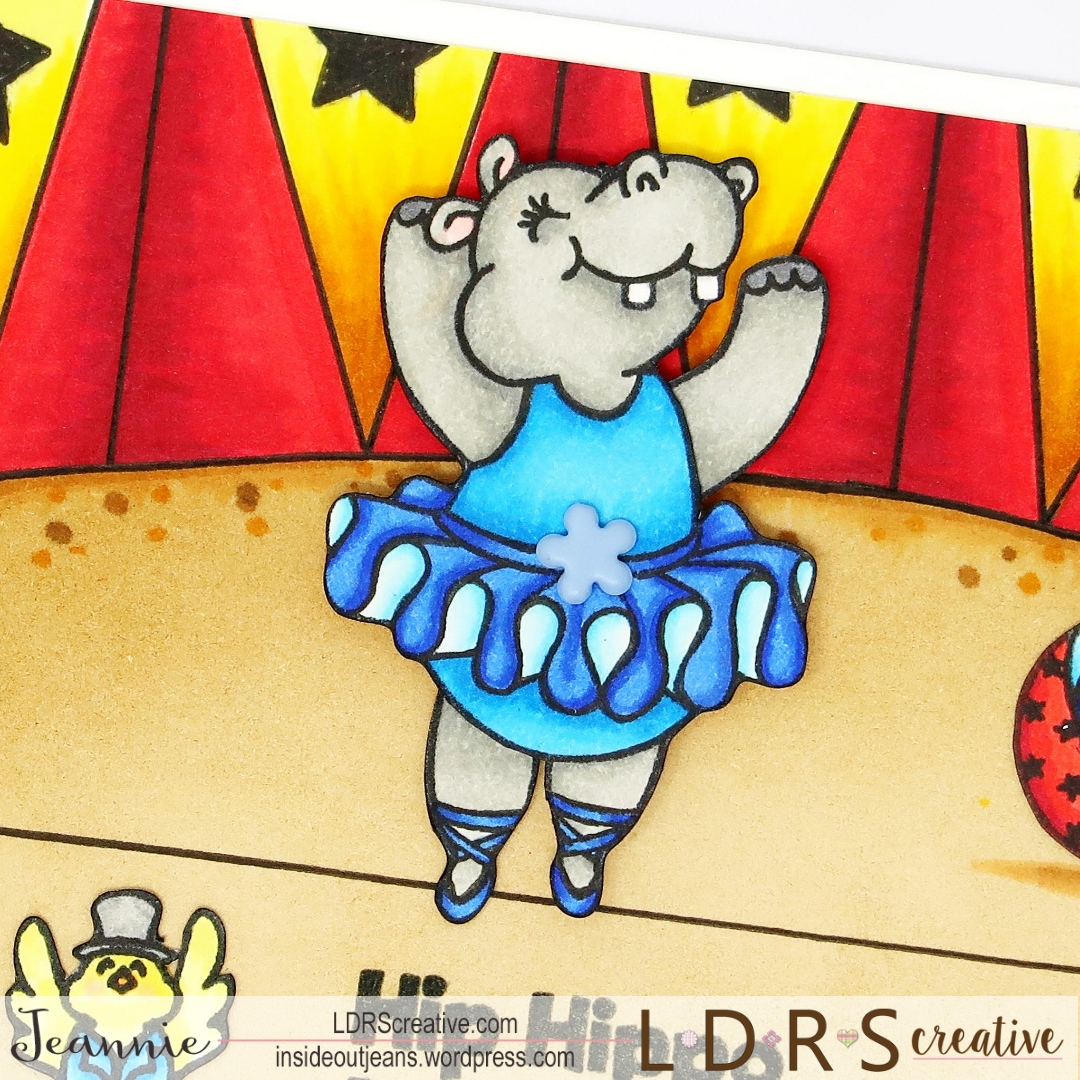
After the background is colored in, I play with the images deciding where they should go. I want to fit everyone in so I add the dancing hippo to a tightrope.
For the hippo, I trim off the left arm and right leg replacing it with the full arm/leg image included in the set. I picked out a blue flower brad so it looks like she’s wearing a little belt with a flower buckle.
To finish off this card, I stamped the Hip Hippo Hooray sentiment in the middle of the card. Additionally, I trimmed the card panel by a quarter of an inch so it would have a white border around the panel.
This dancing hippo is adorable, don’t you think? If you want a visual of how it works, check out my instagram for a short clip. Thanks for stopping by for this LDRS Creative blog hop! Hope you’ve enjoyed all the inspiration.