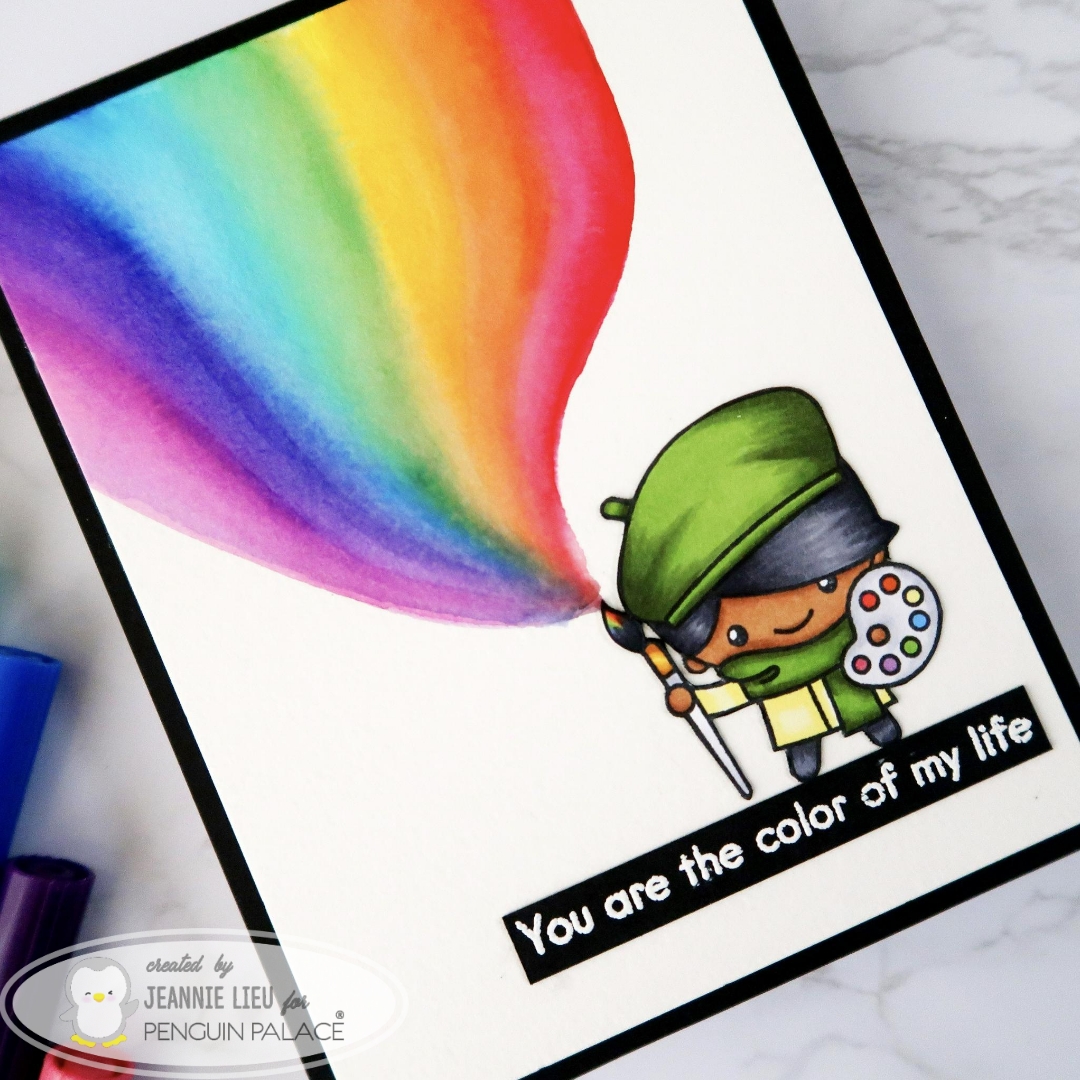
Hi everyone! I’m here to share a sneak peek for Penguin Palace’s new release with the awesome stamp set named, Let’s Get Crafty. If you love crafty and artsy stamp sets, this is perfect for you! This is releasing March 20.
I love the main image in this set and wanted to focus on that today. Since this set revolves around being crafty and color, I definitely wanted to include rainbow colors in this. This crafter’s main tool is a paint brush and I wanted the colors to come out it! For this card, I stamped and fussy cut this image out since I am using watercolor, I didn’t want to have to mask off the image.
For this card panel, I used Tombow markers to create this rainbow by drawing lines of color. To blend this out, I used a waterbrush. Of course, it won’t blend perfectly but art and creativity is not meant to be perfect.
I really like how this card turned out and I’m loving how the rainbow colors pop and really pull this card together. I also created a video so you can check out the full process from start to finish. Check it out!
Thanks for stopping by and I hope you enjoyed the sneak peek. Come back tomorrow to see another sneak peek of a new stamp set. Can’t wait to show you what’s coming up!
Thank you for joining us on our LDRS Creativeinspiration week blog hop! We are so excited to feature what was showcased at Creativation in January! There are lots of gorgeous projects using products from our new release. You can even see them in action with step-by-step projects by our amazing designers on their blogs and our own LDRS Creative Youtube channel(make sure you subscribe)!
Who’s ready for mini hybrid inks? We are adding the latest two sets of our very popular Hybrid inks in a mini version, perfect for ink blending, stenciling, stamping, colouring and embossing: At The Beach and On The Farm!
Next, we have two new 6″x6″ stencils that are sure to be as popular as the others: Playful Patterns and the Waffle!
Each day we are giving away a $25 LDRS Creative gift card to one lucky hopper! To enter leave a comment on each blog in the hop, plus follow us on Facebook and Instagram. Winners will be announced on the LDRS Creative inspiration blog on March 5th.
AND for the release event we are excited to offer some great savings! Save 15% on the new release*, including already discounted bundles and use code FEB15 (*Coupon valid until midnight EST 3/6/18)
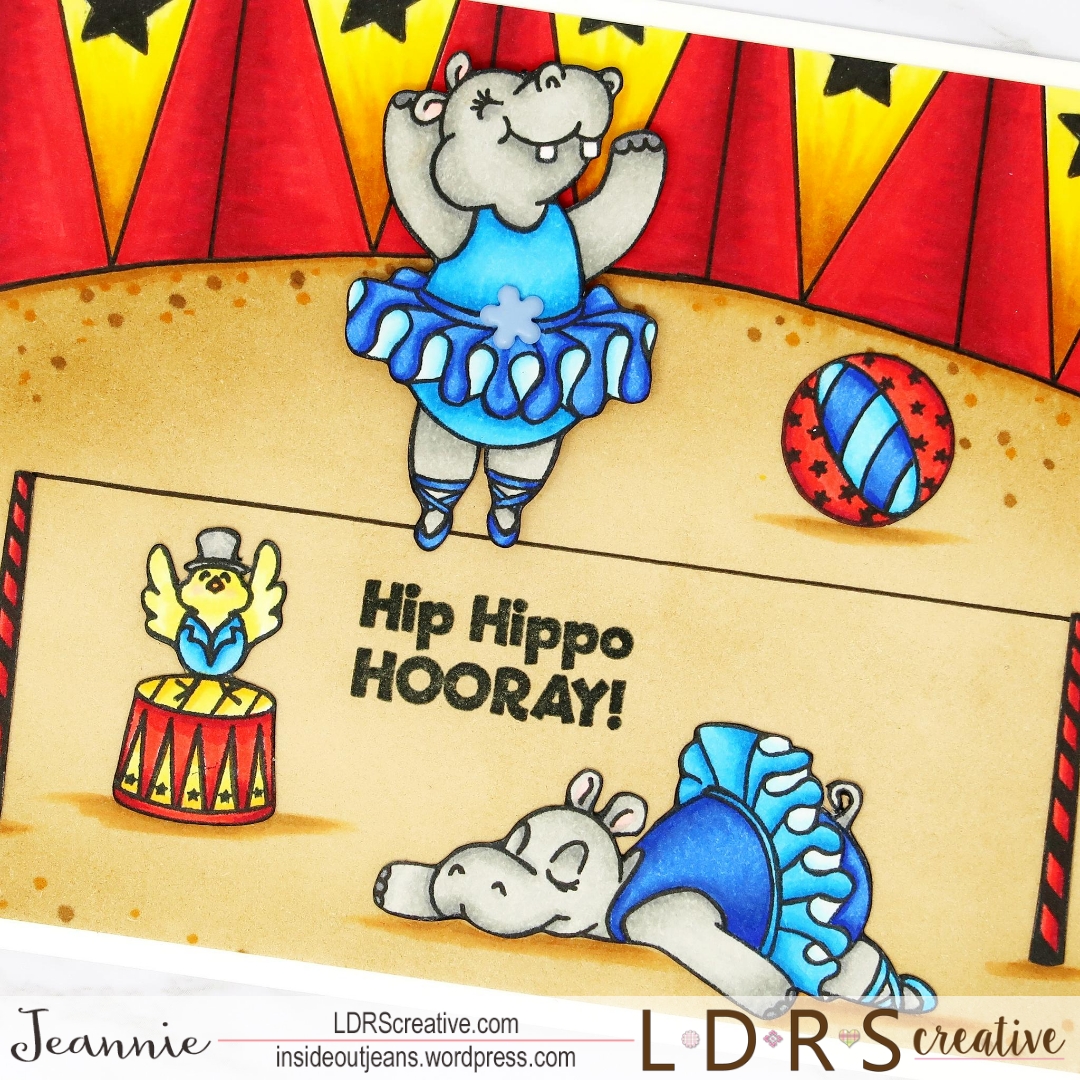
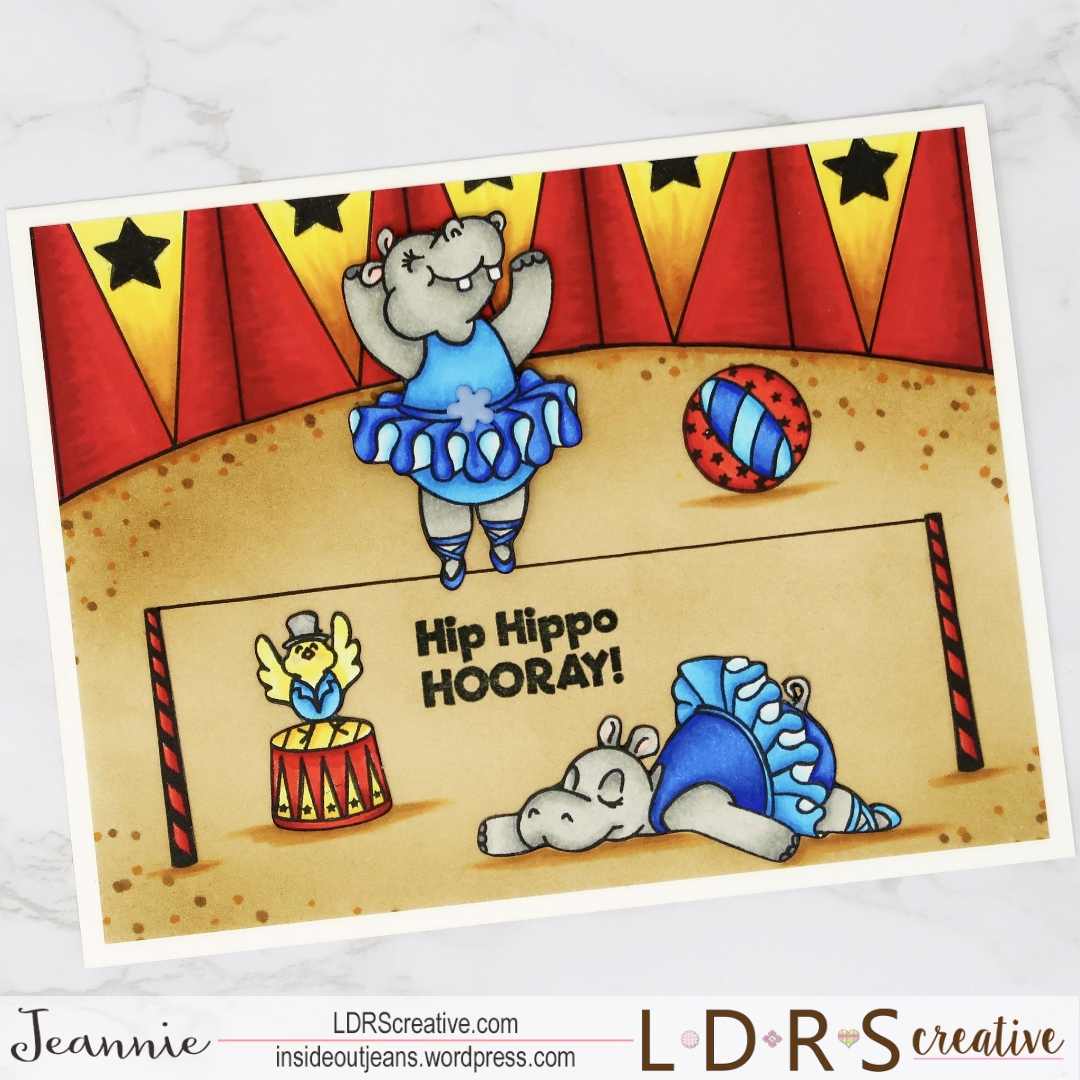
Hi everyone! Thanks for checking out Day 3 of the blog hop for LDRS Creative. I’m sharing a card using one of the sets showcased at Creativation, Hippo Hooray. Similar to Day 1, this set has an interactive image that moves with a brad.
For today’s card, I used a variety of the images. I stamped them out using Raven ink, colored them with alcohol markers, and fussy cut them out. This set doesn’t come with coordinating die because of the nature of the interactive element… It would look odd with the white border a die leaves.
I wanted to create a simple scene for this since I’m using a few images. I just drew in the stage area and used Stamping Mask paper so I could use distress inks to color it quickly. For the stands, I drew in a simple pattern mirroring the stand the little bird is standing on. I also stamped the little star that is in the set to give it a little more decoration.
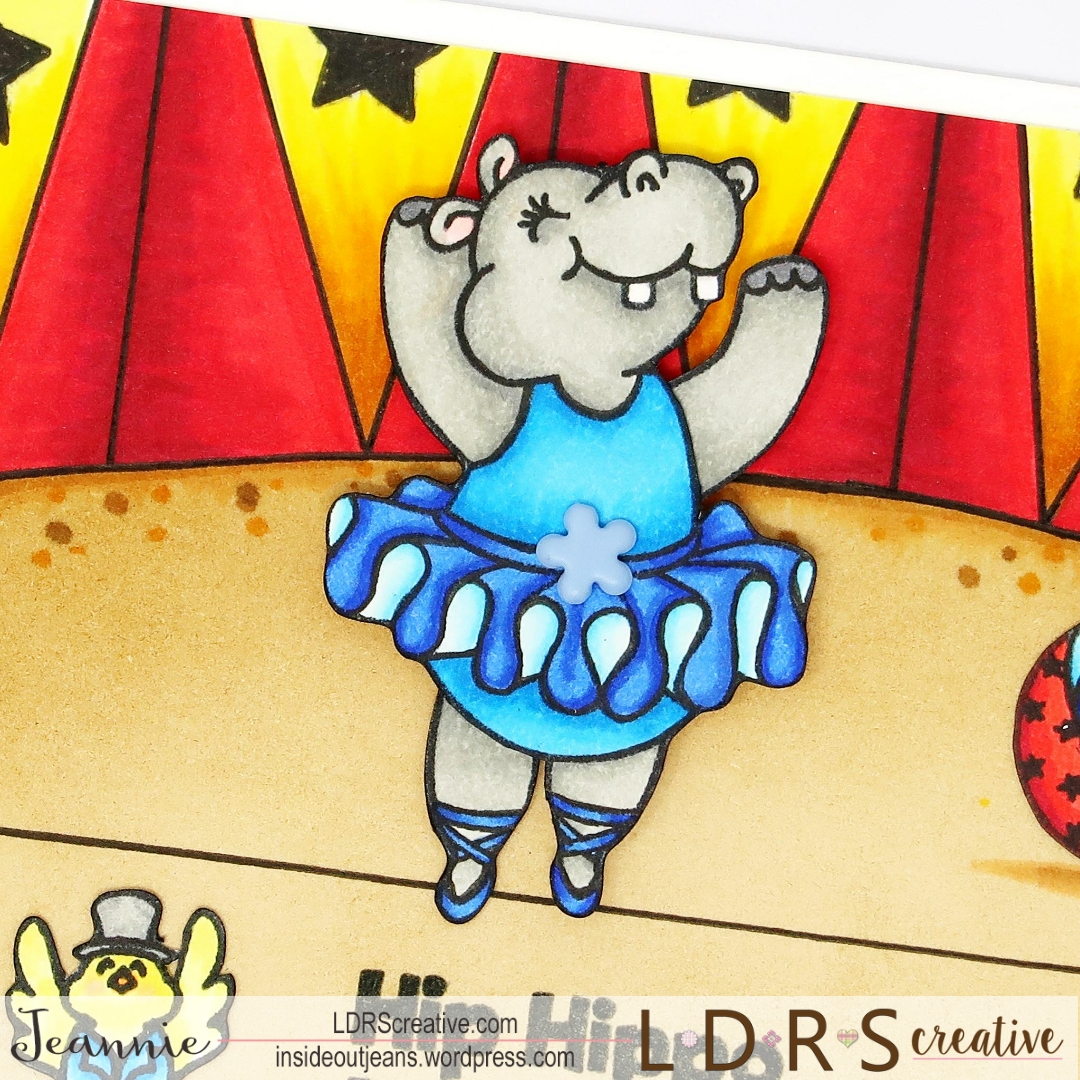
After the background is colored in, I play with the images deciding where they should go. I want to fit everyone in so I add the dancing hippo to a tightrope.
For the hippo, I trim off the left arm and right leg replacing it with the full arm/leg image included in the set. I picked out a blue flower brad so it looks like she’s wearing a little belt with a flower buckle.
To finish off this card, I stamped the Hip Hippo Hooray sentiment in the middle of the card. Additionally, I trimmed the card panel by a quarter of an inch so it would have a white border around the panel.
This dancing hippo is adorable, don’t you think? If you want a visual of how it works, check out my instagram for a short clip. Thanks for stopping by for this LDRS Creative blog hop! Hope you’ve enjoyed all the inspiration.
Hi there! Jeannie back today and I hope you’ve been all enjoying the January release. Everything has been pretty amazing right? I’m blown away from the new sets!
When I first saw the Sweet Carousel set, I knew exactly what I wanted to do with it. Aren’t these images perfect for a spinner card? And what else do horses on a carousel do other than spin?
I set out to create a really simple version since these images were pretty large so I only needed one. I basically grabbed a piece of acetate to help me create a mirror image of the stamp. I stamped it one on cardstock and then stamped the same image on a piece of acetate. I used the image on acetate and pressed it against the cardstock, transferring the image. It wasn’t perfect but I ended up outlining the image again to darken the lines. Once I finished coloring them, I die cut the images using the coordinating Sweet Carousel dies. For the mirror image, I had to die cut on the backside of the image.
I used a piece of paper from the new Watercolor Foil paper pad (it’s so freaking pretty!) and I picked a color that matched the horse’s mane. I think it works really well. I used one of the Stitched Rectangles 2 dies to cut out a window for the carousel. I used transparent sewing thread, stuck it in between the two images and wrapped it around the top and bottom of the card.
If you spin the image and close the card, the card is ready to go. Once the recipient opens the card, the little carousel will spin. If you’re curious to see it in action, visit my instagram page… I’ll have a short video showing it in action.
Thanks for stopping by today! I hope you enjoyed today’s card.
→ SUPPLIES USED ← Items marked with an asterisk (*) were provided by a store or the manufacturer for review and use. All other items were personally purchased. Affiliate links may be used at no cost to you.
Happy Friday! Today I’m sharing two card sets using one singular stamp set. I used the same two flowers but the two cards look completely different.
For the first card, I stamped and masked off the flowers. I smooshed distress inks onto a craft mat, misted it with water, and put the card panel directly into the inks. To finish it off, I added splatters of the same inks. Adding a large sentiment in the middle of the card really finished off the card.
The second card is one created with the same flowers. I heat embossed using white embossing powder and colored it up with multiple colors of distress ink. Once colored, I trimmed out the flowers. I embossed a solid piece of cardstock using a multi dot folder to give it a bit of texture. Adding the sentiment to the card finishes it off.
For details on how I put these two together, I have a video for you.
→ SUPPLIES ← Items marked with an asterisk (*) were provided by a store or the manufacturer. All other items were personally purchased.
I am super excited for my very first post as a design team member on the Drive By Crafts’s blog. I want to share this card using Lawn Fawn’s Wild for You stamp set. Here is the card I created and check out how I made it on their blog.
I had spotted this design on Instagram. It was a card that actually worked to dispense candy! I knew I had to make one for myself. It is such a great idea to give to a kid, or just to someone who enjoys candy!
I checked out her youtube video (Tutorial), tweaked a few things, and created my version of it. I hate when dimensional cards leave you with the foam tape peeking out on the sides so the simple solution was to use washi tape to hide it. The added touch really helps finish the card. Pretty fun…
It works the same way as the tutorial. The only swaps I made was using craft foam instead of foam tape, and lining the edge of the card with washi instead of leaving it bare. It’s so exciting to see it work out successfully.