A quick switch up of your stamp sets in your collection is a good way of stretching your stamps. This originally came out in spring and of course, like here, if you change up the background, you get a brand new vibe to the card.
All my supplies for creating this card will be listed down below (with multiple sources when available) for your curiosity and convenience. Affiliate links used when possible.
Washi is a staple in the planner world and I have tons of it. I collected early in my planner years, buying pretty often and randomly. I put a pause on collecting more for a bit of time to use up them up but of course, that lasted only for a little bit.
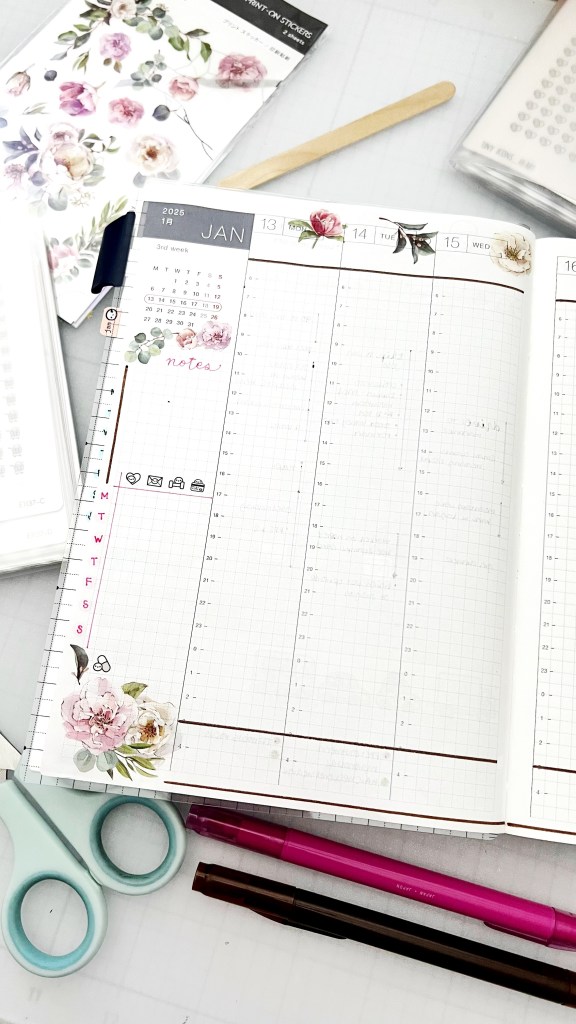
I’ve grown more mindful of using my washi and I like to stretch the use when I can — on cards, on my planners. Here, I used it by cutting out the little emotis for each of the dates. This is something I started doing last year and found it really fun, making for an easy spread.
All my supplies for creating this card will be listed down below (with multiple sources when available) for your curiosity and convenience. Affiliate links used when possible.
There’s a lot of uses for border stamps. Here it’s easy to create a background especially when you have a stamp positioner. It allows the ability to choose different colors palettes or you can use the same ink to stamp every line.
All my supplies for creating this card will be listed down below (with multiple sources when available) for your curiosity and convenience. Affiliate links used when possible.
I used the same A2 Tree Frame Die for a Halloween card last year as a silhouette but I thought it would be pretty with a bit of coloring to create a wintery card. It works perfectly to frame this small gnome image. I love, love, love how this turned out.
All my supplies for creating this card will be listed down below (with multiple sources when available) for your curiosity and convenience. Affiliate links used when possible.
I’m starting to really fall in love with these transfer stickers — they are so thin and they are easy to apply making a planner spread so quick and easy. I actually love pulling up the transparent sheet to revealed that transferred image. I, especially, love these florals.
I added a few lines to create a border for my florals to enclose them. I think it makes it so pretty and adds a little extra to the simple decor.
All my supplies for creating this card will be listed down below (with multiple sources when available) for your curiosity and convenience. Affiliate links used when possible.
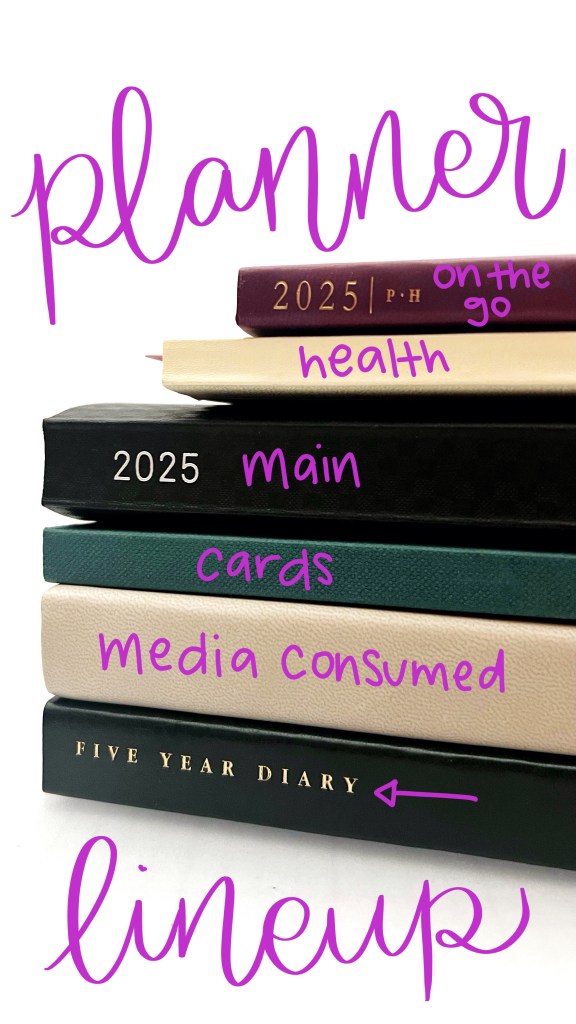
I don’t know why but although I’ve been super excited about 2025 and my planner goals — I just am slow out of the gate getting set up! Here is my planner lineup!
For keeping track of my shows watched, movies watched, books read.
Five Year Diary
Sterling Ink – Five Year Diary | A5 (Undated) in Forest Gold
Trying this again! I started in 2020 but didn’t finish. I wanted a place to look back – it’s really fun to see what happens on the same day in previous years and the changes that come along with it!
All my supplies for creating this card will be listed down below (with multiple sources when available) for your curiosity and convenience. Affiliate links used when possible.
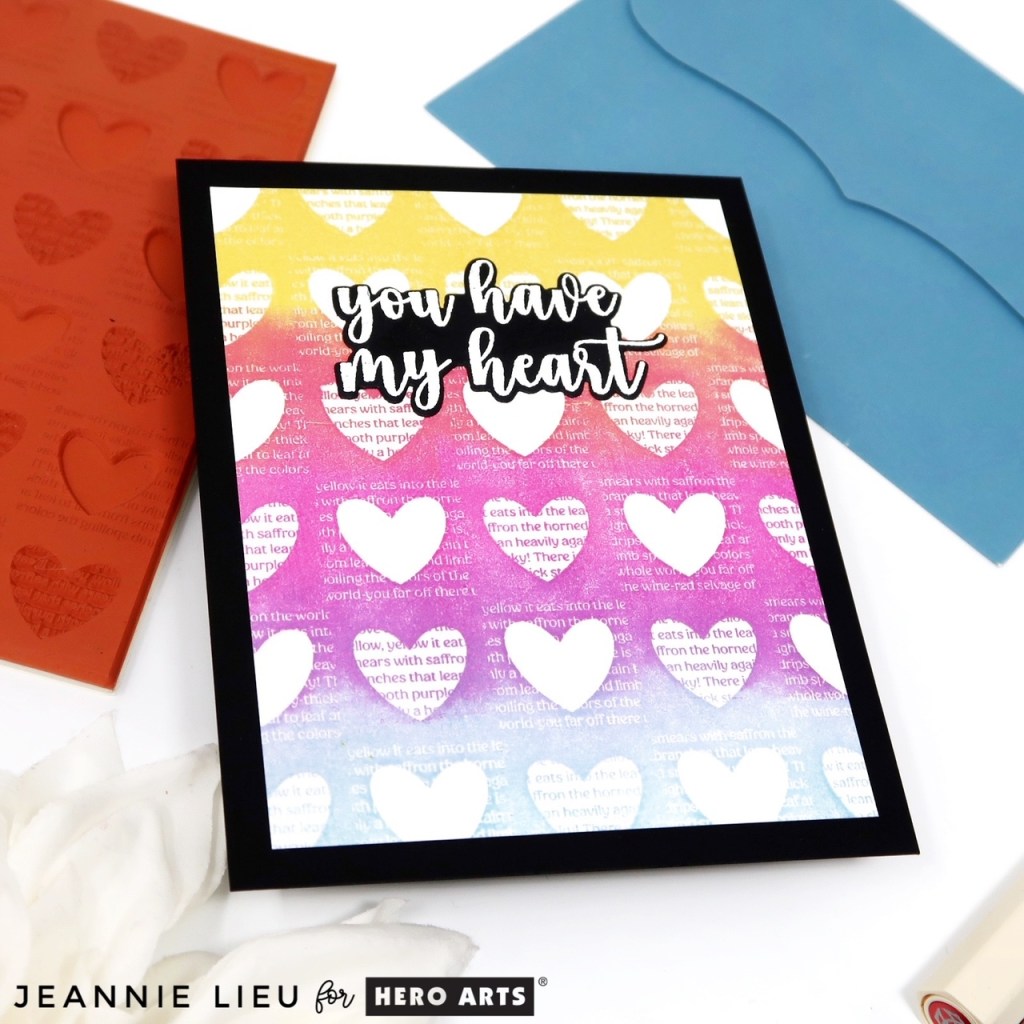
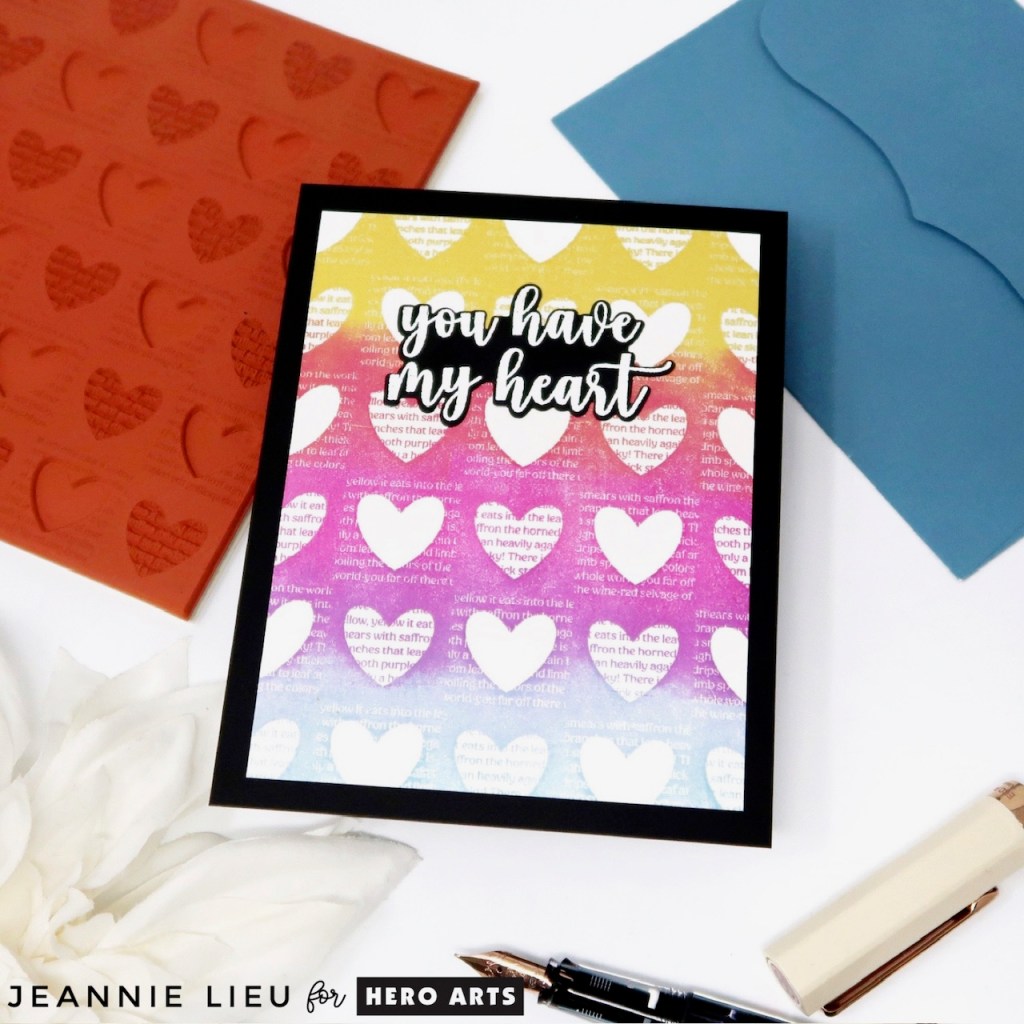
Last week, I shared a card that used a similar stamping technique and it inspired me to pull out another background set to do some rainbow stamping. This time, I wanted to pull out a different sentiment and pop it up on another matted panel so the sentiment stood out a little bit more. I think if you compare this week’s card to last year’s Honey Bee card — you’ll notice that the sentiment was cut out from the background panel and it flows continuously. This one is separate.
All my supplies for creating this card will be listed down below (with multiple sources when available) for your curiosity and convenience. Affiliate links used when possible.
Sizes of stamp images vary but sometimes you just need to fill up the rest of the space. Here, I used die cut shapes for the card to give it a bit of interest. I also hand drew in the frame to tie everything together.
All my supplies for creating this card will be listed down below (with multiple sources when available) for your curiosity and convenience. Affiliate links used when possible.
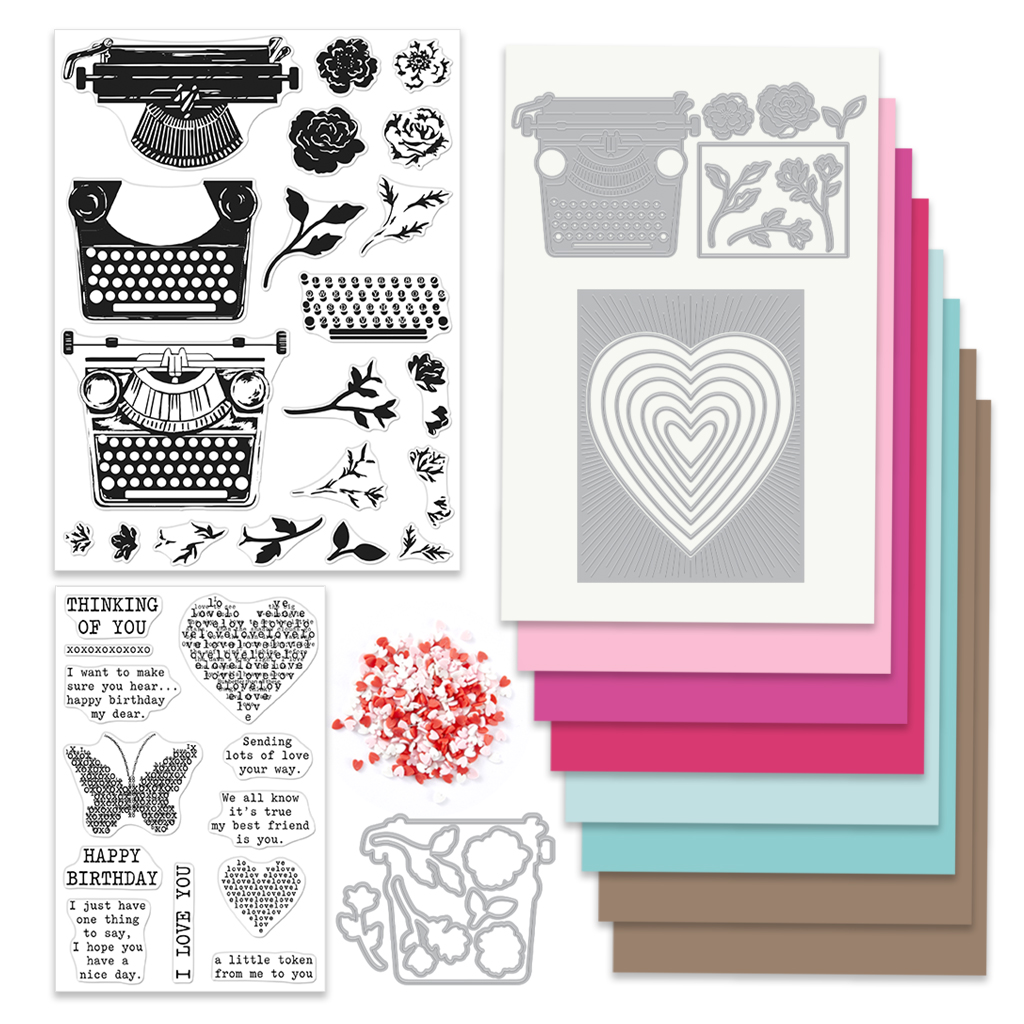
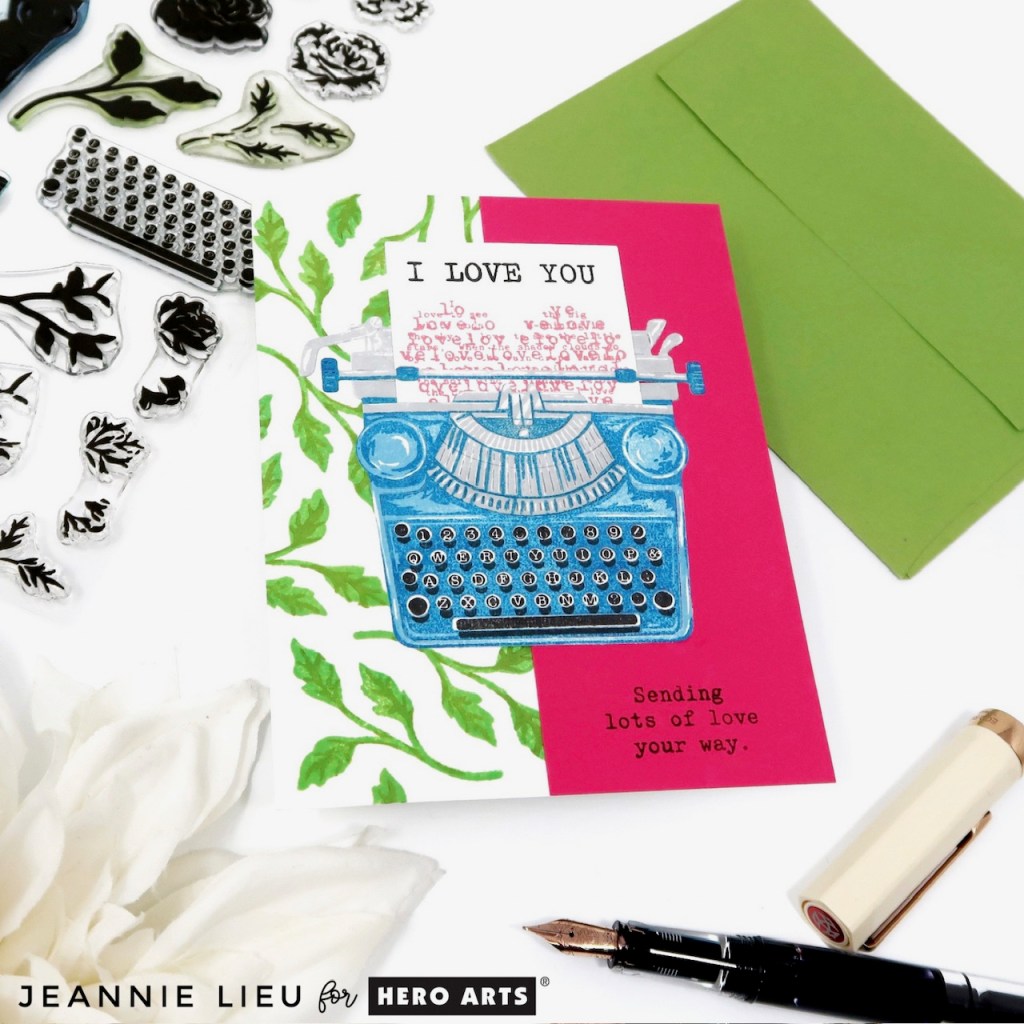
Let’s start by taking a closer look at the January Card Kit of the Month.
Includes:
Color Layering Typewriter Clear Stamp Set, 6” x 8”
Typewriter Messages Clear Stamp Set, 4″ x 6″
Typewriter Frame Cuts
Typewriter Fancy Dies,
Infinity Hearts Cover Plate
Mini Clay Hearts
8 Sheets of Cardstock, 5.5″ x 8.5 (colors: Peony, Ultra Pink, Azalea, Arctic, Mist, Antique Ivory and kraft)
There’s a ton of inspiration and the full blog lineup can be found on the Hero Arts blog. You should be coming from Charlene Madrid‘s blog and your next stop will be Jennifer Kotas. The full blog list will also be updated below!
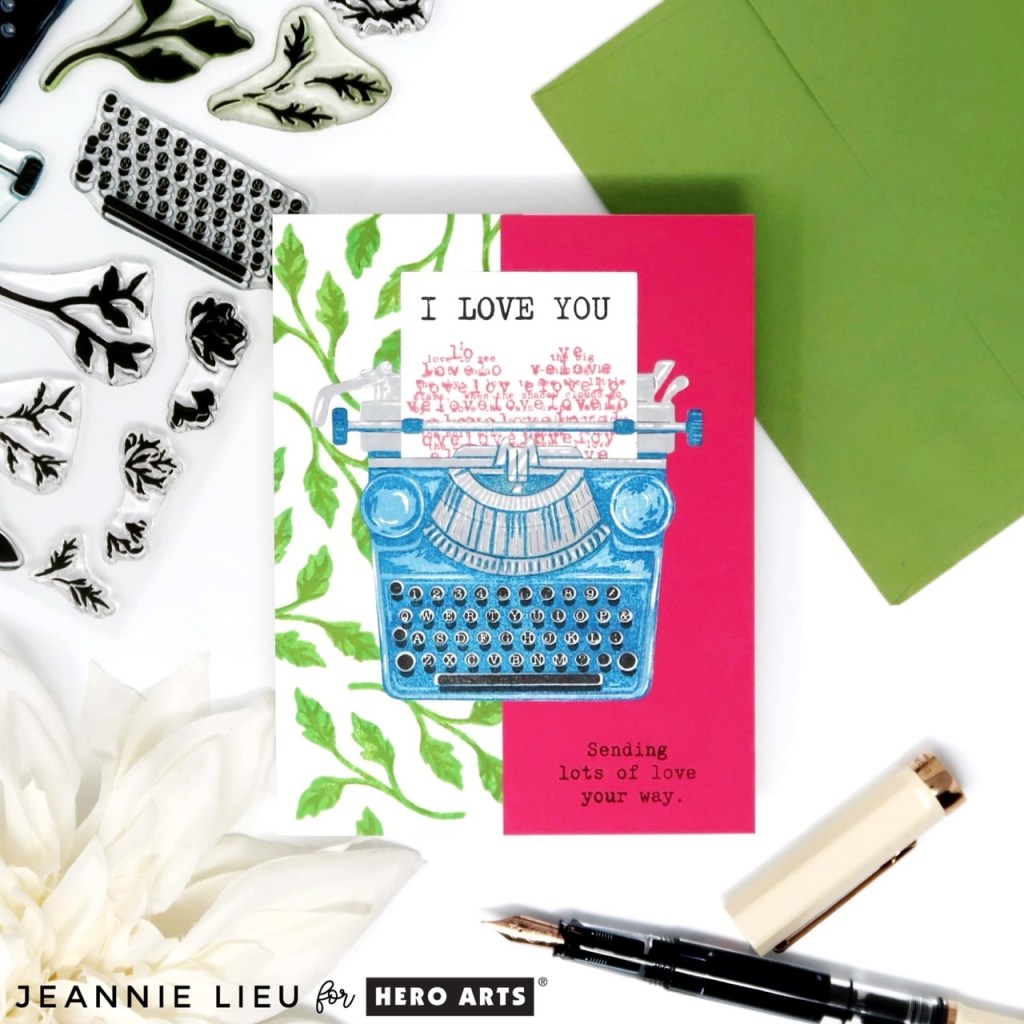
The first card focuses on the Card Kit of the Month. This Card Kit contains a lot of fun, pretty things that is so perfect for a lovey dovey card. I started off by stamping one of the layered leafy pairs using the Hero Hues Core Ink in Fresh Lawn and Moss on the side of the card. Then I worked on stamping out the layered typewriter with Intens-ified Black Ink along with Periwinkle, Deep Ocean and Granite. When it’s all stamped out, the typewriter is so cool plus it the card kit comes with a coordinating die! I also stamped out the sentiment on the piece of paper I insert into the die cut. I used Intens-ified Black Ink and Azalea. I stamped an extra sentiment in the bottom right hand corner on top of a piece of Azalea cardstock to tie everything together.
Here’s a quick video for this above card! Hope you enjoy it!
Thanks for stopping by today and I hope you enjoyed the two cards I shared today using some of the new Hero Studio collection. Hope you were inspired to create!
Giveaway:
Hero Arts will give away a $50 gift card, drawn from the comments left across the hop. Enter by Thursday, January 9 at 11:59pm PST, and the winner will be announced on the Hero Arts blog the following week. Leave a comment on all stops for more chances to win!
I love a good scene card. They take a bit of time but I pick images that are easy to cut and then I also use ink blending to fill up the background so I don’t have to color too much.
All my supplies for creating this card will be listed down below (with multiple sources when available) for your curiosity and convenience. Affiliate links used when possible.
I don’t use watercolors as often as I want — but I definitely need more practice at it. I do love how this turned out.
All my supplies for creating this card will be listed down below (with multiple sources when available) for your curiosity and convenience. Affiliate links used when possible.
This past year, I walked away from a bullet journal set up because it was really time consuming (even though super fun) paired with my card making. In this year, I tested out a doodle planner, which had everything set up for me and I could just color and fill it in — I didn’t love it because it didn’t allow for much creative freedom outside of picking what colors to use. Then I saw a sale for Sterling Ink and it had the vibes of a Hobonichi, which I’ve wanted to test out to see if I’d like it. Suffice to say, I LOOOOOOVED it.
Fast forward, to October, when I was in Japan, I decided to pick up the Hobonichi and I’m trying to commit to it this year! The idea of daily journaling is a bit scary as I’m not a particularly exciting person and I am a total homebody but it’s a goal of mine in this coming year to turn the mundane into fun memories. In my past bujo spreads, sometimes, I’ll use the same elements to create cards — stretching supplies — and I kinda want to incorporate that this year too because I’ve felt I’ve been in a bit of a slump with card making as well.
Anyway, here it is — my first week setup in my A5 Hobonichi HON, where it’s set up for me but I’m allowed some creative freedom to decorate. I’ll follow up with another snippet if I do make a matching card.
All my supplies for creating this card will be listed down below (with multiple sources when available) for your curiosity and convenience. Affiliate links used when possible.