Skies might look intimidating to create but they are one of the easiest things — mainly because it will look a mess but splatter will bring it together. You just need to try it and you’ll see!
All my supplies for creating this card will be listed down below (with multiple sources when available) for your curiosity and convenience. Affiliate links used when possible.
Stencils are generally a low cost alternative to stamps — but now there’s layering stencils — sometimes coordinating stamps and dies. I don’t have the Pretty Pink Posh Across the Miles stamp set but I was able to use the Layered Cars Stencil to create a background scene for these Summer Friends.
All my supplies for creating this card will be listed down below (with multiple sources when available) for your curiosity and convenience. Affiliate links used when possible.
The best part of cardmaking is that you can make anything any color you want. Even though Rainbow Tulips are actually a thing, I haven’t seen them and I decided that these had to be rainbow colored. Just a bit of purposeful ink blending and Voila! a colorful bunch of florals ready to go for a card.
All my supplies for creating this card will be listed down below (with multiple sources when available) for your curiosity and convenience. Affiliate links used when possible.
Here’s a trick for creating card when you don’t want to color. I’m not a pro at watercolors but I definitely can create a rainbow look, which is what I did here. I stepped away because I thought it was too bright but I powered through and created a card that normally isn’t my style — I kinda love how it turned out.
All my supplies for creating this card will be listed down below (with multiple sources when available) for your curiosity and convenience. Affiliate links used when possible.
Black and white cards are so understated — sure, I tossed in a bit of color for this one but it still packs a punch with those two colors. Honestly, I made this card using a pop of color instead of the subtle green found in the succulents and it was too busy. I reverted back and stuck with the simple colors.
All my supplies for creating this card will be listed down below (with multiple sources when available) for your curiosity and convenience. Affiliate links used when possible.
These Ghost Friends are super cute but I had to add a little spooky to them — by using Glow in the Dark Embossing powder. This powder is a bit tricky though because you really need good coverage and I ensured I’d get good coverage by stenciling the ghosts and embossing a couple of times. It was totally worth it!
Let’s create a pattern just by using masking tape and some ink blending. I thought it would be so fun to create with this jumbo jumbo die cut. AND it lets me create 2 cards at the same time. Perfect!
All my supplies for creating this card will be listed down below (with multiple sources when available) for your curiosity and convenience. Affiliate links used when possible.
Lately, I’ve been in a color slump so my go to trick is just to google! I have comfort colors that I stick with and really want to step outside of that from time to time. Here’s what I got when I googled “ocean color palette”:
And I used it here for this color palette and I love it.
All my supplies for creating this card will be listed down below (with multiple sources when available) for your curiosity and convenience. Affiliate links used when possible.
I love when a die cover plate creates an entire scene. I used this Mountain Scene Cover Plate cut out of watercolor paper. Then I did some easy painting and then put this back together like a little puzzle.
All my supplies for creating this card will be listed down below (with multiple sources when available) for your curiosity and convenience. Affiliate links used when possible.
Happy Thursday! Today is Day 2 of blog hops showcasing Pretty Pink Posh’s new release. Check out everyone’s projects for inspiration and leave a comment. There will be a $25 up for grabs. The winners will be picked randomly along the blog hop. There’s a total of three $30 gift cards, one for each day so be sure to stop by Pretty Pink Posh’s blog tomorrow and the day after! Comments must be left by 11:59 PM PST on 8/17/2022. Winners will be announced on the Pretty Pink Posh blog.
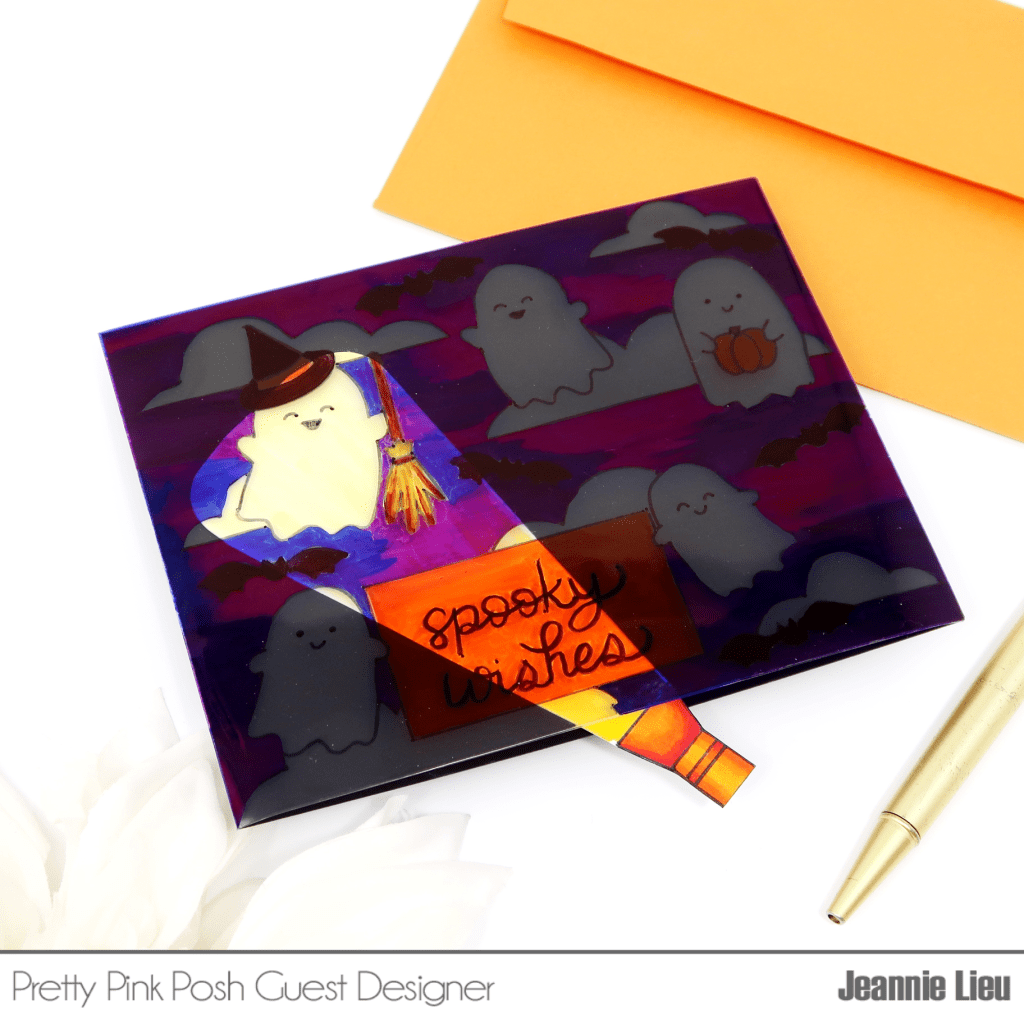
I’m super excited to share my card for today showcasing a couple of the new release items from Pretty Pink Posh. I’ve never been a huge fan of Halloween cards but last year, I really got into them and now, I’m loving when it rolls around. This new release from Pretty Pink Posh has me super excited and once I saw the Ghost Friends, I had to bring back the flashlight card. I’ve done it previously here but I wanted to show a second way of creating it — it’s easy and super fun for the kiddies (even if you’re not a cardmaker)!
To start off, I stamped out a little scene using Ghost Friends and I wanted to use all of them, including a sentiment. Then I used the Spooky Sky stencil from last year’s Halloween release — you can use this or anything else you want — and used it as a literal stencil with a pencil. Once I had my scene ready to go, I pulled out an A2 shaker pocket and slipped my card panel inside but don’t close it up!
Using an ultra fine point sharpie, I went ahead and traced all my images. Alternatively, you could stamp out the images using Stazon because it’ll work on acetate. Then once all my images are traced, I’m going to go ahead and color it. It’s helpful to add a white panel under the acetate so you can see your coloring. For coloring on acetate, I’m using Sharpies — specifically the ones with the brush tip because it’s easier and quicker to color. You can also use any alcohol markers as well (these leave a bit of residue so I would suggest using an anti-static powder on top to remove the stickiness). Once I finished coloring, I’ll remove the white panel and insert a black panel, flip it over, and remove the release paper so it can adhere to the black cardstock. Then I freehand a flashlight and coloring it up with copic markers and the ray of light will be colored in yellow to give it a realistic look. Once I’m done, I’ll go ahead and fussy cut it out. Then let’s go ghost hunting!!!
If you want to see the entire project from start to finish, I’ll leave my YouTube video below.
I really loved how my card turned out and hope it inspires you! Again, make sure to hop along the fellow designers for more inspiration and for a chance to win a $25 giftcard.
Been in love with ink blending lately so been playing with a lot of color combos — this one is so pretty! I also had to add glittery wings to the fairies and I love how it turned out. So simple, yet so fun!
All my supplies for creating this card will be listed down below (with multiple sources when available) for your curiosity and convenience. Affiliate links used when possible.
I love ink blending but my favorite inks to use for any type of rainbow colors or bright assortment are the Ink on 3 Atelier inks. They are bold and bright and pack a punch. I went in heavier with my layers for this peach to give the entire look a pop art vibe. What do you think?