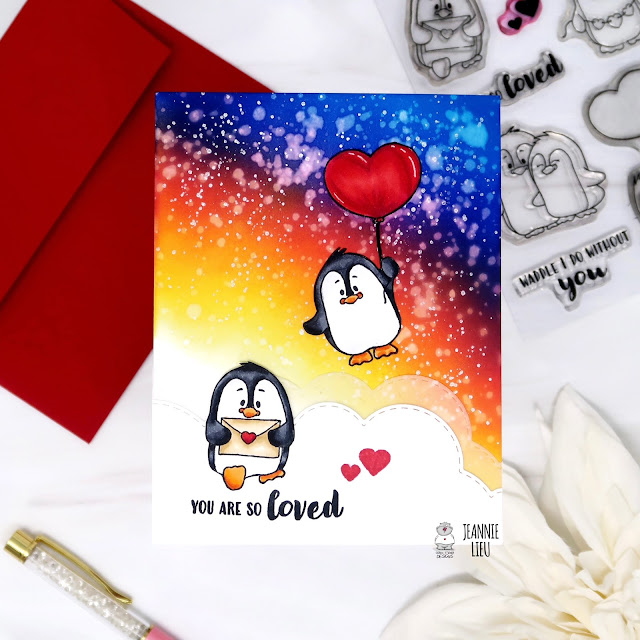
I’ve been creating really quick and simple video card tutorials and I’ve grown to really like them because sometimes I look at a card and don’t really need or have the ten minutes to invest in watching how it comes together. Hope you enjoy them! I plan to post them over here with a quick supply list as well.
Welcome to Trinity Stamps & Artesprix Collaboration. Today, I have some amazing inspiration to share!I’ve wanted to try out sublimation for awhile now… it’s always been on my list of crafty things to do. This collaboration let me really test it out and see if I like it. I loveeeee it! It’s such a fun way to create unique gifts, especially with the upcoming holiday season. I ended up making a matching card and bookmark set, which is perfect for a gift along with a bonus item — just for fun!
For my Artesprix bookmark, I used the white bookmark blank to start off and traced the shape of it onto regular copy paper so I knew where I wanted to place the design. I used the Artesprix black stamp pad with the Artesprix clear sublimation stamps. These stamps are sentiments that are mirrored so they will show up correctly on your projects. It’s important with sublimation to remember that things are mirrored. Around the sentiment, I went ahead and stamped the images from Trinity Stamps’ Autumn Impressions stamp set using Fadeout Ink. I did this because they were solid images and I wanted to color them up using the sublimation markers.
This is the first time I’ve used the sublimation markers and it’s so cool! The ink looks desaturated but when you finish your project, it’s actually really bright colors. I didn’t know if I would be able to blend the markers, but I did it anyway. I taped the design to the surface of the bookmark that it will transfer to using the Artesprix heat tape.
I went to finish this off. I placed the Artesprix project mat on my desk, added an extra piece of copy paper for good measure and then went to create my sandwich. I placed the protective paper first, then the bookmark with the design taped to it, and then another piece of protective paper.
Since I have a Circut EasyPress, I set the temperature to 360 degrees and set the timer for 75 seconds. It was recommended by Artesprix to add 30 seconds to the time they provide for each item. The anticipation was real but once my timer went off, I removed the heat press, waited for it to cool off and revealed my bookmark. It’s SO pretty — I love it so much!
I couldn’t help myself but want to make a matching card so I did exactly that. I pulled out the Trinity Stamps’ Slimline Envelope Builder because I remembered it has a “Friend” word die in it. I wanted it to match the sentiment on the bookmark. I cut that out of gold cardstock. I stamped the same Trinity Stamps’ Autumn Impressions leaves onto card panel using Fadeout Ink and colored them up in the same way but using copic markers. To finish off the card, I used the sentiments from the Trinity Stamps’ A Sentiment for (Almost) Everything to pair with the Friend sentiment. I’m so giddy because I love how this matched perfectly!
Now for my bonus project, which was actually my tester project. I was super nervous on how it would turn out so I wanted to a simple design. I traced my plastic keychain on a piece of regular copy paper and stamped the images from Trinity Stamps’ Autumn Impressions stamp set using Fadeout Ink to create a wreath. The middle looked a little plain so I threw in a flower from the First Bloom stamp set. I colored everything in using the sublimation markers.
Then I went to work on my heat press, creating the same sandwich as my above project but setting the timer for 90 seconds (adding 30 seconds to the recommended Artesprix heat press time). Voila! A cute key chain!
There are so many great ideas that you can create using these tools and if you don’t have a Circut EasyPress, I’m pretty sure you have an iron on hand and that works perfectly as well! Just remember to adjust your heat settings accordingly. Yay to a new crafty adventure — I’m so glad it turned out well and could share my experience with you!
Welcome to the weekend crafty friends! Today, I’m sharing a card featuring a freebie that you can get today, Hero Art’s Daisy and Bees Stamp Set, , over at Scrapbook.com. I used it to create a super cute card.
I stamped out my images from the Hero Arts Daisy and Bees stamp set and did a bit of masking so the ladybug could sit on the daisy. I also cut out masks because I wanted to ink up the background with some distress inks. Once my stamping and masking was complete, I inked blended using the following colors: Seedless Preserves, Stormy Sky, Speckled Egg, and Tumbled Glass.
To finish off the card, I stamped the sentiments on black cardstock, using Versamark ink and Hero Arts White embossing powder. I trimmed it down and placed them on my card (it actually covered over a blending boo-boo I had.. shhhh!).
Remember to if you’re shopping over at Scrapbook.com, to add this freebies to your cart.
Happy Friday-eve! Hi crafty friends! Today, I’m sharing a card featuring a freebie that you can get today, Doodlebug’s Love Notes Ephemera, over at Scrapbook.com (there’s actually two!). I used it to create a cute lovey-dovey card.
For the sentiment, I die cut the letters to spell love out of the Mixed Metals Paper Pack for some extra glitter. To finish off the card, I used some of the heart ephermera pieces to fill up the empty spaces. It’s such a cute card, and so easy to put together!
Remember to if you’re shopping over at Scrapbook.com, to add these two freebies to your cart.
Hi crafty friends! Today, I’m sharing a card featuring a freebie that you can get today, Pink Fresh Studio’s Puffy Alphas, over at Scrapbook.com (there’s actually two!). I used it to create a custom sentiment as a focal point for this card.
I stamped the main lines from the Recipe Card Maker stamp set diagonally on my black cardstock with Versamark ink, covered it with Hero Arts Satin Pearl embossing powder, and heat set it for a subttle pattern in the background. I then placed all letters to create the “Love You” sentiment in the middle of that pattern.
I used distress oxides inks to ink up the edges but you can’t really distinguish the colors so any would be fine. I then covered up the stickers using the mint tape from Scrapbook.com so I could splatter Perfect Pearl mixed with water onto the top and bottom portion of the card. To finish off the card, I trimmed the card panel down to 4.25 x 5.25. I inked up a piece of white cardstock on the top and bottom using Mowed Lawn, Wilted Violet, Spice Marmalade, and Squeezed Lemonade to match the colors of each of the letters. I mounted my main card panel on top allowing those colors the show through.
I thought that was a pretty fun card I ended up with! Remember to if you’re shopping over at Scrapbook.com, to add these two freebies to your cart.
Thanks for stopping by and I hope you got some inspiration to create! Happy Crafting!
Welcome to the A-Haunting We Will Glow Collab Hop with i-crafter and Pear Blossom Press! We’re sharing spooky sweet projects for Halloween. Featuring interactive dies from i-crafter, and with help from Pear Blossom Press, they all really light up! Be sure to hop along with us (line up below) for lots of inspiration; we’ve come up with some brilliant cards. Let me show you mine…
Every good hop has prizes, right? So i-crafter, and Pear Blossom Press are each giving away a $25 store credit! Comment on this post by October 4, 2021 to be entered to win. Winners will be announced on October 8th.
All my supplies for creating this card will be listed down below (with multiple sources when available) for your curiosity and convenience. Affiliate links used when possible.
For the background, I used distress oxide inks (Mowed Lawn, Spice Marmalade, Blueprint Sketch, Black Soot) on black cardstock to create a fun and spooky background and splattered with some Perfect Pearls. I used the die cuts from the Mini Halloween Hauntings to decorate my card panel and for the items I wanted to light up are the skull, spider, and ghost. For the images, I wanted to do something fun, so I inked up a two pieces of white cardstock and one piece of grey cardstock with Versamark ink. I covered the white and grey cardstock with Hero Arts Satin Pearl embossing powder and covered the second piece of white cardstock with Lawn Fawn’s Glow in the Dark embossing powder for the ghost. Isn’t the glow so cool?!
With the EZ lights, it’s really easy to use but the visual is a lot easier to understand and see, so make sure you check out my YouTube video linked up above. The lights are lighting up the skull, ghost and spider and the rest of my die cuts will decorate the card panel. One of my favorite parts of the card is the custom made sentiment using the Alphabet Carly die cuts, which spells outs “Happy Haunting”.
InkOn3 Mini Ink Cubes in Fadeout no-line coloring ink, Sweet Petunia Pink, Marigold Orange, and Goddess Green
This exclusive kit is available only while supplies last for $39.99.
All my supplies for creating this card will be listed down below (with multiple sources when available) for your curiosity and convenience. Affiliate links used when possible.
For my card today, I wanted to focus on the stamps and inks. I stamped images from the Summer Blooms stamp set using Ink on 3’s Fadeout ink onto watercolor paper. Because of how Ink on 3’s Fadeout Ink works, you can blend on top of it and it will pick up on the colors you place on top of it.
I ink blended the entire background using Goddess Green. For my image, I stamped it using the same Fadeout Ink on Bristol Mixed Media paper and did some no-line watercoloring using all the inks in this card kit. Once I finished, I used the coordinating die to die cut out my image and popped it on foam tape on my Goddess Green background.
For the sentiment, I actually pulled out the Big and Bold Sentiments from Trinity Stamps, stamping it using Fadeout Ink and watercoloring it using Sweet Petunia Pink and Marigold Orange. To finish off the card, I used the Summer Sparkles Embellishment and sprinkled them around my card panel.