LDRS – Day 1

Thank you for joining us on our LDRS Creative inspiration week blog hop! We are showcasing lots of gorgeous projects using products from our new release. You can even see them in action with step-by-step projects by our amazing designers on their blogs and our own LDRS Creative Youtube channel (make sure you subscribe)!

In this release, we are celebrating love and friendship, being on Cloud #9 with sweet new products!

There are FOUR stamp sets that are oh-so-sweet:  CLOUD NO.9 from Cre8tive Cre8tions, LOVE IN BLOOM, BEAUTIFUL BLOOMS, and HANGING OUT from our very awesome Polkadoodles line!

We also have FOUR new die sets that will help you get a professional look in no time, thanks to the LOVE LETTER LACE ENVELOPE, the FAIRY FANTASY LACE ENVELOPE, the EYELET LACE RECTANGLE and the BUILD-A-CARD GARDEN ESCAPE die sets.

Who’s ready for mini hybrid inks? We are adding two sets of our very popular Hybrid inks in a mini version, perfect for ink blending, stenciling, stamping, colouring and embossing: COUNTY FAIR and SUMMER SHORE.

Lastly, because we wanted to show you how all the products come easily together, we decided to rerelease the Sincerely Yours 6×6 paperpack. It has so many fantastic patterns; give them a try!

 And you can grab the entire release in bundles, because you KNOW you need them all!

Simply use the list at the end of the post to keep hopping!

Each day we are giving away a $30 LDRS Creative gift card to one lucky hopper!  To enter leave a comment on each blog in the hop, plus follow us on Facebook and Instagram. Winners will be announced on the LDRS Creative inspiration blog on December 4th.

AND for the release event we are excited to offer some great savings!

Save 15% on the new release*, including already discounted bundles and use code LOVE15

(*Coupon valid until midnight EST 12/2/18)


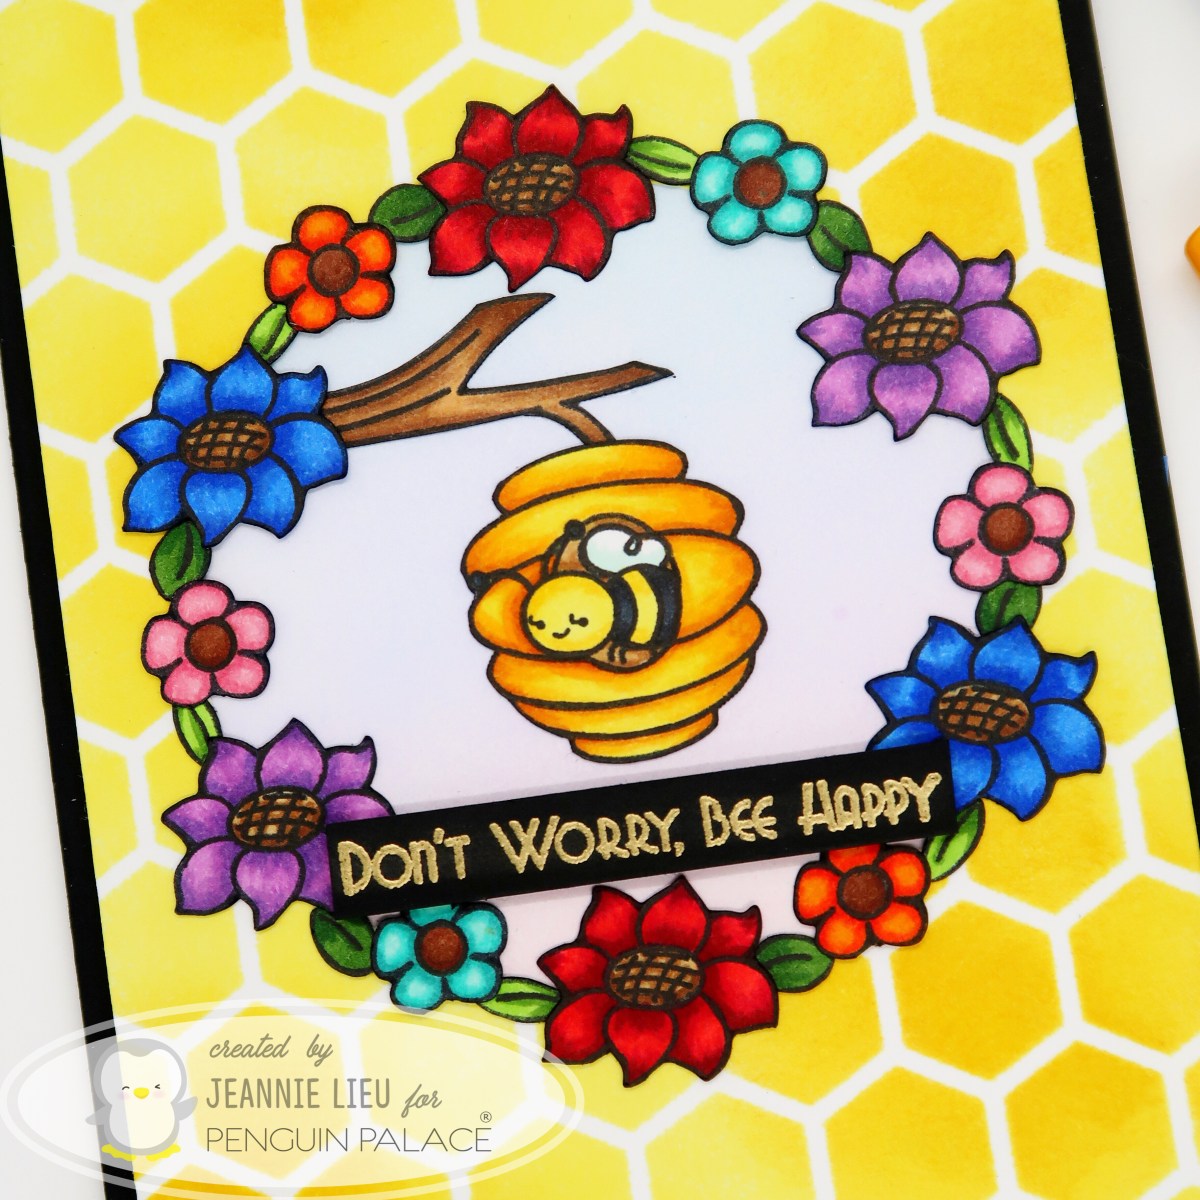
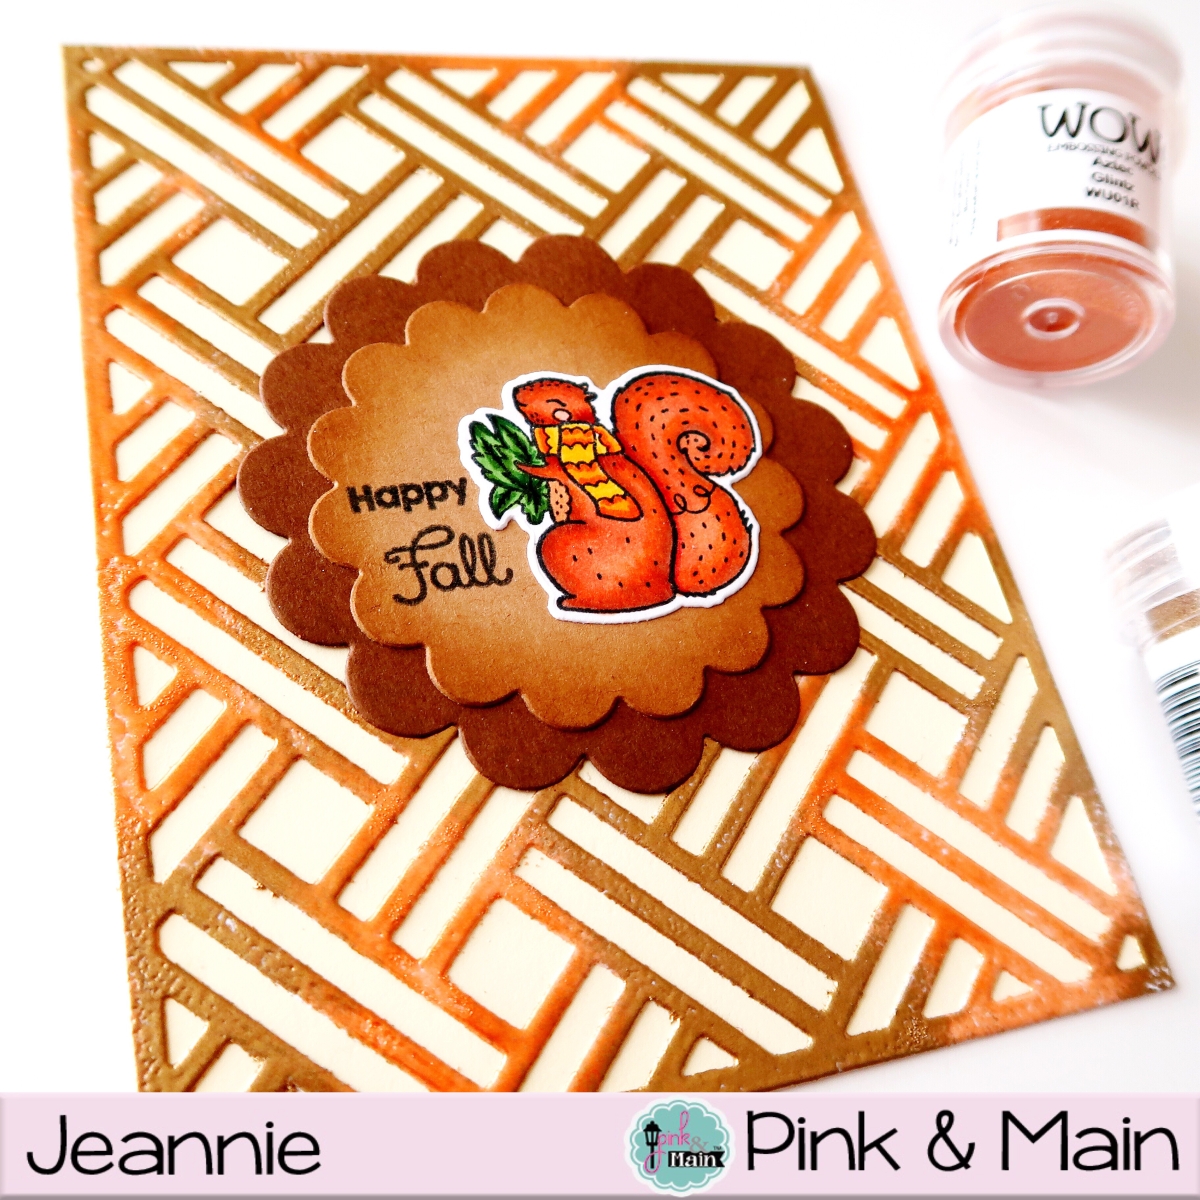
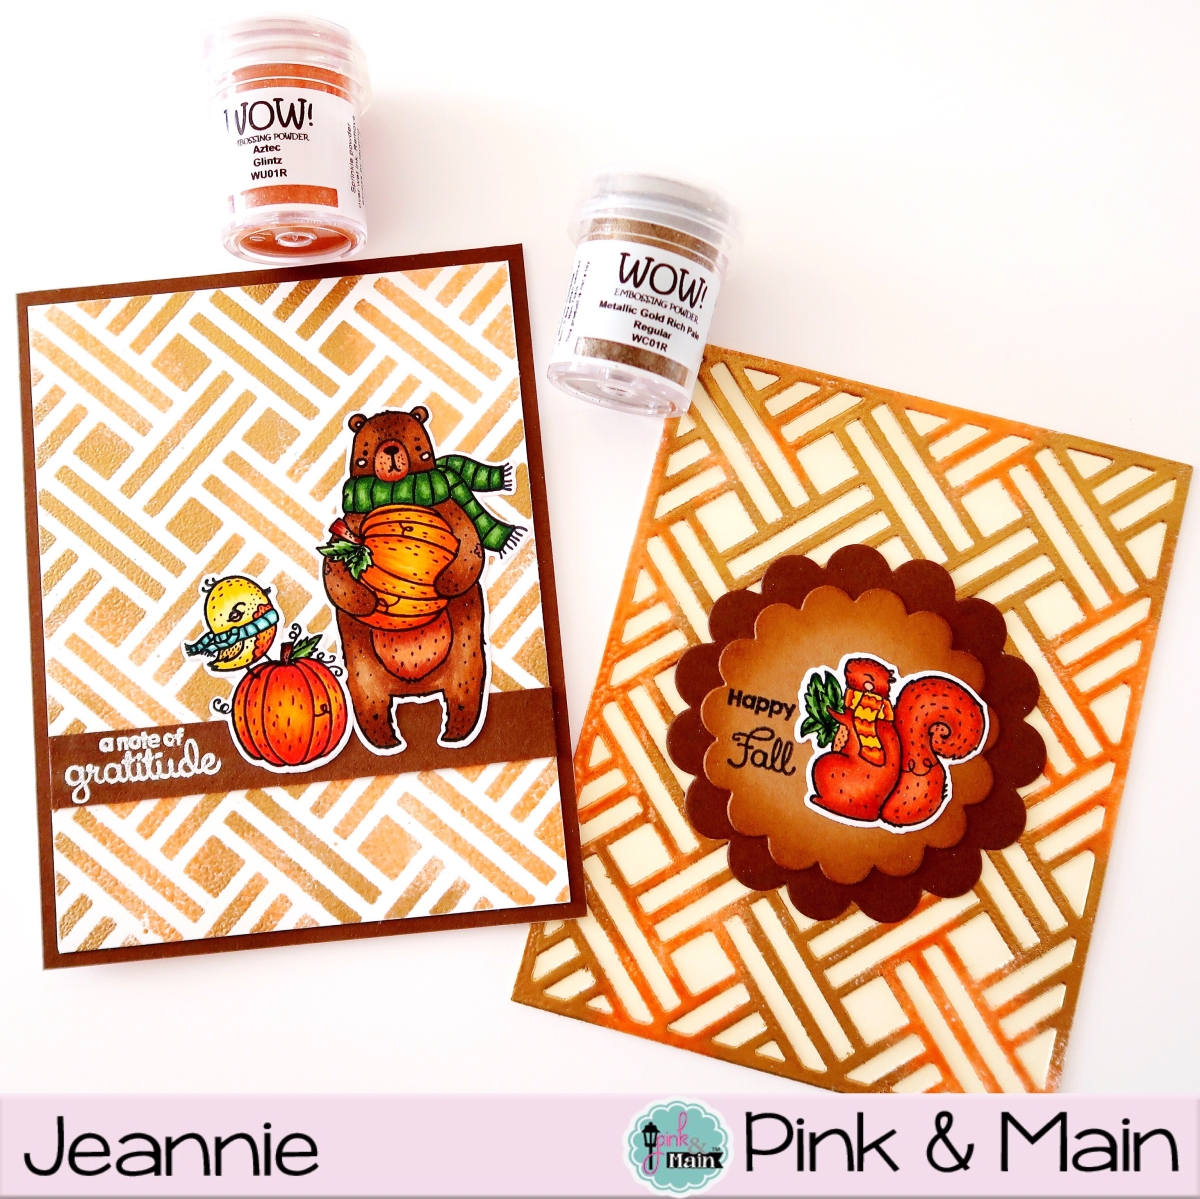
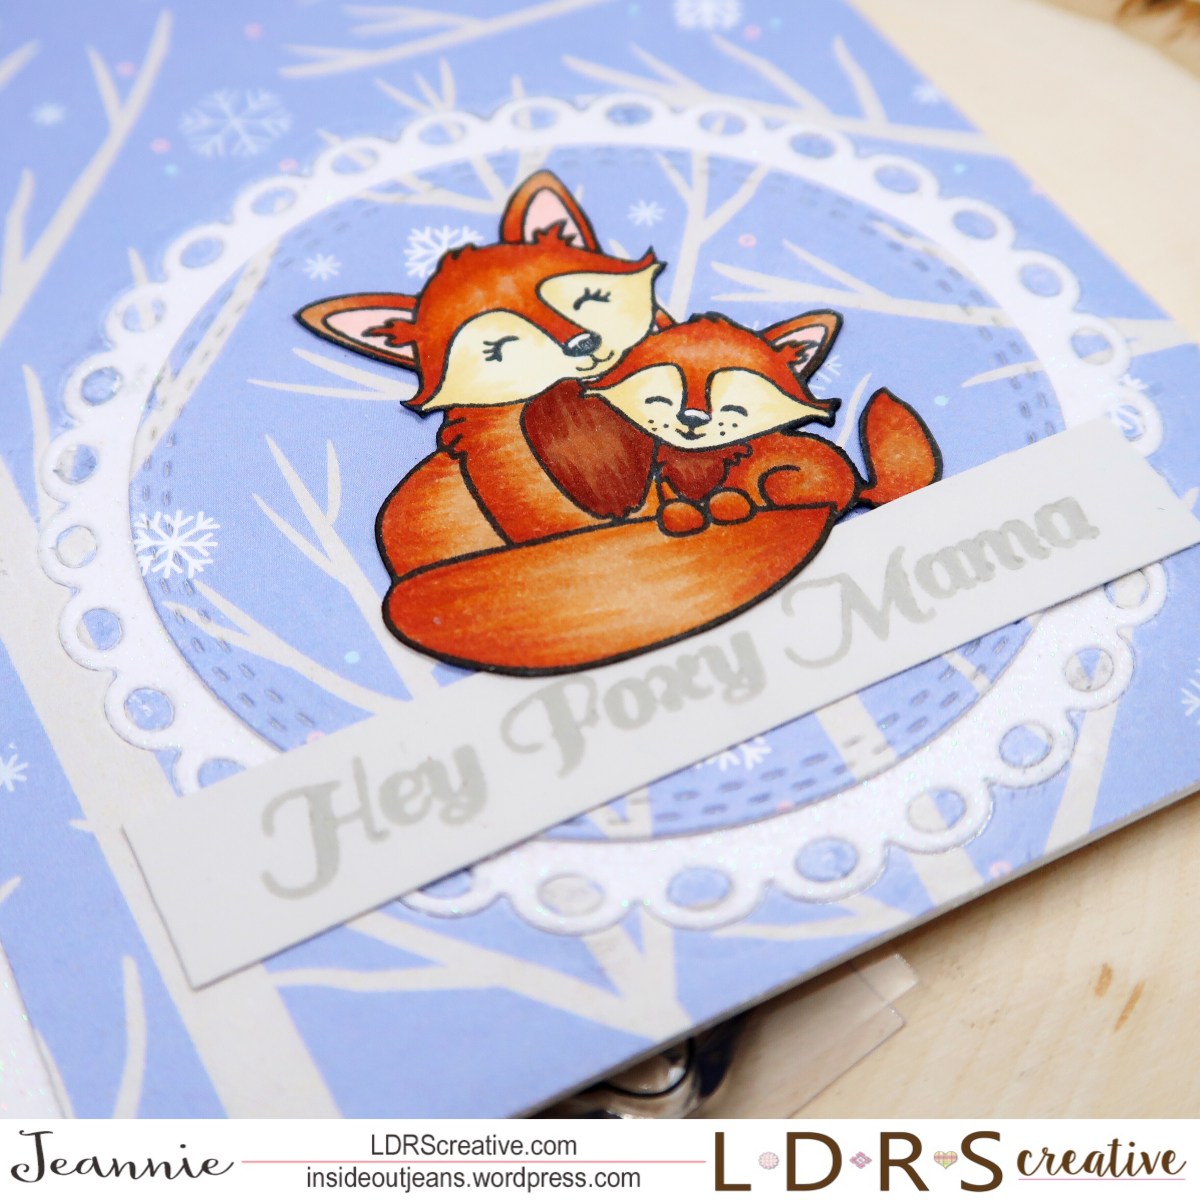
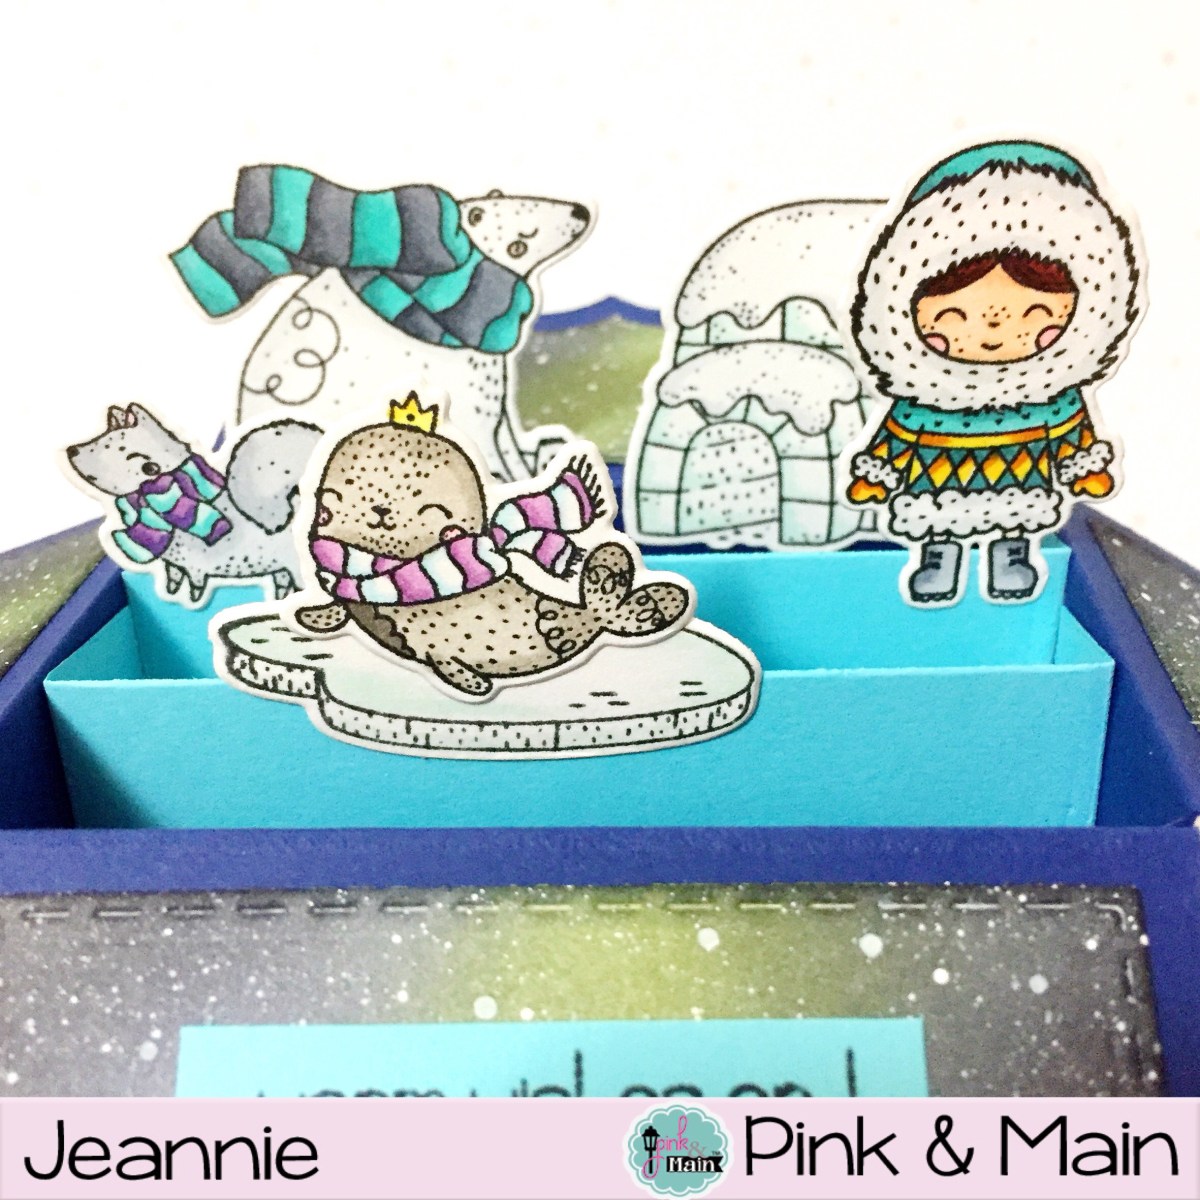
Today, I’m sharing one of Polkadoodles’ stamp set from the LDRS line, Hanging Out. I adore this stamp set since it creates a full scene and is super cute with a bunch of different animals. It’s such a versatile set since you can change up the sentiment to whatever occasion you need it for. For today’s card, I used a sentiment from the Love in Bloom set.

IMG_7187

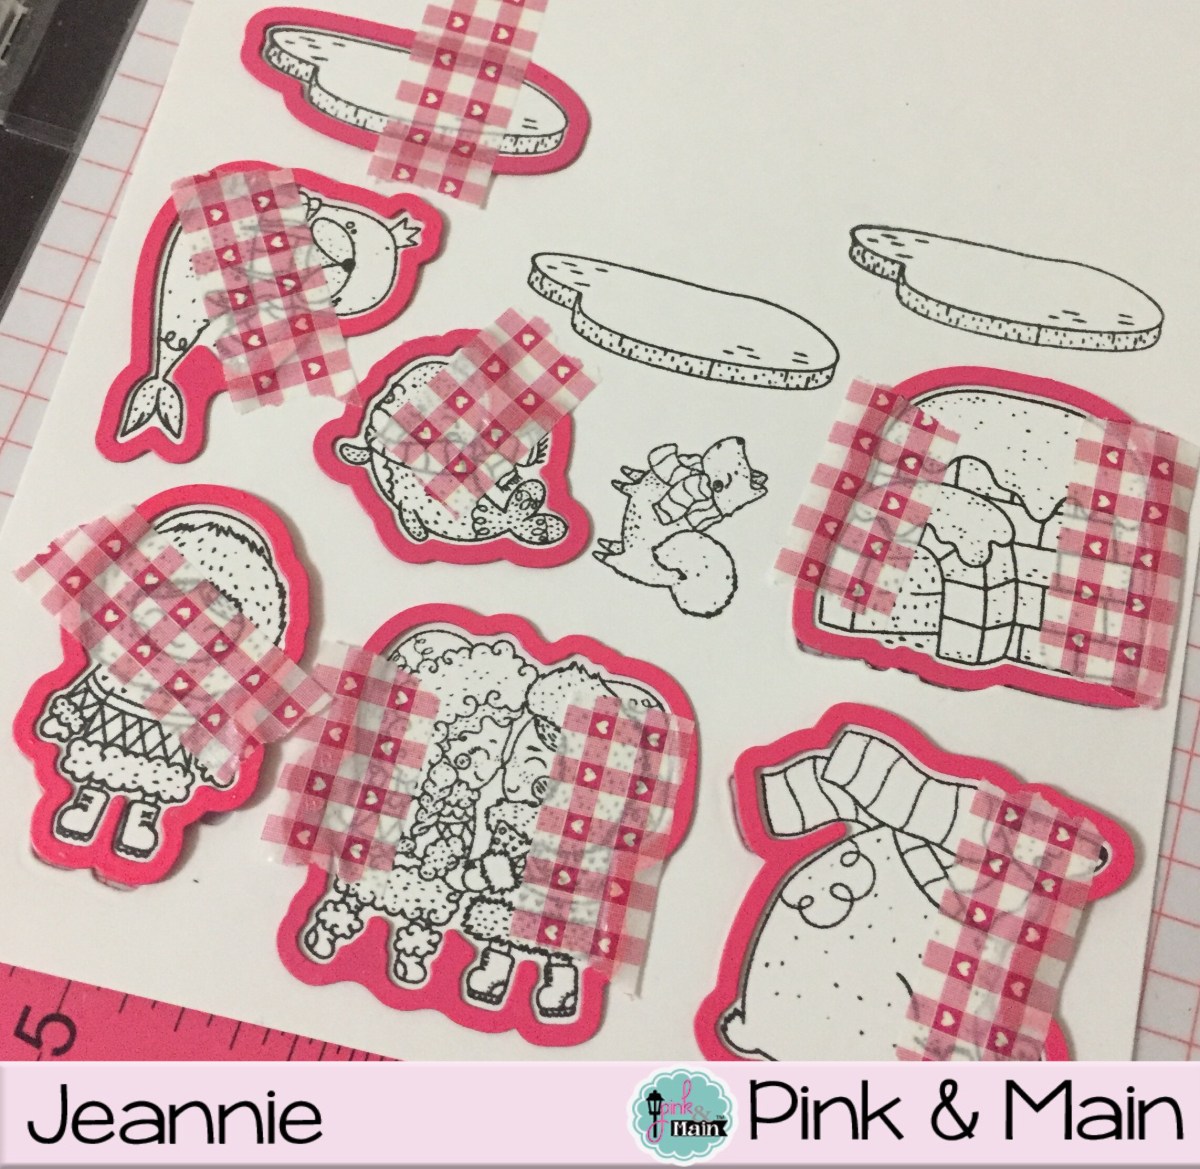
I need to practice more but no line coloring is definitely a challenge but this stamp makes it really easy paired with the LDRS Alloy hybrid ink pad, which is a light grey. I didn’t think it would work because it would be too dark but it isn’t. No line coloring also allows you to play with the shapes of the characters as well (specifically look at the owl – lol).

IMG_7186

Thanks for stopping by today. Hope you enjoyed today’s card and be sure to come back tomorrow for more inspiration!

Hop along and leave a comment so you could win! 

Day 1:

LDRS CREATIVE BLOG
JANE
KASSI
ALANNA
JEANNIE [You are here!]
ZSOFIA

And make sure to be back tomorrow for more inspiration!

Love Train | Penguin Palace

Hi everyone! I hope you have enjoyed Thanksgiving and had a lot of family time, which is what I did. Now, it’s Monday and back to reality.

Today I’m sharing another card using a stamp set from Penguin Palace, Love Train. It’s a super cute set that has buildable train sections so you can customize one as you please.

I decided that for this card, I wanted to mask and build a semi-one layer card. For the bottom portion of the card, I stamped out the train, the railroad, and the mountains. I was able to mask all of this off and use distress inks for the grass and mountains. I did use some Copics to enhance the shading and give the mountains some dimension.

The sky at dusk is the star of the card though. I used a variety of distress inks to blend out the sky and I loved how it turned out. I also used a white glaze pen and a clear glaze pen to add little stars to the sky, adding a bit of interest to the card generally. I definitely love how this turned out.

If you haven’t already, you should check out Penguin Palace stamps and use “GRANDOPEN” for a 20% off all the items in the store.

Have a great day!

Bee Happy | Penguin Palace

Hi there! I’m so excited to share my first card as a design team member for Penguin Palace. It’s a new stamp company with some super cute stamp sets! Sharon, the owner of Penguin Palace, is kicking off the grand opening of her company by offering a 20% discount (Code: GRANDOPEN) so go check it out!

My card for today showcases one of her cute stamp sets, Bee Happy. This set is extremely adorable with little images to create a great scene. I decided however to focus on the smaller floral images to create a nice frame.

IMG_6978

I also decided to use a hexagon stencil (since this set includes bees) for the background so I could mimic honeycombs.

IMG_6954

Hope you check out the new stamps from this brand new company and take advantage of the discount!

IMG_6979

Thanks for stopping by!

25 Days of Christmas Tags

Hello there! Thanks for stopping by and checking out the tags I created for the 25 Days of Christmas Tags.

For me, I love creating multiple tags at the same time and make them a little different from each other with similar aspects. I decided to use Scalloped Circle Dies as a base for my tags. The shape generally looks like a wreath so this was perfect. First, I used two different patterned papers from the Sunrise paper pad to die cut a larger shape and die cut a smaller piece using white cardstock.

I wanted a bow and although the stamp set, Bowtiful, would be perfect for this, I really wanted to use the bow die from the Winter Wreath Decor dies. I cut out two using white cardstock and colored them in using alcohol markers, adding the look of dimension to them.

IMG_6867

I love the layers of the patterns and colors, making the holiday tags look really pretty adn detailed. As a final touch, I took one of the sentiments from Bowtiful that has the “To” and “From”, that finishes off a vital part of a Christmas tag.

IMG_6866

Hope you enjoyed the tags here and check out all the other tags created for 25 Days of Christmas Tags.

IMG_6865

Have a great day!

Galaxy Backgrounds | Mama Elephant

Hi there! I received a bunch of questions about the galaxy backgound for one of my previous cards, so I decided to put together a video to show how I created two different ones using distress inks and white cardstock.

It’s definitely the perfect background for a card that doesn’t need much else.

I have had this set for awhile and even though they are perfect for Christmas cards, it also works for birthday cards or just because cards.

For this card, I used colors for the balloons that matched the colors peeking through the galaxy in the background, making it really playful and whimsical.

IMG_5903

For the second card, I really wanted to play with purple colors for a galaxy instead of a typical dark blue and black background. I like how this looks so different from the first one, with just a few color changes. It makes such a big difference.

IMG_5904

If you’re interested in learning more, below is my video showing my process video of these two cards.

SUPPLIES
Items marked with an asterisk (*) were provided by a store or the manufacturer. All other items were personally purchased.

DISCLAIMER
Some products are provided by manufacturers for review and use. Affiliate links may be used at no cost to you.

Pink & Main – WOW Blog Hop

Hello there! Thanks for joining me today in Pink & Main’s blog hop collab with WOW! Embossing Powder. I actually did a 1 for 2 card to share today.

42090699_10156971156679683_5272965803526848512_n

My focus is using the Basket Cover die for today’s two cards. The intricateness of this card is amazing and it allows you to create a background easily. You can always die cut out a piece of paper in multiple colors to use it. However, for today, I decided to mix this with heat embossing powders to create a different effect.

First of all, I die cut a white piece of cardstock using the Basket Cover die. Taking that die cut, I placed it over another piece of white cardstock and pressed my Versamark ink all over. This way, I could add both Metallic Gold Rich Pale and Aztec Glintz to the negative space of the die cut. IMG_5135.JPG

Once I finished adding the embossing powder, I heat set it. This was a perfect background for my first card, paired with the Season of Change stamp set. I trimmed down my card panel and added it to a dark brown cardstock. I added the images and a strip of brown for the sentiment to the front panel and my card is done. I love the subtle glimmer from the embossing power.

IMG_5325.JPG

Since I used the die cut for the first background and already added Versamark ink to it, I decided not to waste it and added the same two embossing powders on it. Once I finished, I heat set and it works perfectly for a second background.

IMG_5324.JPG

For this second card, I also used the Season of Change stamp set. I decided to cut two of scalloped circles from the Scallop Circle die set out of a piece of Kraft and Dark Brown cardstock. These two scalloped circles help the focus go to the image instead of the background and I think it turned out pretty simple and cute.

IMG_5323.JPG

Thanks for stopping by the blog to check out these two cards using Pink & Main stamps and dies along with WOW! Embossing powder. Be sure to stop by the rest of the blog hop and comment for a chance to win!

WOW! Embossing Powder
Pink & Main
Andrea
Ankita
Dana
Donna
Jackie 
Jaine 
Jeannie  <— You are here!
Jo  
Julie  
Kathy 
Kimberly
Laurie 
Lynnea 
Michelle
Olga
Raluca
Riikka
Tracy 
Yasmin
Zsofia 

41755206_10156971157699683_2514852339928530944_n.jpg

LDRS – Artic Snowfall

42429456_10161108347755650_9033883671802675200_o.jpg

Thank you for joining us on our LDRS Creative inspiration week blog hop! We are showcasing lots of gorgeous projects using products from our new release. You can even see them in action with step-by-step projects by our amazing designers on their blogs and our own LDRS Creative Youtube channel (make sure you subscribe)!

We have TWO new 6×6 designer paperpads, with awesome patterns all ready for your Holidays and Winter-themed projects called ARCTIC SNOWFALL and HOLLY JOLLY HOLIDAYS!

There are FOUR stamp sets that are simply dreamy:  ARCTIC SNOWFALL, TREE LINE, MOUNTAINS, and let’s not forget the awesome HOT CHOCOLATE set from Cre8tive Cre8tions!

We also have two new die sets that save you time on cutting, because they coordinate perfectly with the line stamp sets, but can also stand on their own! Crafters, meet the Tree Line Border Die and the Mountains Border Die!

 And you can grab the entire release in bundles, because you KNOW you need them all!

Simply use the list at the end of the post to keep hopping!

Each day we are giving away a $50 LDRS Creative gift card to one lucky hopper!  To enter leave a comment on each blog in the hop, plus follow us on Facebook and Instagram. Winners will be announced on the LDRS Creative inspiration blog on October 2nd.

AND for the release event we are excited to offer some great savings!

Save 15% on the new release* and use code ARCTIC15
(*Coupon valid until midnight EST 9/30/18)

Hi there and welcome to day 3 of the LDRS blog hop for the September release. I’m really excited to share this card since it’s my favorite of the three days.

I used the Artic Snowfall set along with the matching paper pad. I find the matching paper pads so ingenious and you can create so many cute cards easily!

I started by stamping out the mama fox with her baby using Raven hybrid ink. I colored it in quickly using alcohol ink markers.I debated on which pattern paper to use for this card. I wanted to go for a soft look, so I pulled out this scenic piece of paper that had a bunch of trees and snowflakes. It was perfect!

IMG_4474

I really wanted to have the stamp image I colored be the focal point and sometimes that’s really hard when you use patterned paper. I decided that I wanted to use the Happy Days Circle dies to help make sure a person’s attention goes towards the foxes. I used the scalloped die to cut a piece of glittery white cardstock and the patterned paper, being SUPER careful to keep all the little interior pieces from the patterned paper. I wanted to  inlay all those little pieces from the patterned paper to the glittery white paper. Then, I used the interior circle to cut out the patterned paper.

For the sentiment, I found a matching grey cardstock to the color of the trees on the patterned paper. I used Alloy hybrid ink to stamp the sentiment.

IMG_4563

I trimmed the patterned paper just a bit on the top left and left side. I added it on top of white, glitter paper. It tied everything on the card together and finished it off.

IMG_4562

The softness of the card makes it super wintery, and I think it’s the perfect card to cap off this blog hop. I hope you enjoy this card as well. Hope you enjoyed the last three days of cards.

Have a great day! Happy Friday!


Hop along and leave a comment so you could win!

Day 3:
LDRS CREATIVE BLOG
JANE
KASSI
ALANNA
JEANNIE  – You are here! 
DIANE

LDRS – Scenery Card

42520877_10161108346075650_3313240554996760576_o

Thank you for joining us on our LDRS Creative inspiration week blog hop! We are showcasing lots of gorgeous projects using products from our new release. You can even see them in action with step-by-step projects by our amazing designers on their blogs and our own LDRS Creative Youtube channel (make sure you subscribe)! 

We have TWO new 6×6 designer paperpads, with awesome patterns all ready for your Holidays and Winter-themed projects called ARCTIC SNOWFALL and HOLLY JOLLY HOLIDAYS!

There are FOUR stamp sets that are simply dreamy:  ARCTIC SNOWFALL, TREE LINE, MOUNTAINS, and let’s not forget the awesome HOT CHOCOLATE set from Cre8tive Cre8tions!

We also have two new die sets that save you time on cutting, because they coordinate perfectly with the line stamp sets, but can also stand on their own! Crafters, meet the Tree Line Border Die and the Mountains Border Die!

 And you can grab the entire release in bundles, because you KNOW you need them all!

Simply use the list at the end of the post to keep hopping!

Each day we are giving away a $50 LDRS Creative gift card to one lucky hopper!  To enter leave a comment on each blog in the hop, plus follow us on Facebook and Instagram. Winners will be announced on the LDRS Creative inspiration blog on October 2nd.

AND for the release event we are excited to offer some great savings!

Save 15% on the new release* and use code ARCTIC15
(*Coupon valid until midnight EST 9/30/18)

Hi there! Thanks for joining us during release week! There are some really unique and fun things being released this month.

One of the first things that caught my attention right away was the Tree Line stamp set. It’s a small set but so versatile. At first you think, what can I really do with this, but there’s SO many things you could use it for: to create a background or to using it as a main image.

For today’s card, I used it as a main image. I stamped this out using Raven Hybrid Ink and color it up quickly using shades of green. I wanted to use this to create a gorgeous sky behind the Tree Line.

Using distress inks, I ended up creating a Northern Lights-esque background and then added “stars” by using white splatter. It was gorgeous! I never have had the chance to see the Northern Lights but it’s definitely a bucket list item.

IMG_4560

I definitely wanted to add a sentiment to this card and decided to make it really simple and use the “Congratulations” sentiment from Artic Snowfall. I didn’t want the sentiment to be too harsh so I decided against using Raven again and went with Olive Branch, which went along the green from the sky.

IMG_4559

I’m really happy how simply gorgeous this card ended up being. I can’t wait to use this stamp for a gorgeous background as well. I hope you enjoyed this card and the idea. I’ll see you back here tomorrow for another card. Have a great day!


Day 1:
LDRS CREATIVE BLOG
JANE
ERIKA
KASSI
ALANNA
JEANNIE <– You are here!
DIANE

Snow Marker | Mama Elephant

Hi there!

I finally got myself to make a Christmas card, thanks to the new release by Mama Elephant! When I received the new release in the mail, I knew I just had to create something immediately.

I wanted something pretty simple and the Grid Window die from Mama Elephant made it really easy. I just colored up 12 snowmen and my card was more or less done. The special element to this card was using the Snow Marker. The snow marker dispenses a liquid that when heat is added, it’ll puff it up like snow. I added it to all the windows for the snowmen to sit on.

ACS_0858.JPG

See how I created it by watching my process video:

SUPPLIES
Items marked with an asterisk (*) were provided by a store or the manufacturer. All other items were personally purchased.

DISCLAIMER
Some products are provided by manufacturers for review and use. Affiliate links may be used at no cost to you.

Pink and Main & Glue Dots Blog Hop

Hi there! Thanks for stopping by my blog for the Glue Dots and Pink & Main Blog Hop collaboration, where you can win a $25 gift card just for leaving a comment. Winners will be announced on Wednesday, September 26, 2018 at 6am.

For today’s card, I decided to use the new stamp set from this month, Eskimo Kisses, and its coordinating dies. I stamped this out on white cardstock and used the dies to cut easily cut all these images out.

IMG_4393

After I colored all the images I cut out, I decided that I wanted to use the Box Card die, which made creating an interactive card extra easy!

IMG_4394

Once I cut out the box card pieces, I used Glue Dot’s glue lines to put everything together. These glue lines are perfect for the tabs that make the box card. Two work perfectly for the side tabs.

IMG_4395

For the inner part of the box, I used Bristol Smooth paper and created a Northern Sky look using distress inks and white splatter. I truly believe that white splatter makes anything into a galaxy or a star filled sky. For the outer part of the card, I die cut out blue paper to mimic ice. Once, I did that I used the Glue Dot’s glue runner to tape all these pieces to the box card.

IMG_4396

I was able to use various Glue Dots adhesive to add the stamped and die cut images to the box. It works really well since Glue Dots has a variety of sizes so it could be added to the nooks and crannies of the images. In particular, the mini dots are a favorite for box cards. Look at the little girl’s feet! They are so small but the mini dots fit perfectly on behind each shoe.

IMG_4397

To finish off this card, I stamped out the sentiment on the matching blue on the interior of the card. I loved how this card turned out and can’t wait to give this away! I hope you enjoyed it and the blog hop. All the other participants are listed below… and remember to comment for a chance to win! Enjoy!

IMG_4398

BLOG HOP LINEUP
Glue Dots 
Tracy 

Robyn
Lynnea 
Amanda
Ilina
Samantha
Zsofia
Dawn
Jeannie — You are here!
Melanie
Jackie 
Grace
Andrea
Danielle
Pink and Main

42165854_10156971014979683_8580890254163050496_n

2 Die Cut Backgrounds | LDRS Creative

Hi there everyone! It’s Jeannie and I’m back to share not just one, but two cards!
When I first saw the Autumn Breeze die in the August release, I really couldn’t believe how gorgeous it was. Normally, I am really picky about background dies because sometimes they take away from your main image. Part of this particular die will cut and part of it embosses, creating really pretty details in the leaves.
I decided to use this die to cut out of kraft cardstock, thinking that it just fits perfectly for Fall and for some reason, I just tend to use this cardstock color more during the Fall.
I really wanted to color using colored pencil on kraft so I decided to choose three green shades to create dimension on the leaves. I used the darkest green in the embossed crevices and the border. Then I used the lightest green in the center of the leaves and then the mid-shade to blend the dark and light out. Doesn’t it look amazing? For the branches, I also used three shades of brown to quickly color it in.
For the center of this die background, I used the oval die cut that comes in this die set. I decided to use one of the sentiments fromMagic Fall Sentiments for the center.
Secondly, I die cut the same Autumn Breeze die on brown cardstock and used a mix of yellow, orange and red colored pencils for the leaves instead. For the center, I decided to use an image from the Happy Fall stamp set to stamp in white and also do some no-line coloring. The little mouse is so adorable and fits right in with this die cut background.
I really love how these cards turned out and I have a video showing my process:

Have a great day! See you next time!

Peek-a-boo Pull Tab card | GSD

Hi there! It’s Jeannie and I’m so happy to be back to share a card as an official Design Team member.

Gerda Steiner Designs recently released a handful of new stamp sets and they are all adorable! Today, I’m focusing one of the smaller sets, Upside Down Flamingo. This set comes with one large flamingo and two large sentiments. I think it’s such a cute image… it’s so silly and I love it!

When I first saw this stamp set, I liked how the head was between the legs peeking at you. I thought it was perfect for an interactive card.

Putting this together was a little tricky because I just wasn’t sure how to go about creating it but once I figured it out, it turned better than expected. It’s also just as silly as the image.

This is a spin on a pull tab using the element of the stamp image itself. Check it out in my video tutorial here:

Hope you love this card as much as I do. I think it’ll bring a smile to anyone’s face. It’s so random and unexpected.

SUPPLIES
Items marked with an asterisk (*) were provided by a store or the manufacturer. All other items were personally purchased.

DISCLAIMER
Some products are provided by manufacturers for review and use. Affiliate links may be used at no cost to you.