Hello everyone! Here is a sneak peek for Penguin Palace’s new release with the awesome stamp set named, My Best Pal. This is releasing March 20th, so get ready!
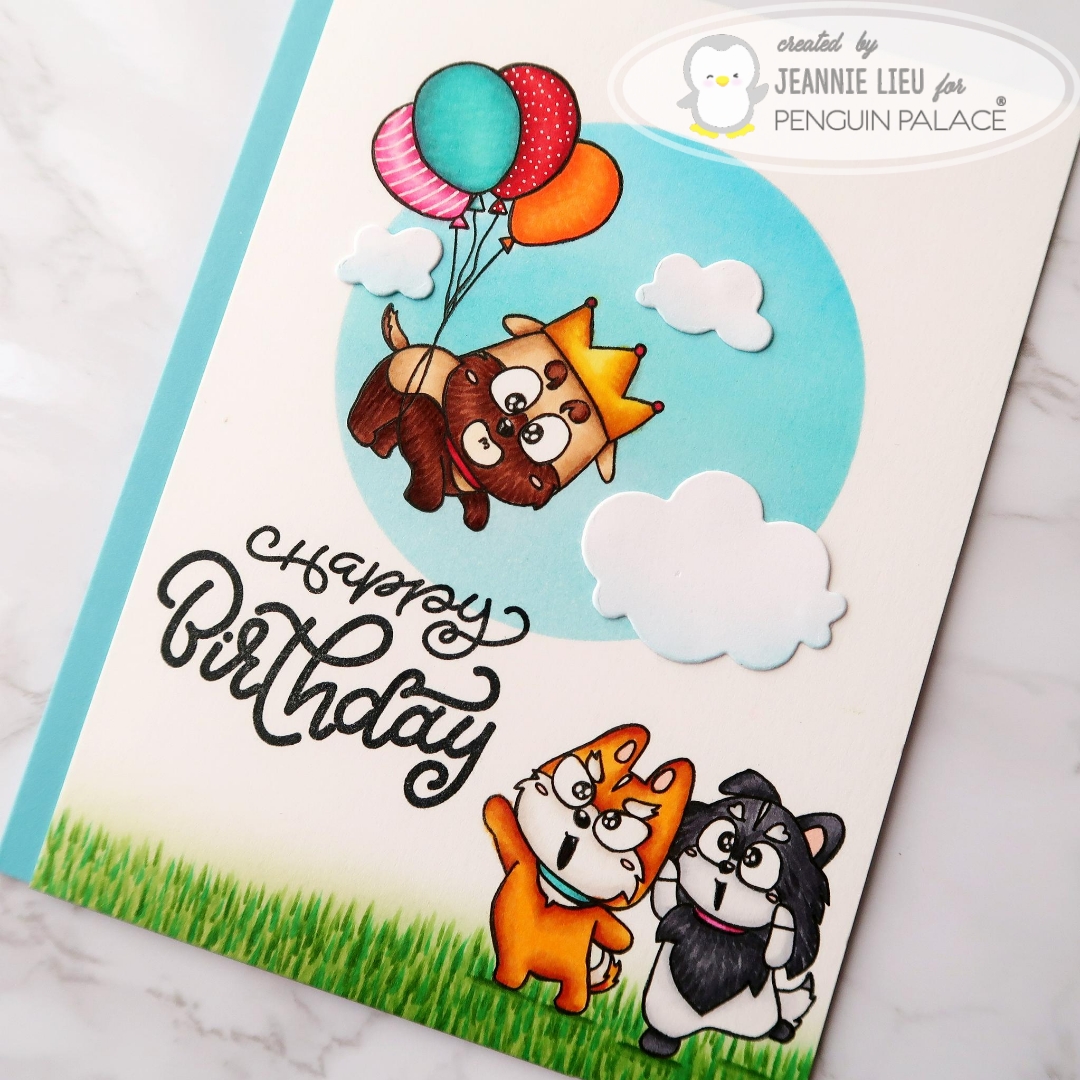
I love the three doggies in this stamp set so I wanted to use all three of them. I didn’t want to create a full scene yet still have one. Sounds weird right?
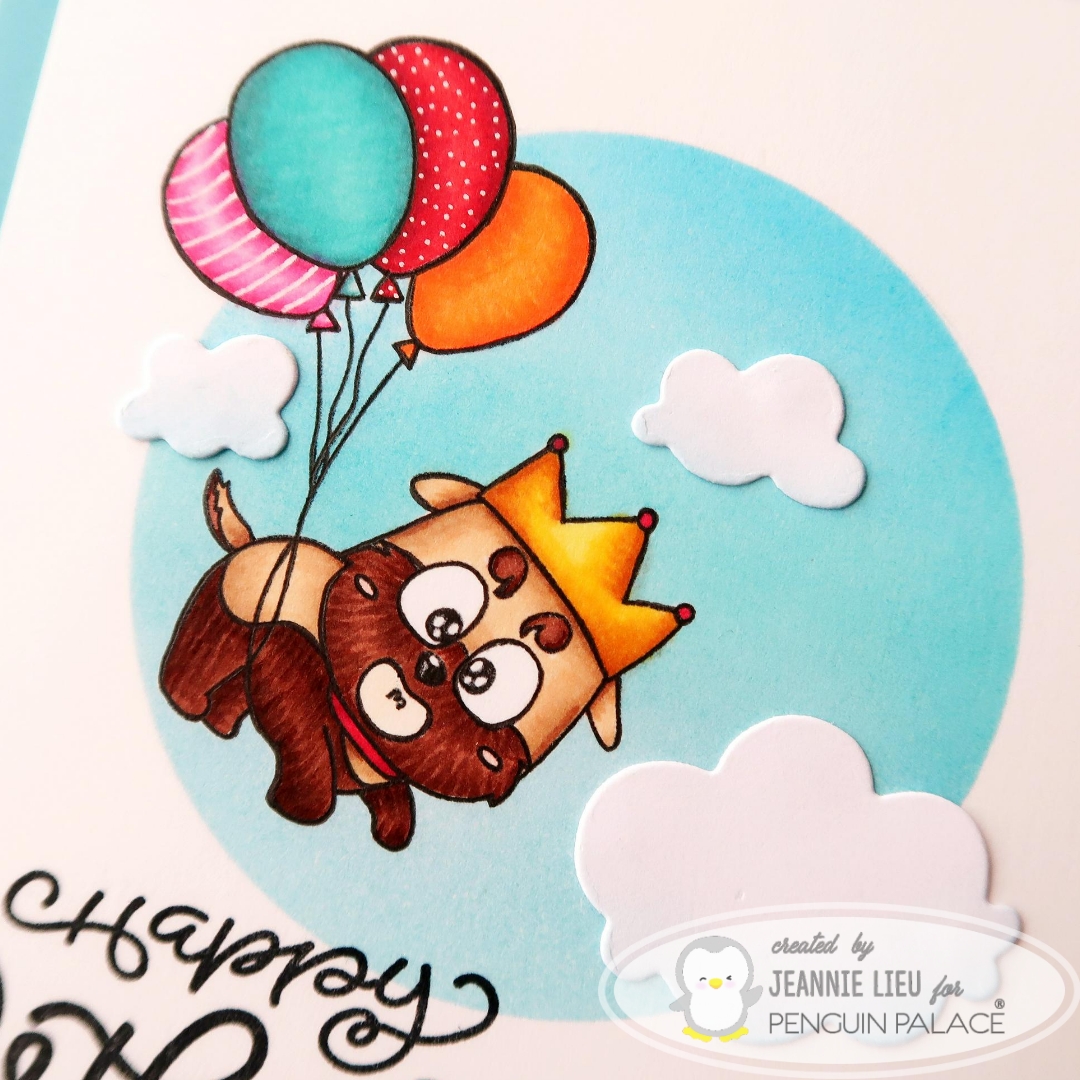
To start off, I stamped out the two doggies in the set looking up. I masked one of them so it looked like one was standing behind the other.
Next, I stamped and masked the doggie with balloons on the top portion of the card. Using masking paper, I masked a circular area where the dog will be. With distress inks, I blended a few colors to create a nice background.
Using a few cloud die cuts, I added them to the circular area to add interest.
For the rest of the card, I just colored in the doggies and added some grass to the bottom. I trimmed the entire panel on the side by a quarter of an inch and mounted this one a blue card base.
Aren’t they all super cute? I can’t wait for you to see the rest of the items releasing!
Thanks for stopping by and I hope you enjoyed the sneak peeks. Come back again soon for some more inspiration and ideas!
Thank you for joining us on our LDRS Creativeinspiration week blog hop! We are so excited to feature what was showcased at Creativation in January! There are lots of gorgeous projects using products from our new release. You can even see them in action with step-by-step projects by our amazing designers on their blogs and our own LDRS Creative Youtube channel(make sure you subscribe)!
Who’s ready for mini hybrid inks? We are adding the latest two sets of our very popular Hybrid inks in a mini version, perfect for ink blending, stenciling, stamping, colouring and embossing: At The Beach and On The Farm!
Next, we have two new 6″x6″ stencils that are sure to be as popular as the others: Playful Patterns and the Waffle!
Each day we are giving away a $25 LDRS Creative gift card to one lucky hopper! To enter leave a comment on each blog in the hop, plus follow us on Facebook and Instagram. Winners will be announced on the LDRS Creative inspiration blog on March 5th.
AND for the release event we are excited to offer some great savings! Save 15% on the new release*, including already discounted bundles and use code FEB15 (*Coupon valid until midnight EST 3/6/18)
Hi everyone! Thanks for checking out Day 2 of the blog hop for LDRS Creative. I’m sharing a simple card that’s easy to put together and gives you time for some relaxing coloring!
For today’s card, I’m using two stamp sets together that were both previously only available on HSN. My main image focuses on Polkadoodles’ Holly stamp set, Story Time. This is a larger image that takes up most of an A2 card panel. I stamped this on the bottom right of my card panel and colored it in.
Once I finished coloring this, I wanted to add a little color in the top left corner so I used Swimming Hole hybrid ink and blended it very lightly.
Since this set doesn’t come with a sentiment, I pulled out the If Friends Were Flowers stamp and die set. This set was also previously only available on HSN, and it has so many different sentiments that you can use. I die cut the large “friend” sentiment out of black cardstock and also stamped the smaller sentiment using Watermark ink with white embossing powder. It’s so perfect for this card.
I decided to trim the top and left of the card by a quarter of an inch. This helped the sentiment fill up the white space in the top left.
I’m loving this simple and clean card. As with most cards, all you need is an image and a sentiment. I’m loving how this turned out and I hope you did too!
Thanks for stopping by! Come back again soon for some more inspiration and ideas!
Thank you for joining us on our LDRS Creativeinspiration week blog hop! We are so excited to feature what was showcased at Creativation in January! There are lots of gorgeous projects using products from our new release. You can even see them in action with step-by-step projects by our amazing designers on their blogs and our own LDRS Creative Youtube channel(make sure you subscribe)!
Who’s ready for mini hybrid inks? We are adding the latest two sets of our very popular Hybrid inks in a mini version, perfect for ink blending, stenciling, stamping, colouring and embossing: At The Beach and On The Farm!
Next, we have two new 6″x6″ stencils that are sure to be as popular as the others: Playful Patterns and the Waffle!
Each day we are giving away a $25 LDRS Creative gift card to one lucky hopper! To enter leave a comment on each blog in the hop, plus follow us on Facebook and Instagram. Winners will be announced on the LDRS Creative inspiration blog on March 5th.
AND for the release event we are excited to offer some great savings! Save 15% on the new release*, including already discounted bundles and use code FEB15 (*Coupon valid until midnight EST 3/6/18)
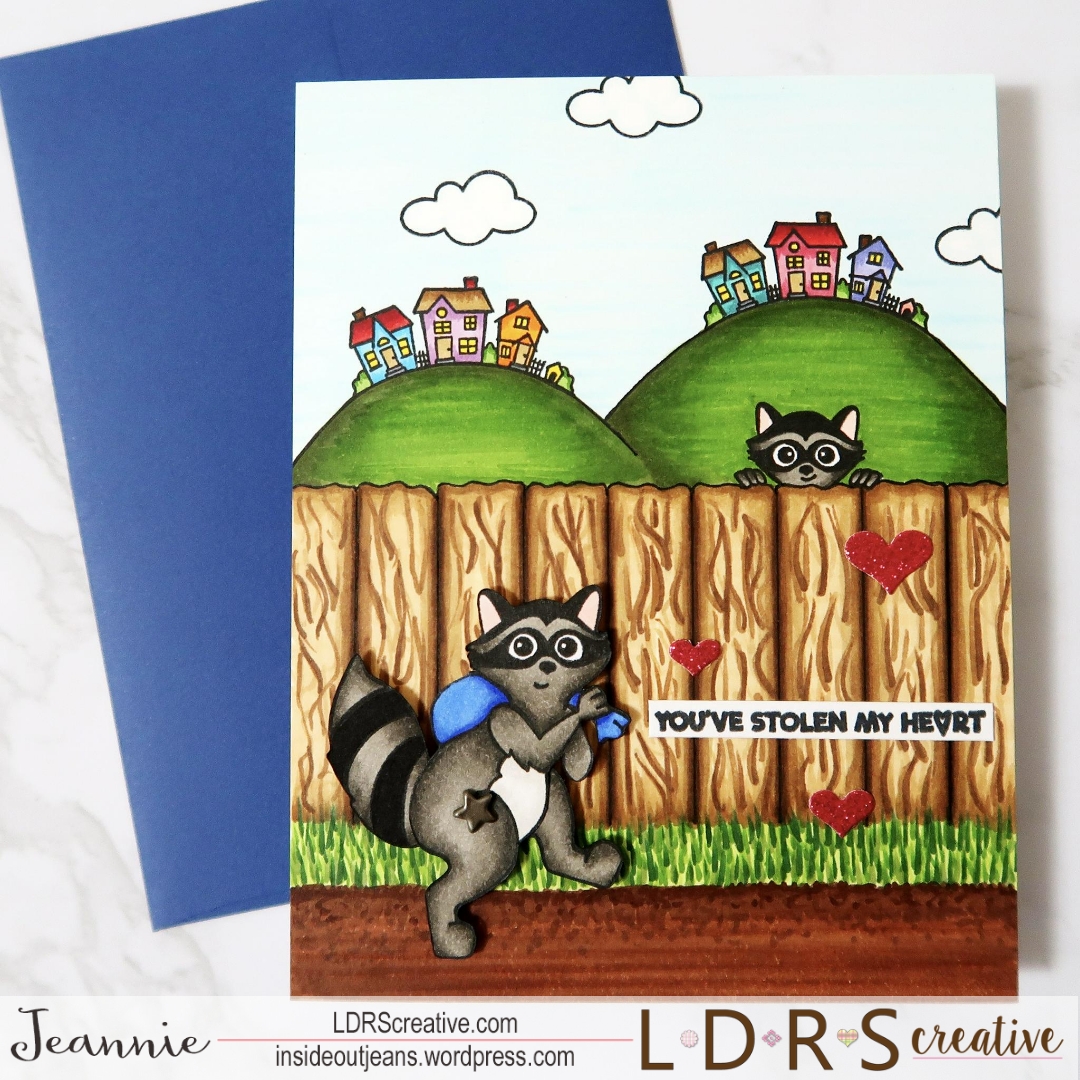
Hi everyone! Thanks for checking out the blog hop for LDRS Creative. I hope you’ve been enjoying all the new items and get inspired to create. I have a project using the new stamp set called Super Critters! It’s one of the new interactive stamp sets that was showcased at Creativation and I personally think it’s super cute.
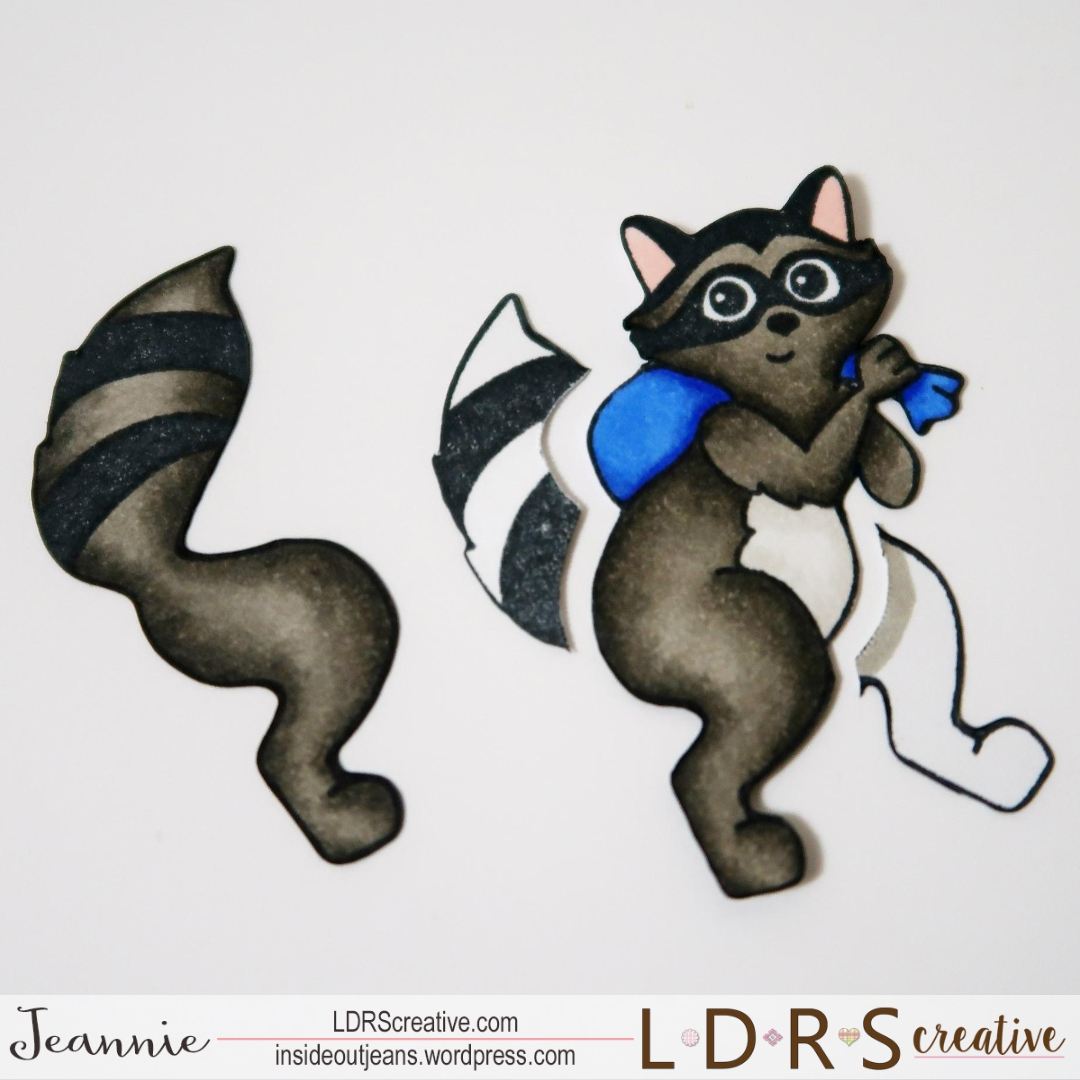
I was drawn to the raccoon because it’s pretty adorable and it’s actually a critter I don’t see often in stamp sets. This particular raccoon is the image that has an interactive element to it.
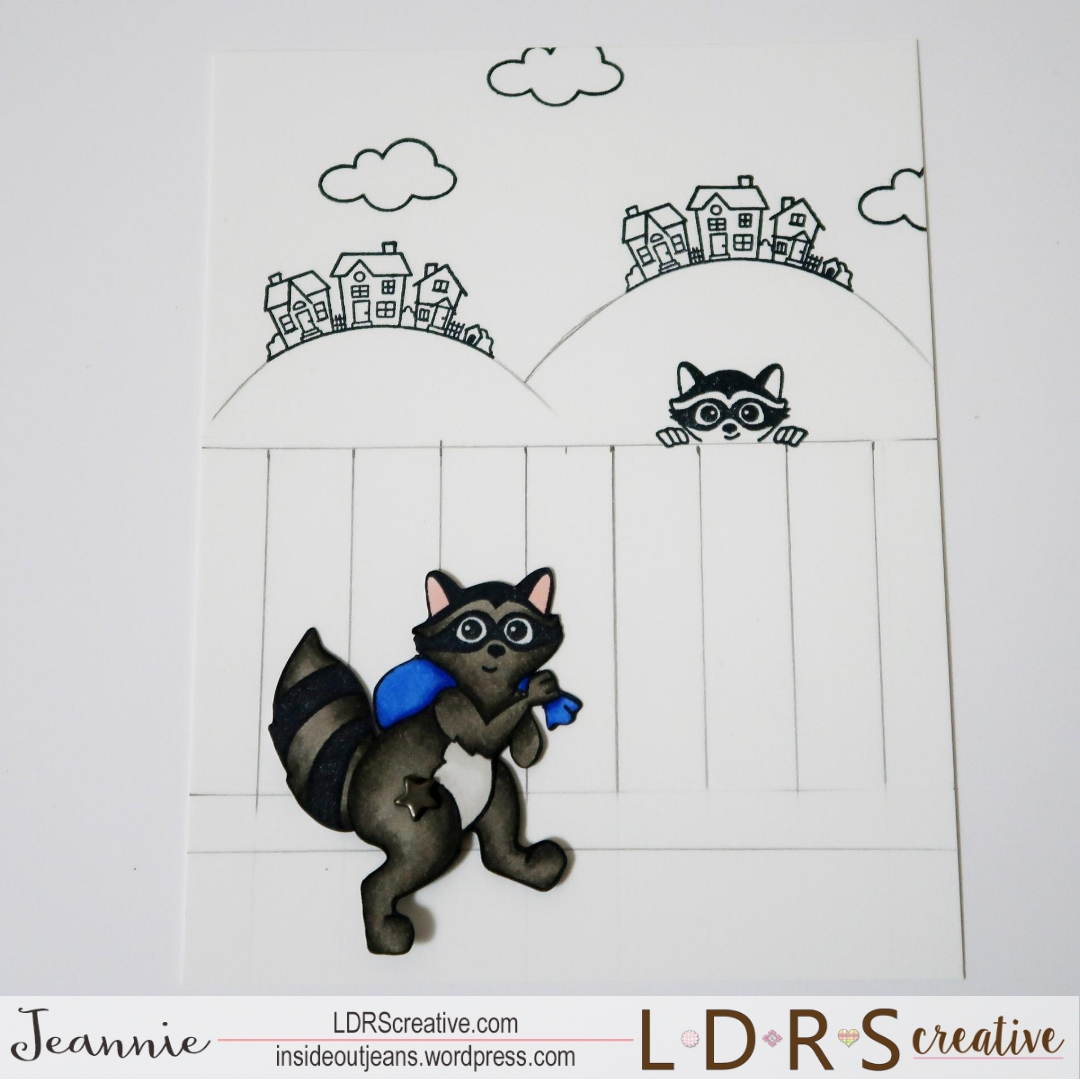
I stamped the main image and the interactive body part (tail and leg) using Raven hybrid ink, which you can use with alcohol markers and watercolor. For the main image, you don’t need to color the tail and the left leg since you actually trim this portion off.
The interactive body part goes right behind the main image and is held together by a brad. I only had a star brad around, and this is ok because it looks like a little tattoo on the raccoon.
I used a few of the smaller images from the set to create a background scene. Using a pencil, I filled out the rest, including a little fence so the raccoon with her two paws could be looking over something.
Once I finish drawing everything in, I used an alcohol marker friendly pen to outline all the areas I drew in. I went ahead and colored everything bringing the scene to life.
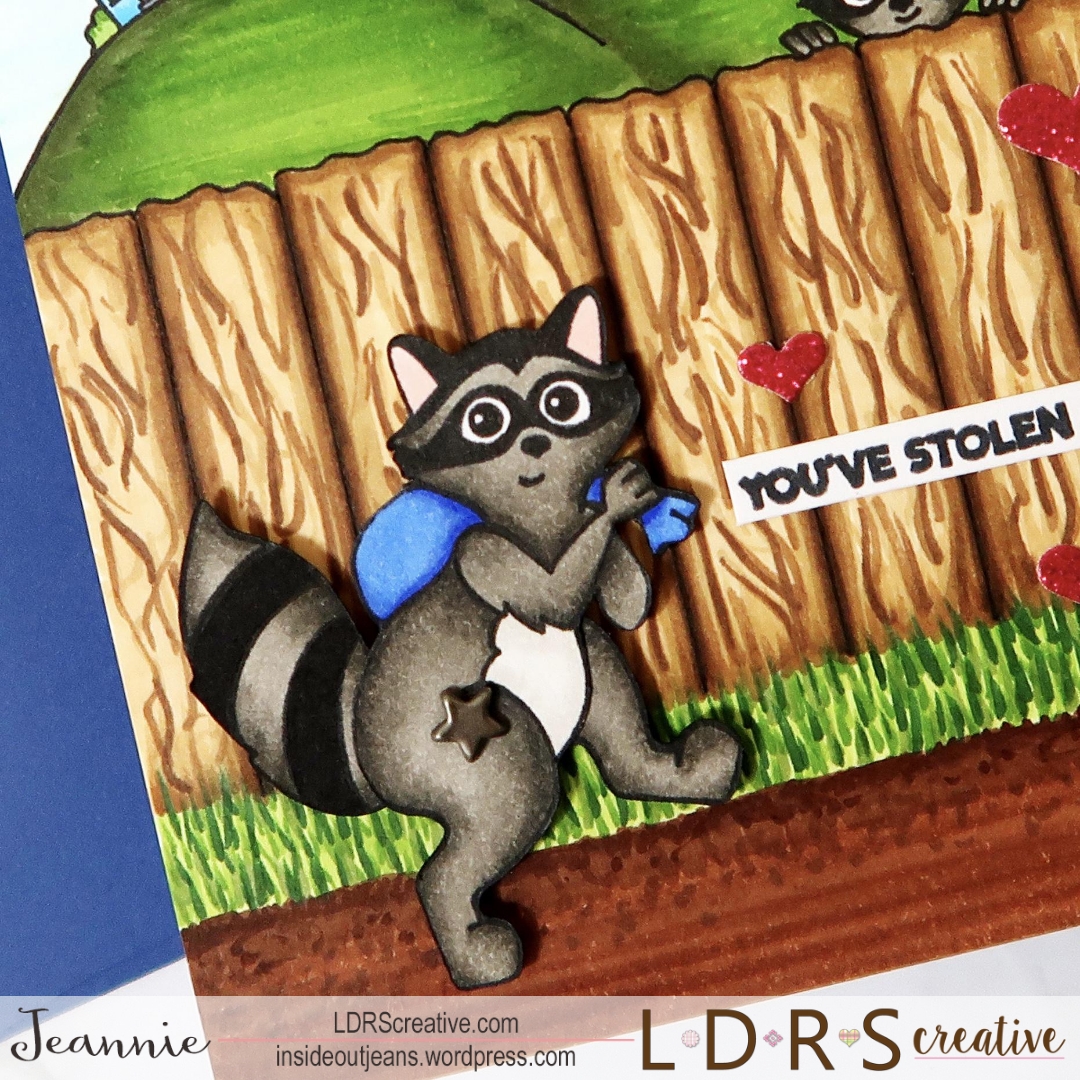
For the main raccoon, I added a little bit of foam tape behind his head and behind his right leg. The foam tape gives the image enough dimension so that the brad and his tail and leg could move freely.
To finish off this card, I added the sentiment “You’ve Stolen My Heart”. I also used the little hearts from the Scalloped Rectangle Die and cut hearts from red glitter cardstock. It adds a cute touch to the card and corresponds to the sentiment.
I love how it turned out and I’m loving the movement. Check out the card in action over on my instagram!
Thanks for stopping by! Come back again soon for some more inspiration and ideas!
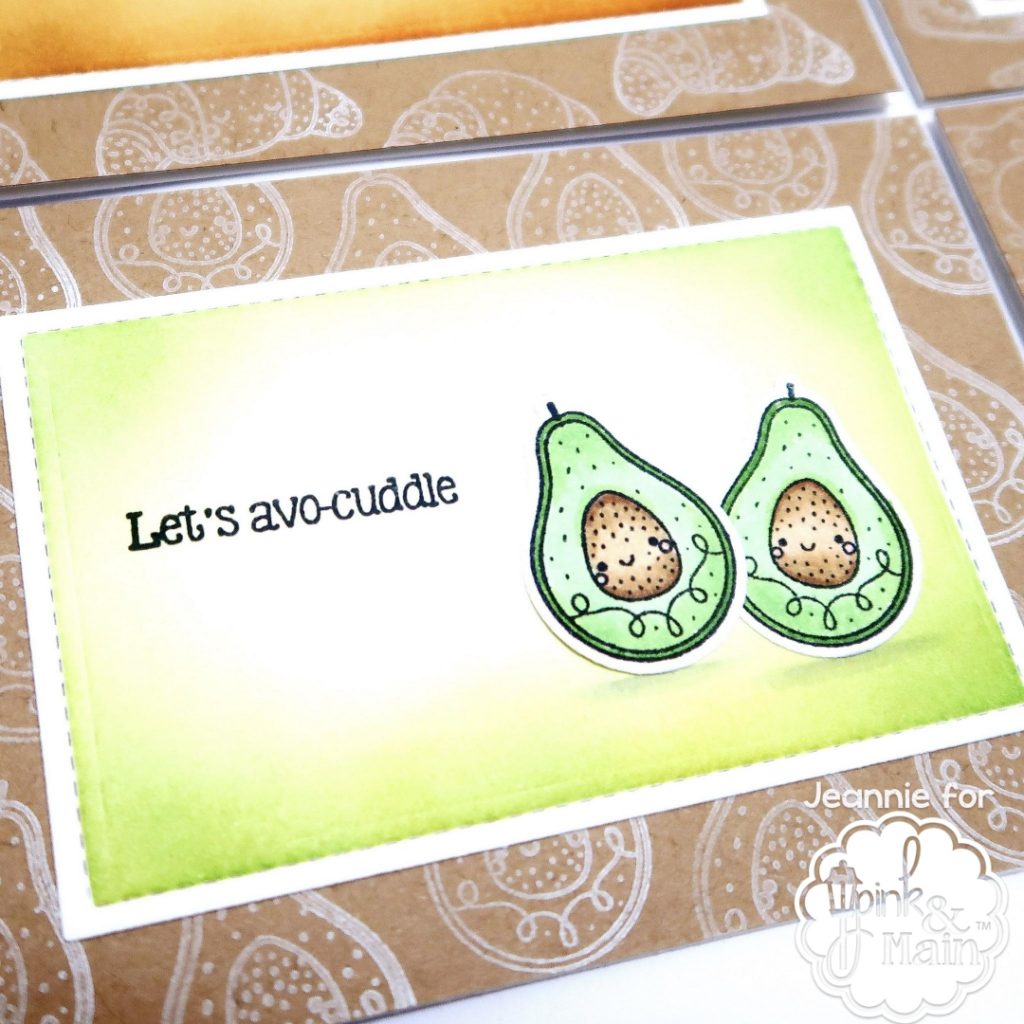
Hi everyone! I’m back today using Pink and Main’s new release with the amazing stamp set named, Breakfast Fun.
I love the idea of card sets as gifts and when a set like this comes along, it’s the first thing to come to mind. Breakfast Fun is perfect for it. It has images that go with each sentiment in the set so I’m able to use every single thing in this stamp set at once.
I also created a video to go with these cards so please check it out if you’re interested in how these all come together.
Here’s all nine of them! I was able to utilize the entire stamps set along with the sentiments and I think that’s amazing to do.
Thanks for stopping by! Come back again soon for some more inspiration and ideas!
→ SUPPLIES ← Items marked with an asterisk (*) were provided by a store or the manufacturer. All other items were personally purchased.
I’ve had this set for awhile now and I had a vision for this card but never had a chance to create it…. until now so I hope you get inspired to create!
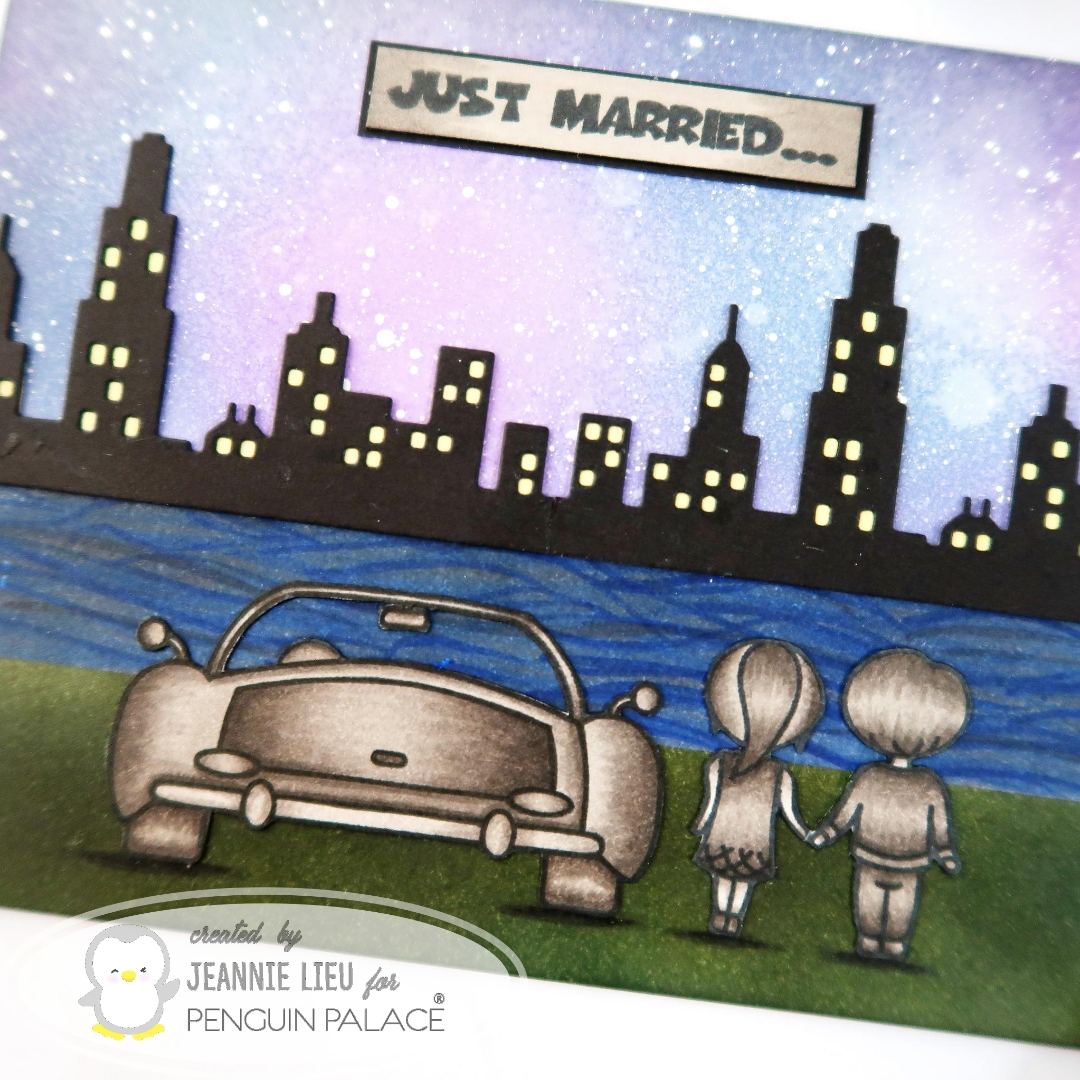
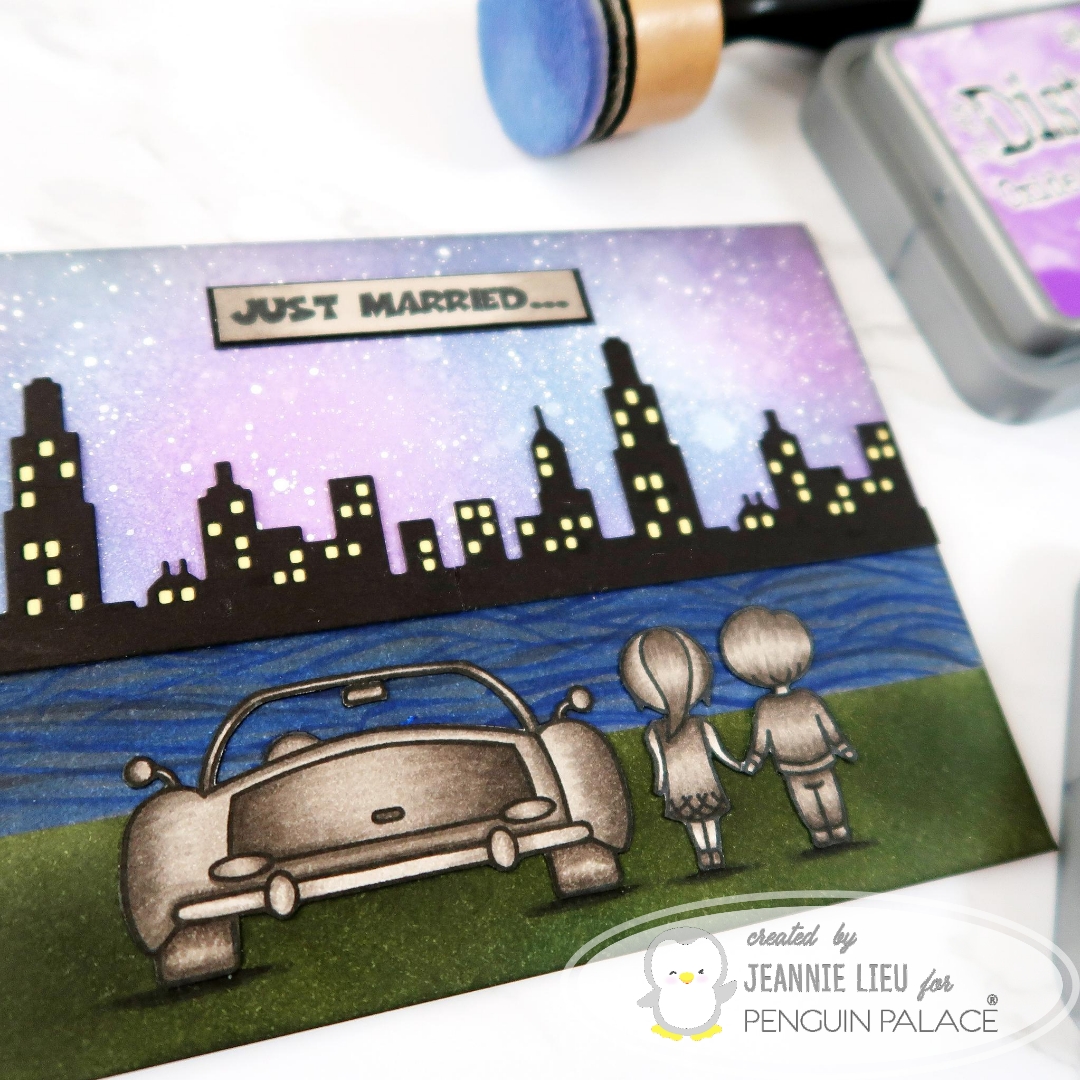
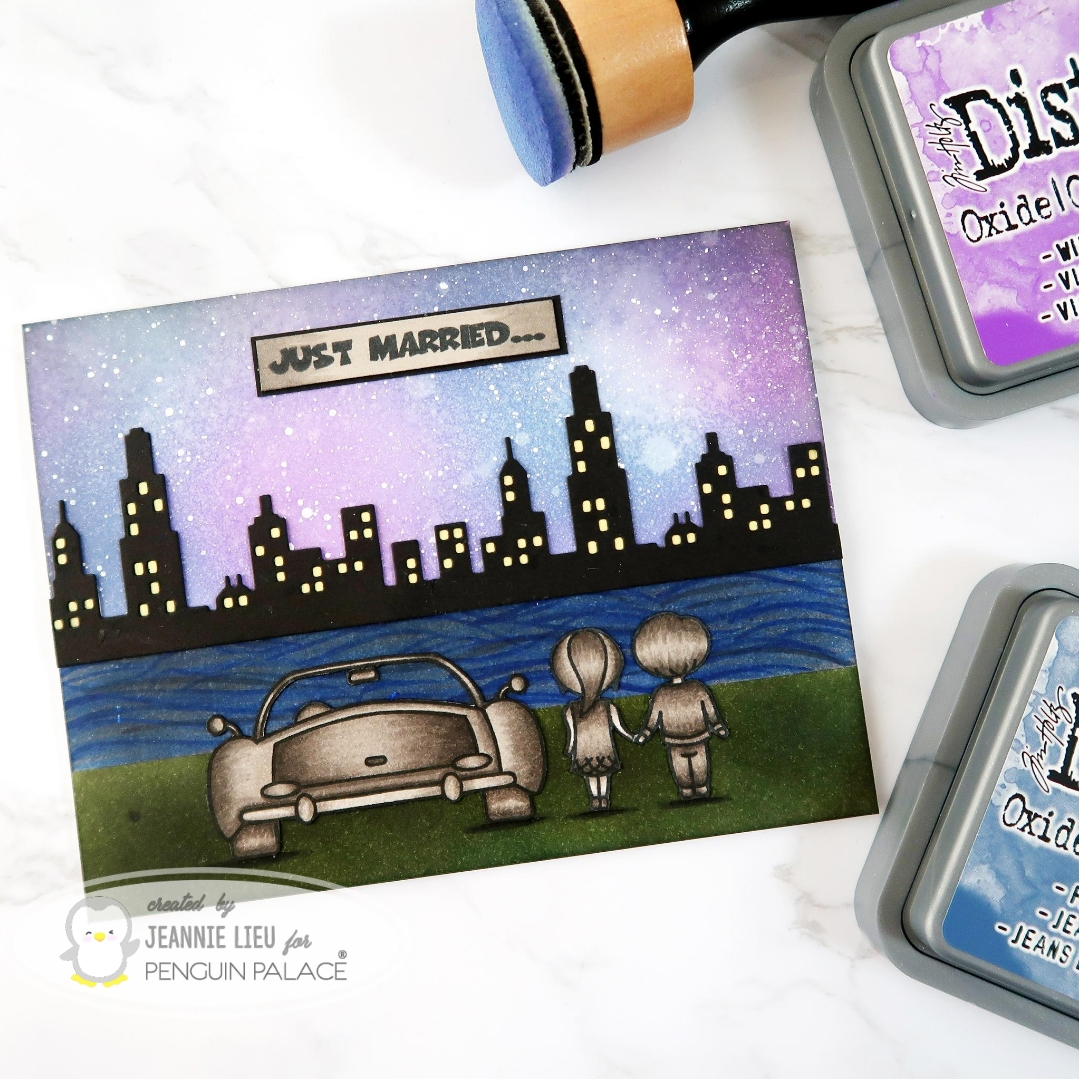
I wanted a silhouette of the car and the couple watching a sunset or enjoying some kind of view. This card accomplishes this because the stamp set includes the front and back of both the car and people. I stamped them out and colored them in a greys to create a monotone feel.
I also created a blue and purple sky background along with using glimmer spray and white opaque paint to add texture. I added a cityscape over the sky so the couple could be peering at the city lights.
To ground the couple, I wanted them to be peering at the skyline from a distance so I added some water between the city and added grass for them to stand on.
Thanks for stopping by! Come back soon!
→ SUPPLIES USED ← Items marked with an asterisk (*) were provided by a store or the manufacturer for review and use. All other items were personally purchased. Affiliate links may be used at no cost to you.
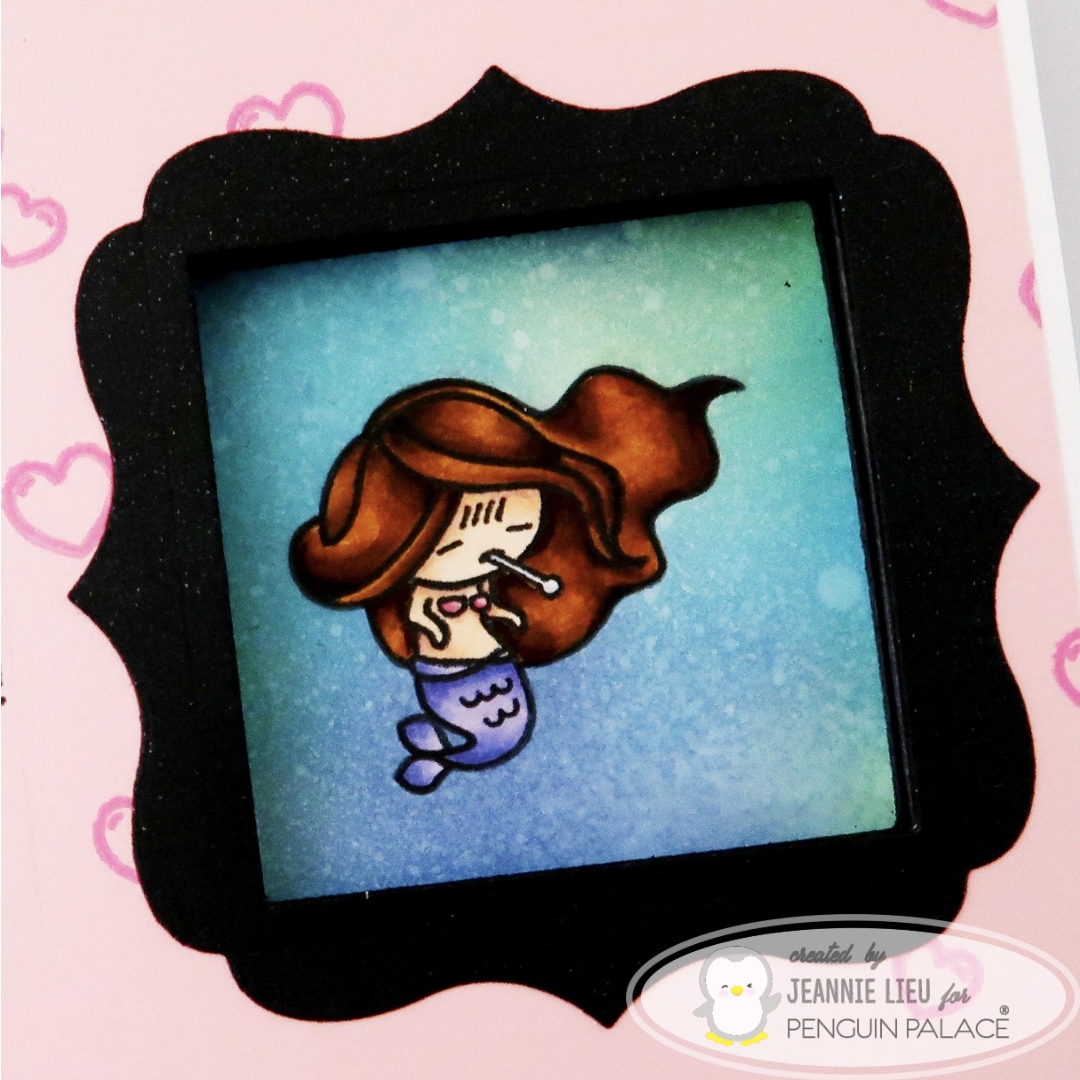
Hi everyone! Today I wanted to share a card I created using Penguin Palace’s stamp set named, Get Well Soon. This is a smaller stamp set but a perfect one to wish someone good thoughts. I previously did a flip card that showed the sick mermaid and then flipped to a happy, healthy mermaid.
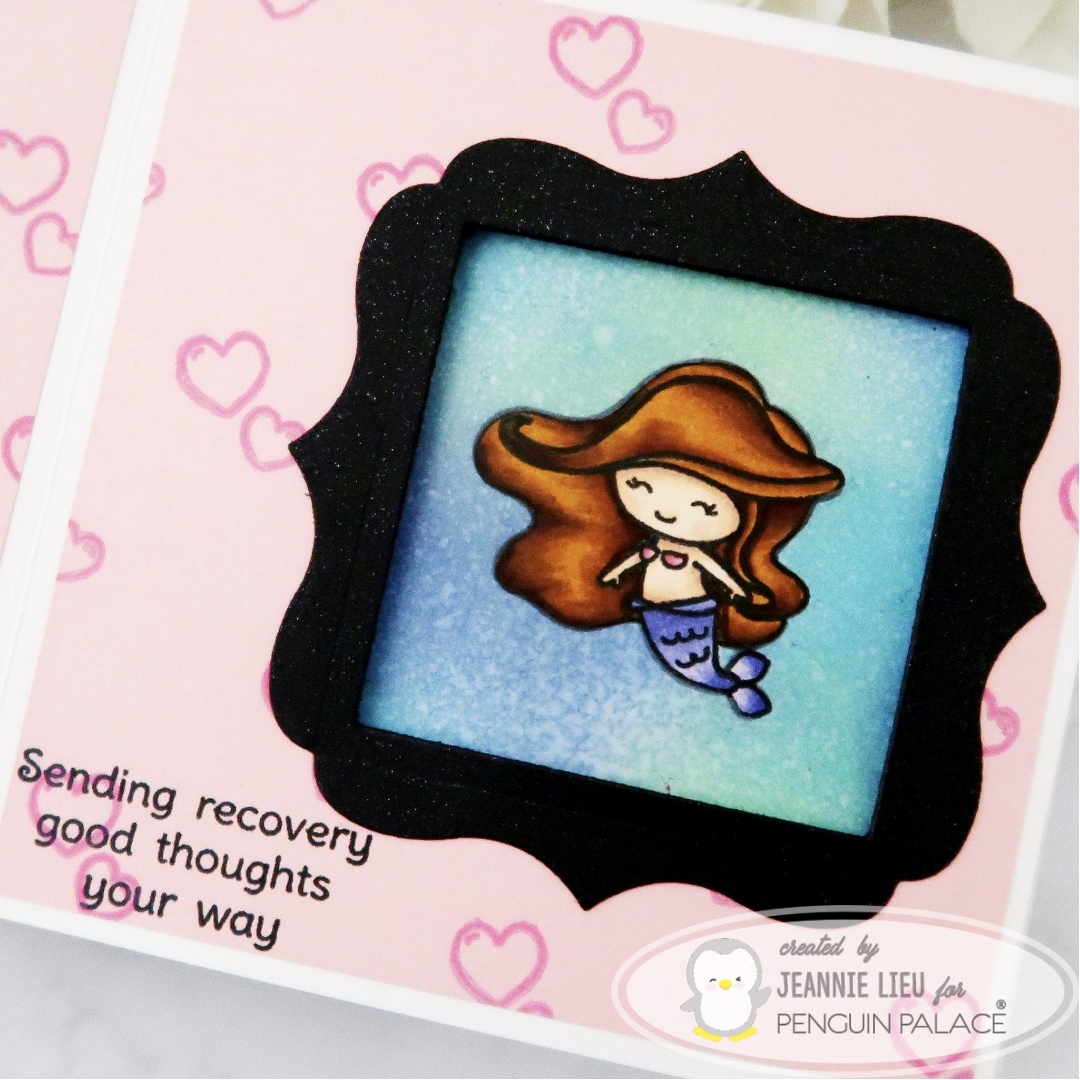
Today, I wanted to share this peek-a-boo card that is essentially the same idea just one step up from a flip card. There are a ton of tutorials for this type of card and this set is perfect for it. The front of the card will feature the sick mermaid and then when you open it, it’ll feature a healthy mermaid.
I used pink cardstock and used the top two hearts from the bubbles to stamp all over, creating my own patterned paper for the front and inside of the card. For the frame, I used Mama Elephant’s Union Square and Sizzix’s Square Framelits to create the window. I chose Penguin Palace’s Mysterious Galaxy cardstock for this because it has this gorgeous glitter on it. I love how it’s super smooth and not grainy. I was able to die cut using the paper easily.
For the background of the mermaid, I used three distress oxide ink colors, sprayed it with Hero Art’s Shimmer Spray, and used a paper towel to pick up the splatters creating a watery effect.
I really like how this card came out and I hope you did too!
Thanks for stopping by! Come back soon!
→ SUPPLIES USED ← Items marked with an asterisk (*) were provided by a store or the manufacturer for review and use. All other items were personally purchased. Affiliate links may be used at no cost to you.
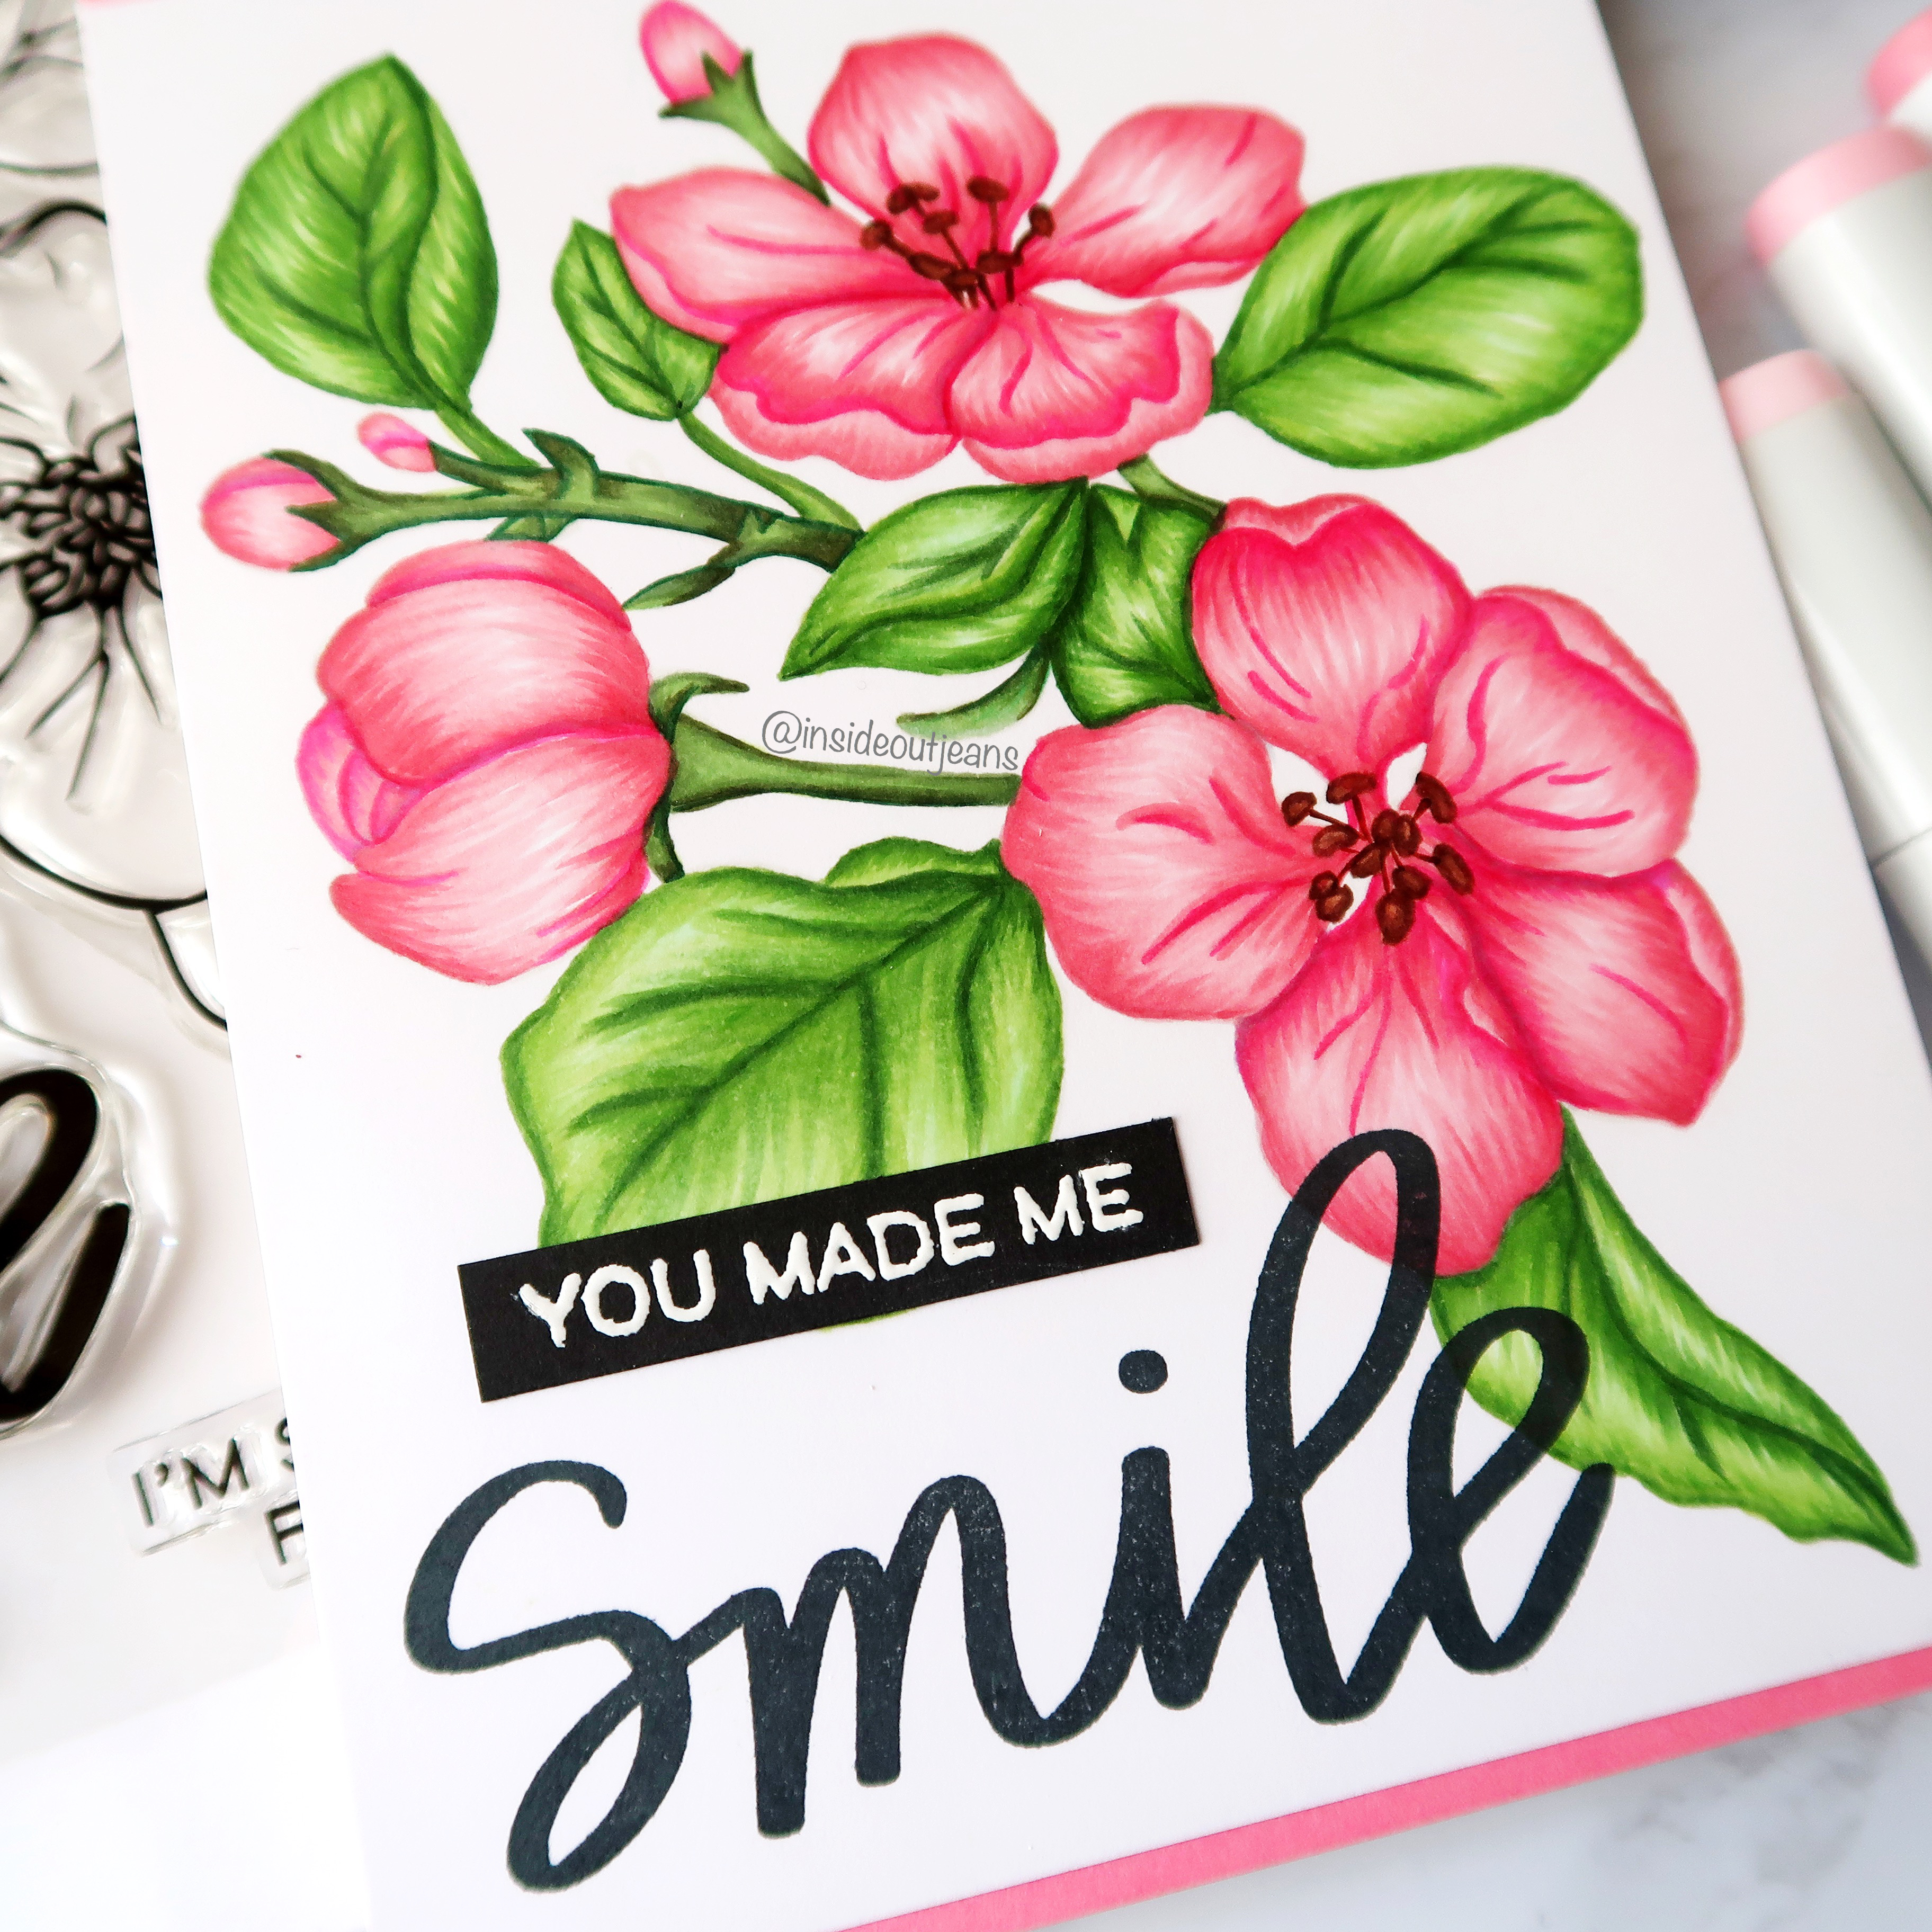
Hi everyone! I’m here to share a card I created using The Stamp Market’s stamp set named, Friendly Bunch.
I met Amy, the owner of The Stamp Market, when I visited her booth at Creativation and she was so sweet. When she spoke about her products, you could tell she was so passionate and genuine. I really was inspired to go home and ink up one of her stamp sets… so I did.
I also met Fleurette, owner at Inkon3, at Creativation and wanted to practice some no-line coloring using her Fadeout Ink.
It took a bit of time to color since this stamp image is pretty large as it takes up most of an A2 panel, but I was really proud of myself once completed. Generally, it’s a very simple card since the floral image makes up for the entire card. The sentiment in the set is also really large, so it took up the empty space on the bottom. To add a little different interest to it, I stamped the smaller portion of the sentiment on black cardstock, and heat embossing using white embossing powder.
I love how this card came together. If you love no-line coloring, you really need to check out this ink… and if you love florals, you really should check out this stamp set. Combined, it makes one gorgeous card.
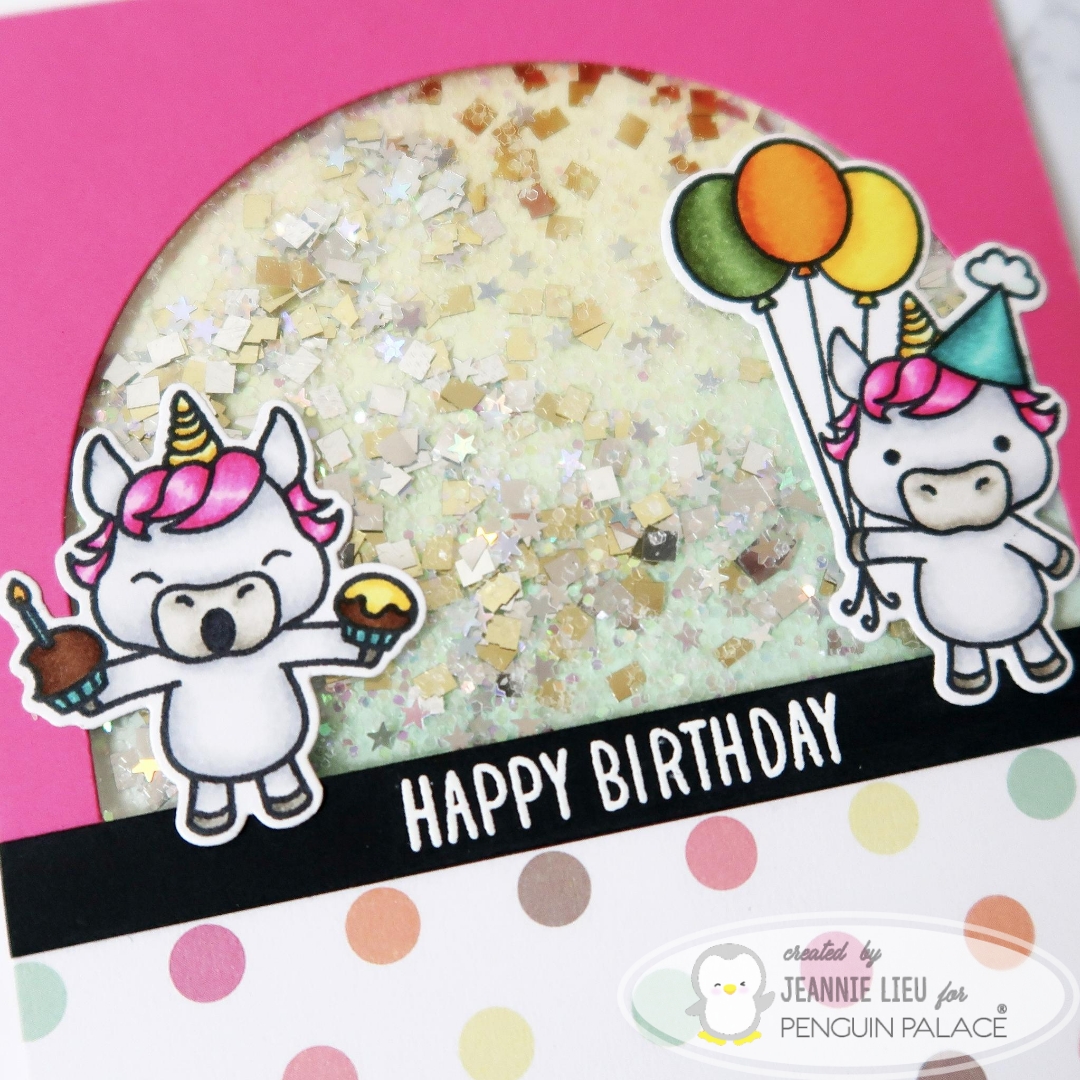
I’ve already created some cards using this set because it’s so easy to work with and super versatile. However, I really wanted to do something bright, fun, and pink.
I wanted to create a shaker card for today. I used one of the Stitched Dome STAX Die-namics for my opening because I wanted something different from a circle, square or rectangle. Since I decided to use a pink background, I wanted to break up the color by using a piece of fun patterned paper for the bottom portion of the card. I added the sentiment using Versamark ink and Hero Art’s white embossing powder to a strip of black cardstock.
I added acetate to the die cut opening, placing foam tape around the dome area and around the card panel. Adding bits of glitter and shaker bits, I completed the shaker portion of this card.
I originally used one of the unicorn images but adding it to the card, it looked really empty so I stamped, colored and die cut another one. It really helped fill out the card and I totally love it!
Thanks for stopping by! Come back soon!
→ SUPPLIES USED ← Items marked with an asterisk (*) were provided by a store or the manufacturer for review and use. All other items were personally purchased. Affiliate links may be used at no cost to you.
Hi there! Today I’m sharing another card using Penguin Palace’s Love Train stamp set. I used the same concept as one of my previous cards (Spinning Bunnies). It has a hidden spinning mechanism.
The only difference with this card compared to my previous card is that I stamped the trains individually around a circle. I wanted variation among the trains.
I kept everything really simple. I used a clouds stencil and some distress inks for the background. For the front portion of the card, I stamped some of the landscape images in grey so it doesn’t distract from the spinning trains.
For the idea behind the concept, check out the corresponding video that explains the mechanism. It’s really simple.
Thanks for stopping by to check out this card. See you next time!
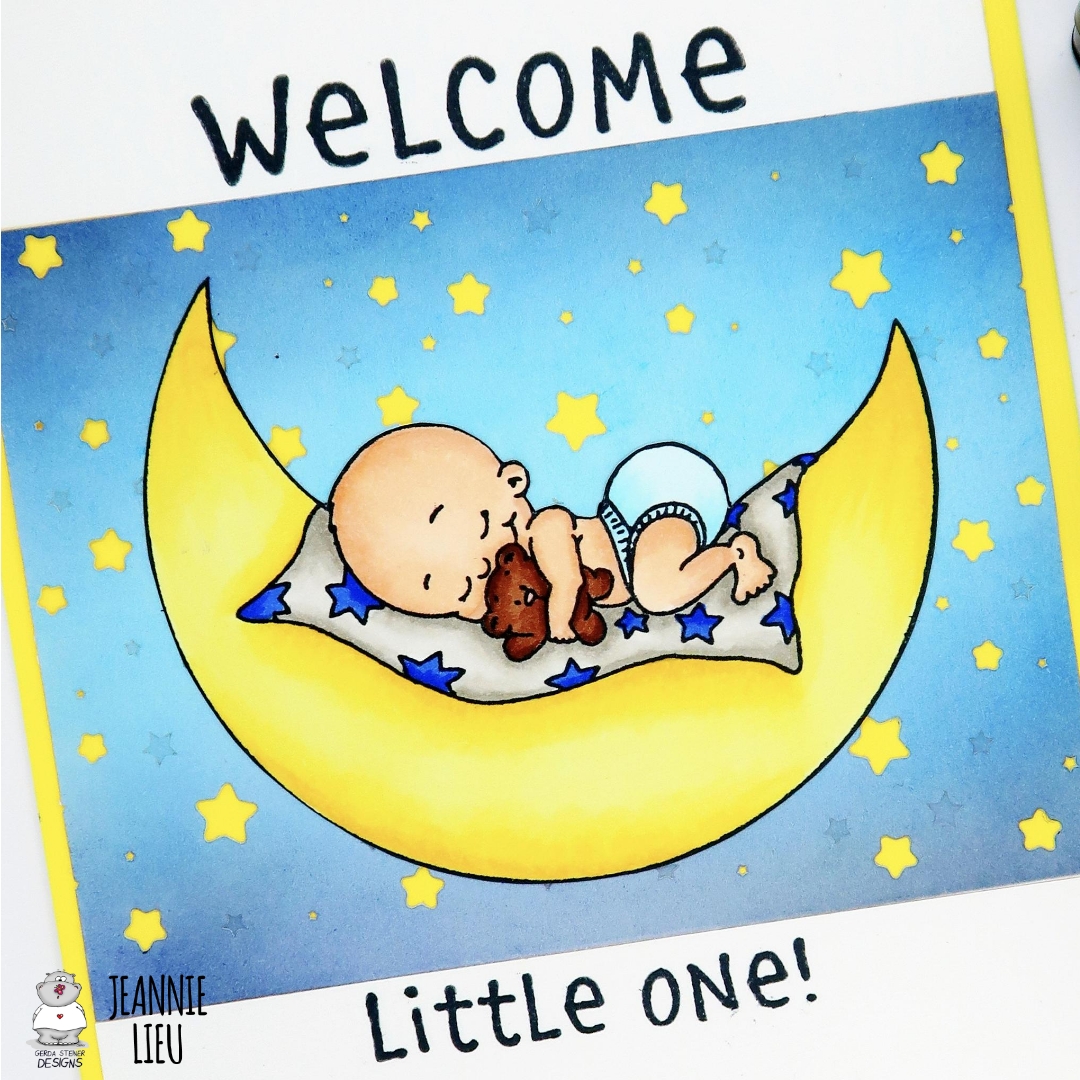
Hi everyone! I’m back to share another card with you today using one of Gerda Steiner Designs’ stamp, Hello Little One. This is one of the images that was originally a digital stamp and now converted to a clear stamp. Personally, I love clear stamps over digital stamps because I want to be able to stamp directly to a card base.
In this case, I actually fussy cut the image out because it was easier for what I wanted to do. I created a distress ink background with a bit of an ombre effect. To spice it up a little more, I used a die that cut out stars and embossed. I put this over a piece of yellow cardstock so the color could peek through the stars.
Once I added this, I trimmed it down a bit so it’s a strip that runs across the card base. I added the sentiments on the top and bottom to finish off the card.
I really like how this one turned out. Simple and sweet!
Thank you for joining us on our LDRS Creativeinspiration week blog hop! We are showcasing lots of gorgeous projects using products from our new release. You can even see them in action with step-by-step projects by our amazing designers on their blogs and our own LDRS Creative Youtube channel(make sure you subscribe)!
In this release, we are celebrating love and friendship, being on Cloud #9 with sweet new products!
Who’s ready for mini hybrid inks? We are adding two sets of our very popular Hybrid inks in a mini version, perfect for ink blending, stenciling, stamping, colouring and embossing: COUNTY FAIR and SUMMER SHORE.
Lastly, because we wanted to show you how all the products come easily together, we decided to rerelease the Sincerely Yours 6×6 paperpack. It has so many fantastic patterns; give them a try!
And you can grab the entire release in bundles, because you KNOW you need them all!
Simply use the list at the end of the post to keep hopping!
Each day we are giving away a $30 LDRS Creative gift card to one lucky hopper!To enter leave a comment on each blog in the hop, plus follow us on Facebook and Instagram. Winners will be announced on the LDRS Creative inspiration blog on December 4th.
AND for the release event we are excited to offer some great savings!
Save 15% on the new release*, including already discounted bundles and use code LOVE15
(*Coupon valid until midnight EST 12/2/18)
For today’s card, I’m sharing a really simple, layered card. I love these kind of cards since they are easy to put together.
In the new release, there’s the Eyelet die that is just gorgeous. I paired the die with the new paper pack, Sincerely Yours. It was just perfect. The die comes with three items, the eyelet frame, a small rectangular piece and a tag (which I didn’t use). I used the frame and rectangular piece for this card. I also trimmed down a rectangle that’s a little larger using black cardstock.
I stamped one of the flower blooms from the Bloom in Love stamp set and added the sentiment.
Then I just layered all the pieces together and voila! a super simple yet gorgeous card.
Hope you have enjoyed the new release blog hop! Be sure to leave a comment for a chance to win some prizes!
Thank you for joining us on our LDRS Creativeinspiration week blog hop! We are showcasing lots of gorgeous projects using products from our new release. You can even see them in action with step-by-step projects by our amazing designers on their blogs and our own LDRS Creative Youtube channel(make sure you subscribe)!
In this release, we are celebrating love and friendship, being on Cloud #9 with sweet new products!
Who’s ready for mini hybrid inks? We are adding two sets of our very popular Hybrid inks in a mini version, perfect for ink blending, stenciling, stamping, colouring and embossing: COUNTY FAIR and SUMMER SHORE.
Lastly, because we wanted to show you how all the products come easily together, we decided to rerelease the Sincerely Yours 6×6 paperpack. It has so many fantastic patterns; give them a try!
And you can grab the entire release in bundles, because you KNOW you need them all!
Simply use the list at the end of the post to keep hopping!
Each day we are giving away a $30 LDRS Creative gift card to one lucky hopper!To enter leave a comment on each blog in the hop, plus follow us on Facebook and Instagram. Winners will be announced on the LDRS Creative inspiration blog on December 4th.
AND for the release event we are excited to offer some great savings!
Save 15% on the new release*, including already discounted bundles and use code LOVE15
(*Coupon valid until midnight EST 12/2/18)
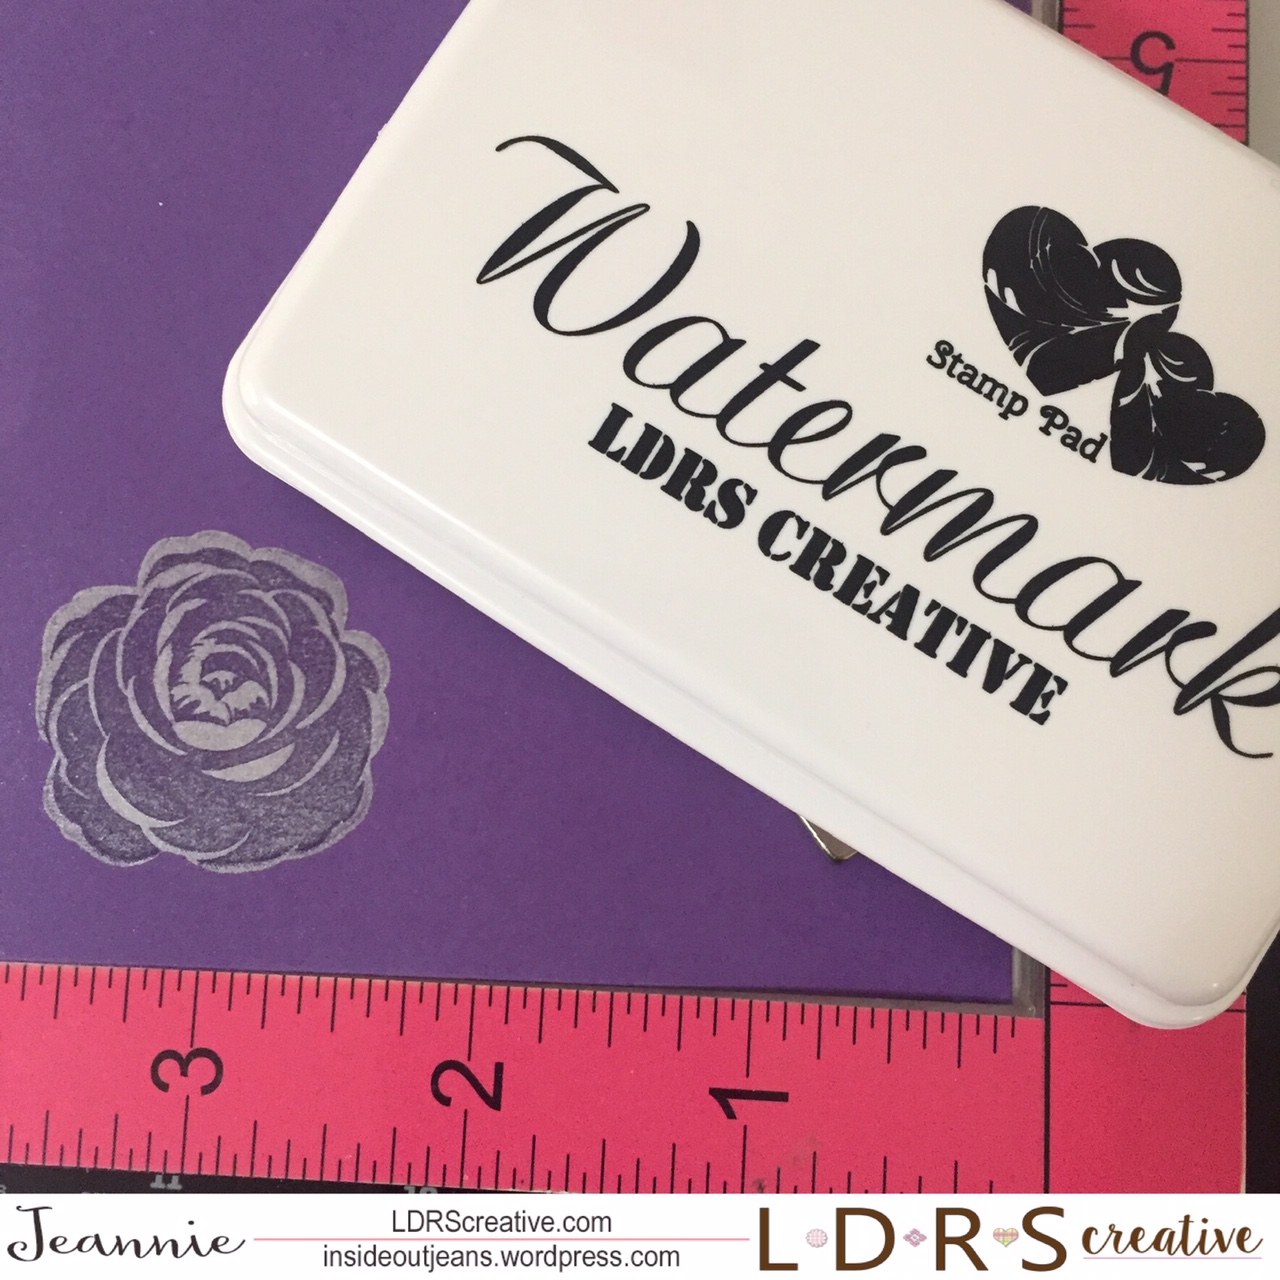
For today’s card along the LDRS blog hop, I’m sharing more details on my card today using a technique with perfect pearls and Watermark ink.
The newest set, Love in Bloom, includes layered dies. I personally don’t care for a lot of different inks because I just prefer to color versus stamping out solid images. The only time I run into issues is when there are layered stamps but this is a simple solution to that.
Using LDRS watermark emboss ink, I’m stamping the first solid bloom stamp on colored cardstock. I went with purple so I would end up with purple flowers. Once the watermark ink was on the paper, I would add perfect pearls over it.
Nothing that looks super special, but it will look gorgeous when we finish. For the second layer of the stamp, I’m once again using watermark ink to stamp it and it’ll lift the pearlized stamping up.
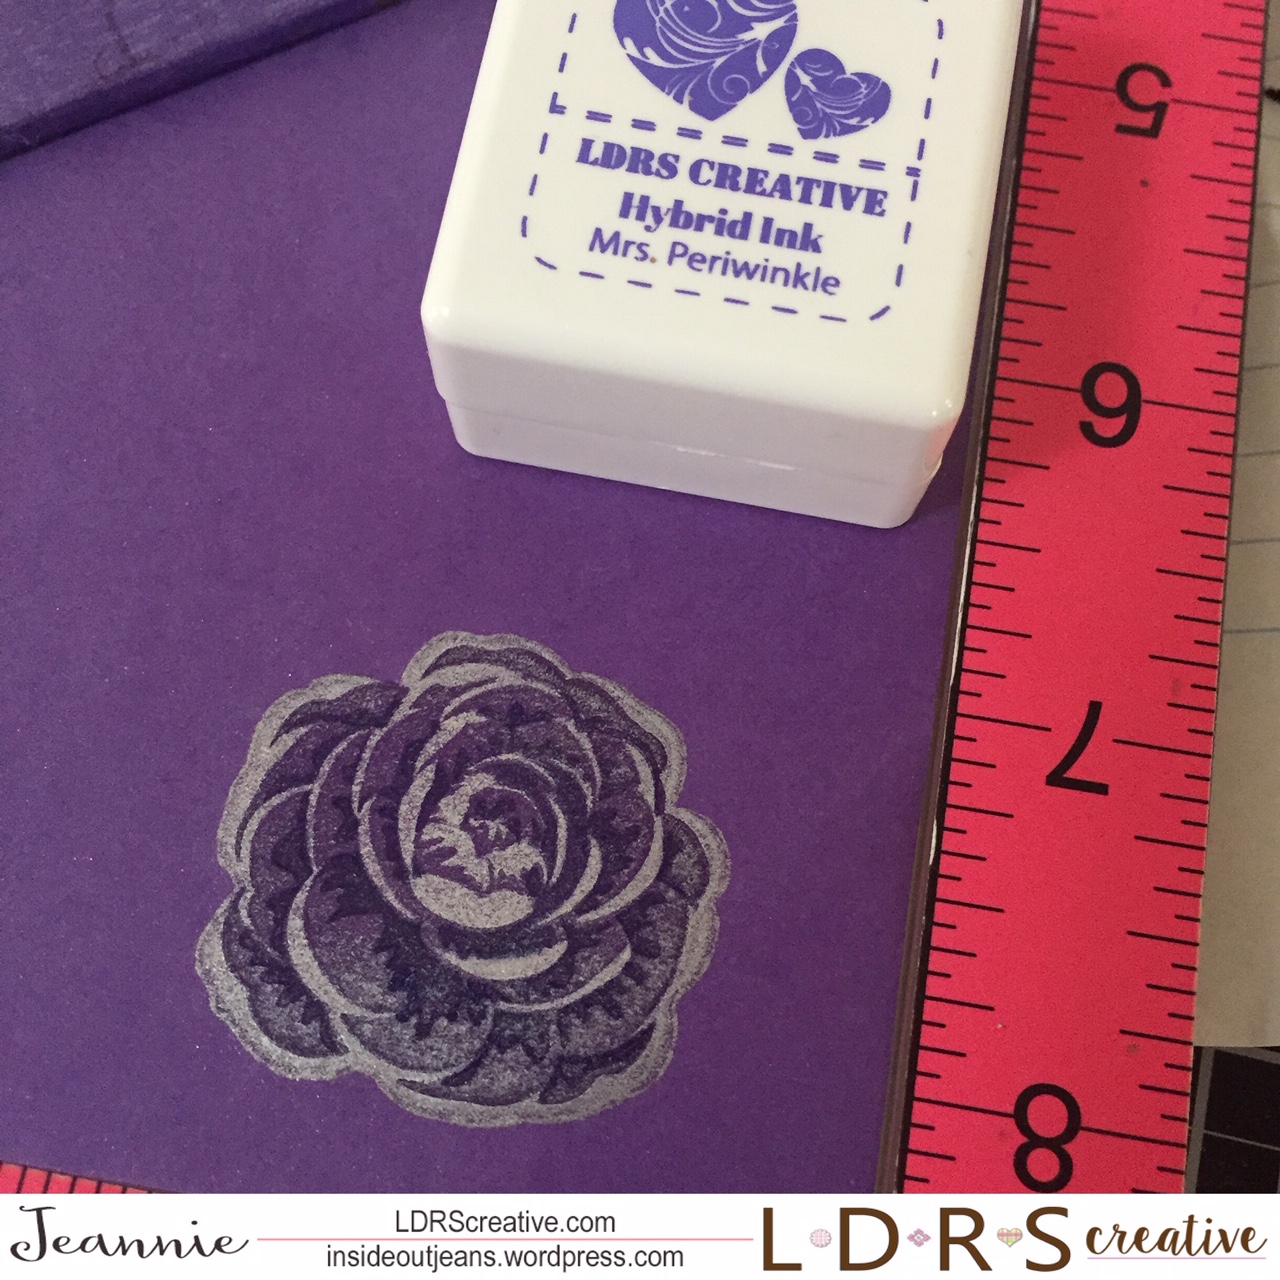
For the third layer, I’m using a darker purple ink, Mrs. Periwinkle, and it really creates the three dimensional look for the flowers.
I create three of these flowers and do the same thing for the leaves. The leaves only have two layers, so I only use watermark ink and perfect pearls for the first layer and watermark ink for the second layer on green cardstock.
For the background, I decided I wanted to have something subtle but not distracting because I want the main focus on the flowers I just created. I used the smaller images to stamp a background, use clear embossing powder, and heat emboss.
Once I created the background, I put the card together to create a gorgeous look. I love how the perfect pearls really add shimmer to the flowers and I didn’t need three different inks to create the layered effect.
Thanks for stopping by! Hope you enjoyed the card.