I always forget to pull out my brayer to create easy backgrounds … ok, to be transparent, it took me awhile to pick out the colors I wanted and realized I needed green for the grass so the dinosaurs could roam the earth. You just gotta make sure to swipe that brayer back and forth so the inks blend together nicely.
All my supplies for creating this card will be listed down below (with multiple sources when available) for your curiosity and convenience. Affiliate links used when possible.
I love the no line look but it does take a lot of time to achieve when you color — but with solid stamping, it does make it a bit easier and you can add some dimension by adding darker colors on the edges of the image.
All my supplies for creating this card will be listed down below (with multiple sources when available) for your curiosity and convenience. Affiliate links used when possible.
When you have smaller images, there’s a lot you can do with them but my favorite thing is creating multiple mini scenes! I use the square die cut to create that anchor for the images.
All my supplies for creating this card will be listed down below (with multiple sources when available) for your curiosity and convenience. Affiliate links used when possible.
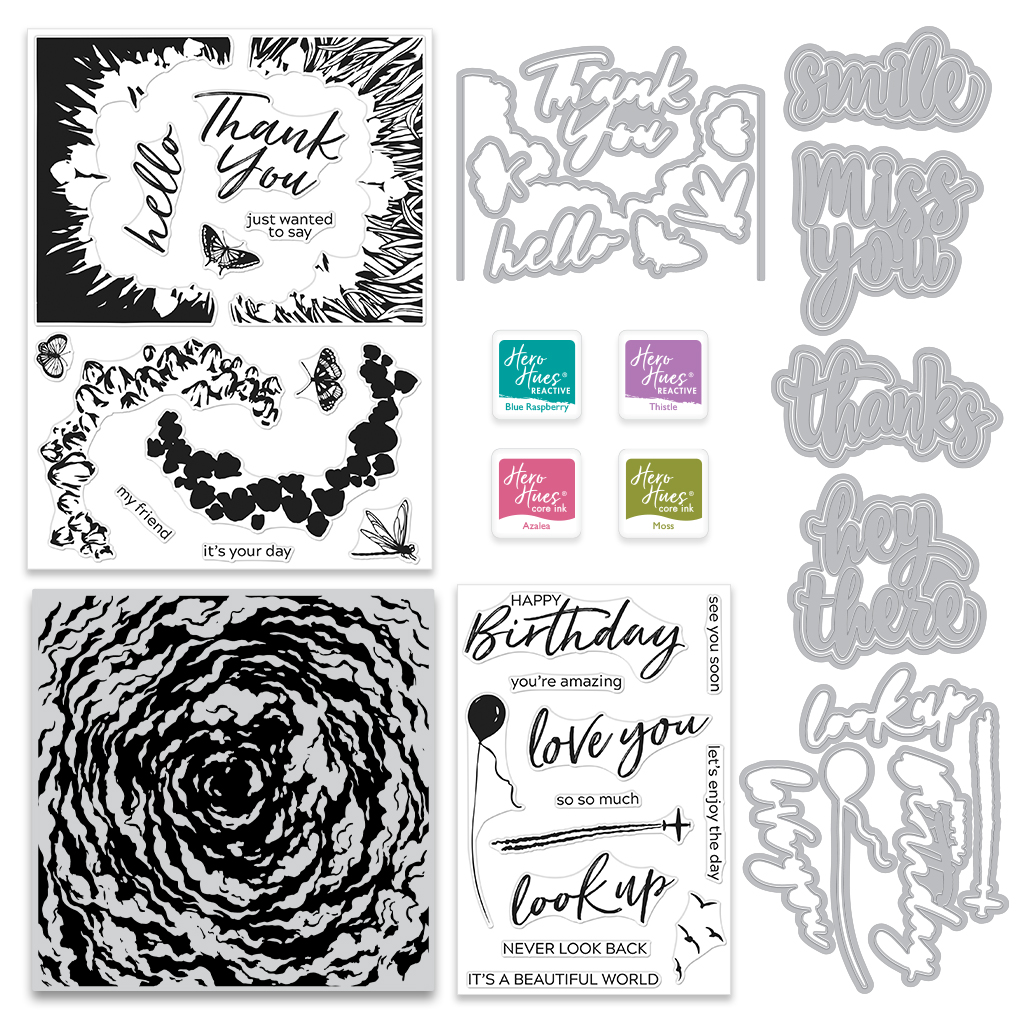
4 Ink Cubes (Thistle, Azalea, Moss, Blue Raspberry)
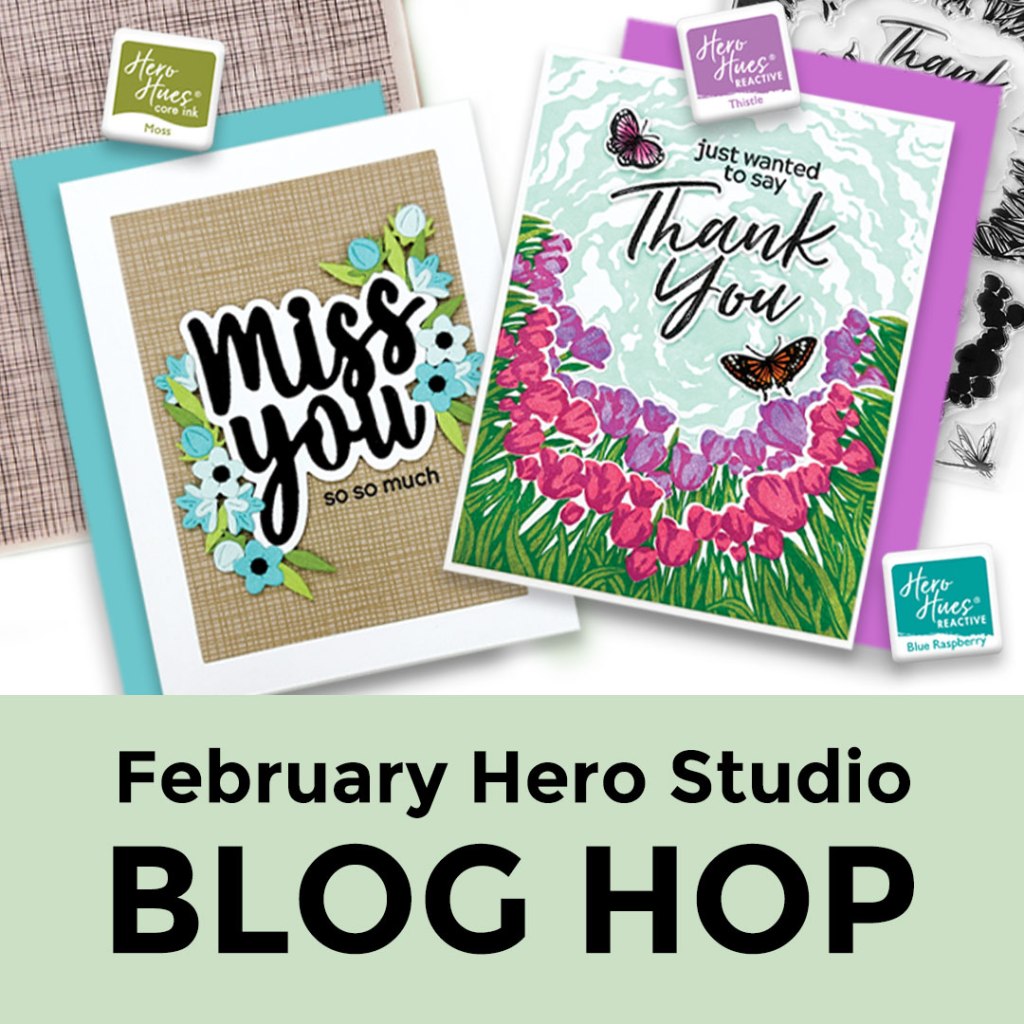
There’s a ton of inspiration and the full blog lineup can be found on the Hero Arts blog. You should be coming from Jennifer Kotas‘s blog and your next stop will be Charlene Madrid. The full blog list will also be updated below!
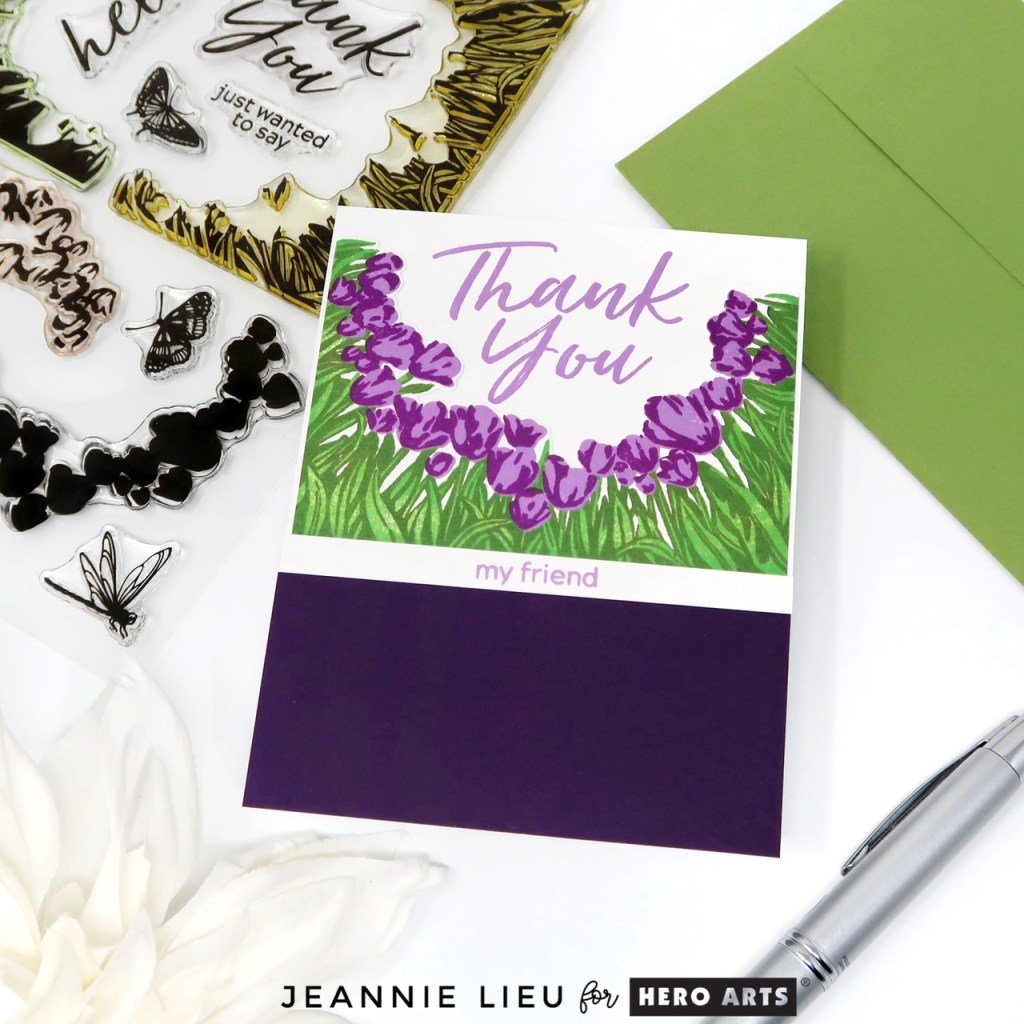
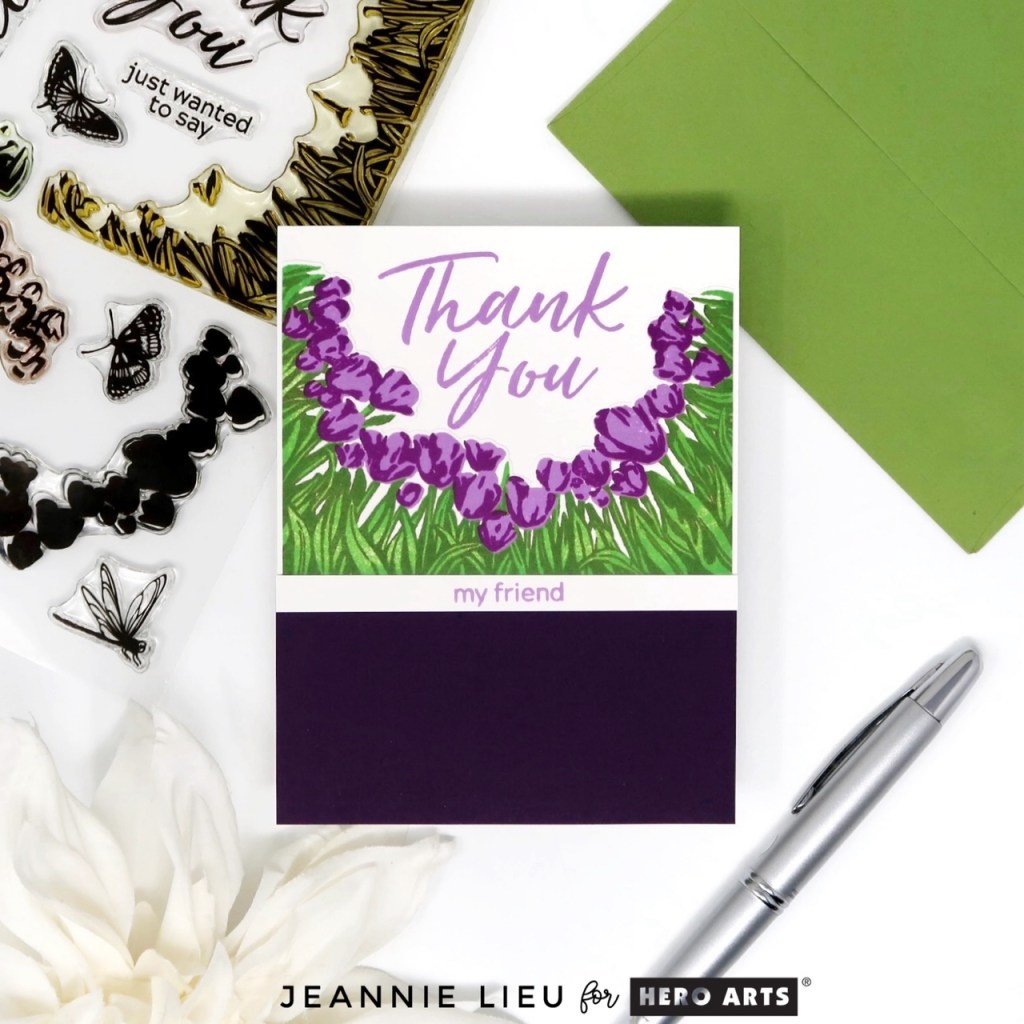
The first card focuses on the Card Kit of the Month . This Card Kit contains a fun layering stamp set to create a border of floral tulips. I picked a bunch of Hero Hues to do some stamping with the tulips layered stamps: Forever Green, Fresh Lawn, Orchid, and Grape Juice. I decided to use the layered stamped image on the top portion of my card and the Thank You sentiment that comes in the stamp set fits perfectly. I also decided to add a supporting sentiment (my friend) on a strip of white cardstock. I wanted to add in more of the purple color by adding Eggplant cardstock at the bottom part of the card.
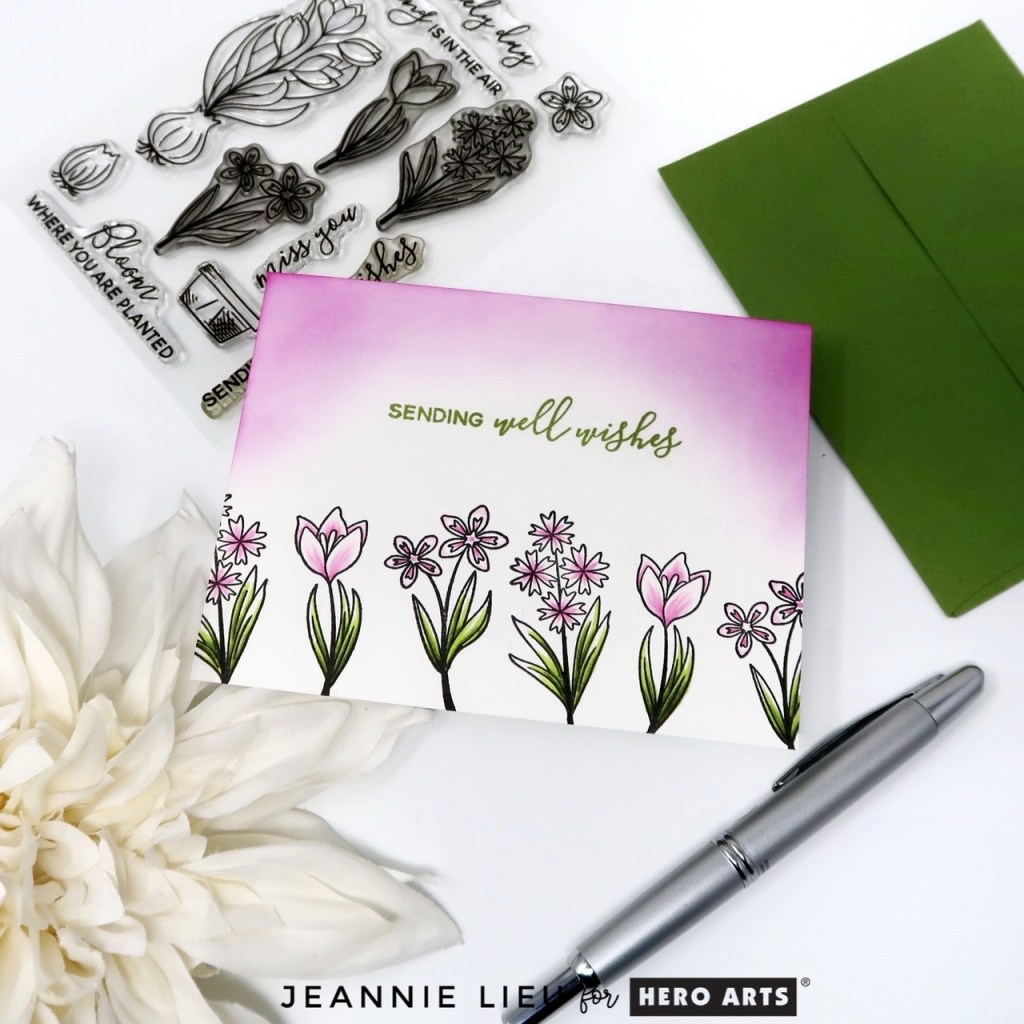
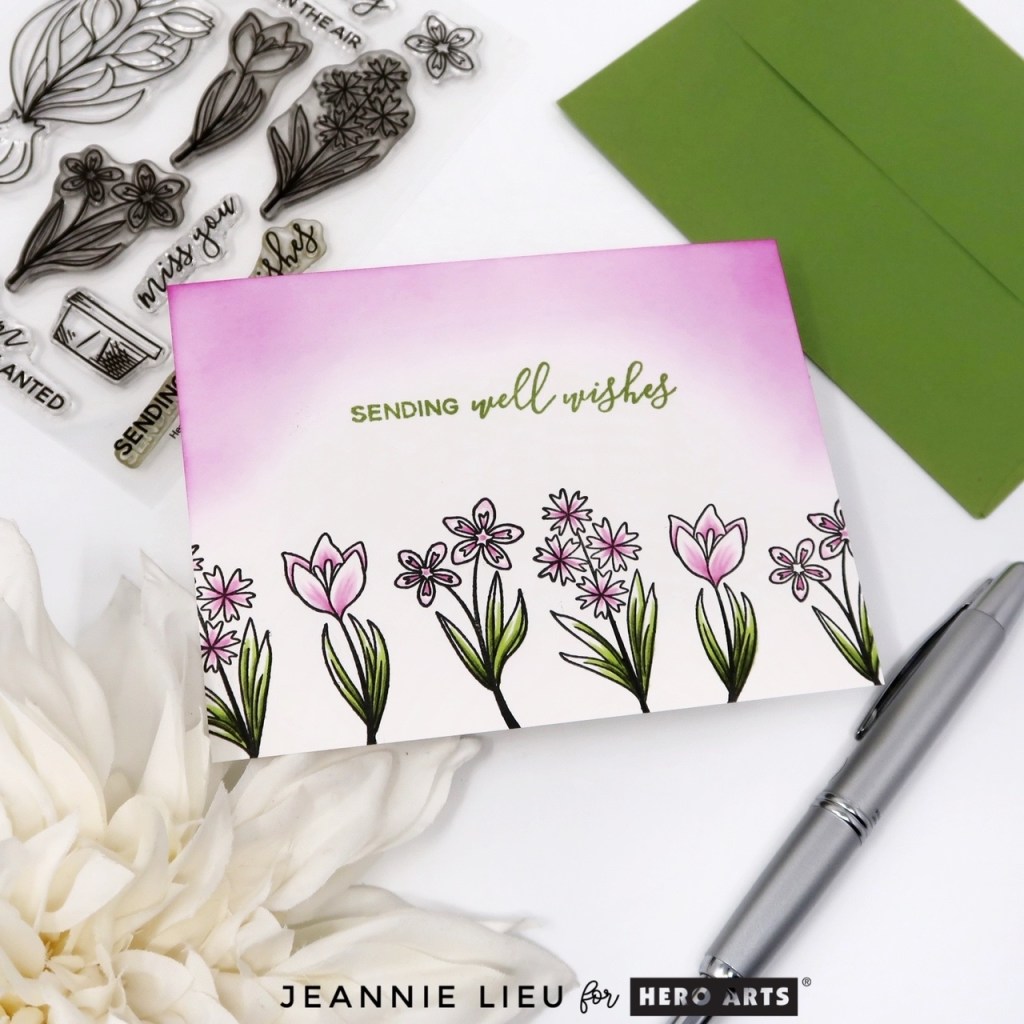
My second project focuses on the Clear Stamps & Dies of the Month, Lovely Flowers. This one is a pretty simple one. I stamped a variety of the flowers using Intens-ified Black Ink at the bottom part of my card panel and then I stamped the sentiment with Moss ink. Then I ink blended the top of card panel with Ultra Pink core ink, using the Large Ink blending brush. It’s a simple and pretty card that you definitely can mass produce.
Thanks for stopping by today and I hope you enjoyed the two cards I shared today using some of the new Hero Studio collection. Hope you were inspired to create!
Giveaway:
Hero Arts will give away a $50 gift card, drawn from the comments left across the hop. Enter by Saturday, February 8 at 11:59pm PST, and the winner will be announced on the Hero Arts blog the following week. Leave a comment on all stops for more chances to win!
When I have a small image and I want to keep it simple, I’ll stamp, mask and then ink blending. I love how it looks! Removing the mask is my favorite part. It’s such a simple card that sometimes I feel like it needs something extra — so I’ll use an strip of washi as an accent to the card.
All my supplies for creating this card will be listed down below (with multiple sources when available) for your curiosity and convenience. Affiliate links used when possible.
Tone on tone backgrounds are a good way to use up your colored cardstock. It creates a super subtle background and pair it with a pop of color, it makes for an even prettier card!
All my supplies for creating this card will be listed down below (with multiple sources when available) for your curiosity and convenience. Affiliate links used when possible.
A quick switch up of your stamp sets in your collection is a good way of stretching your stamps. This originally came out in spring and of course, like here, if you change up the background, you get a brand new vibe to the card.
All my supplies for creating this card will be listed down below (with multiple sources when available) for your curiosity and convenience. Affiliate links used when possible.
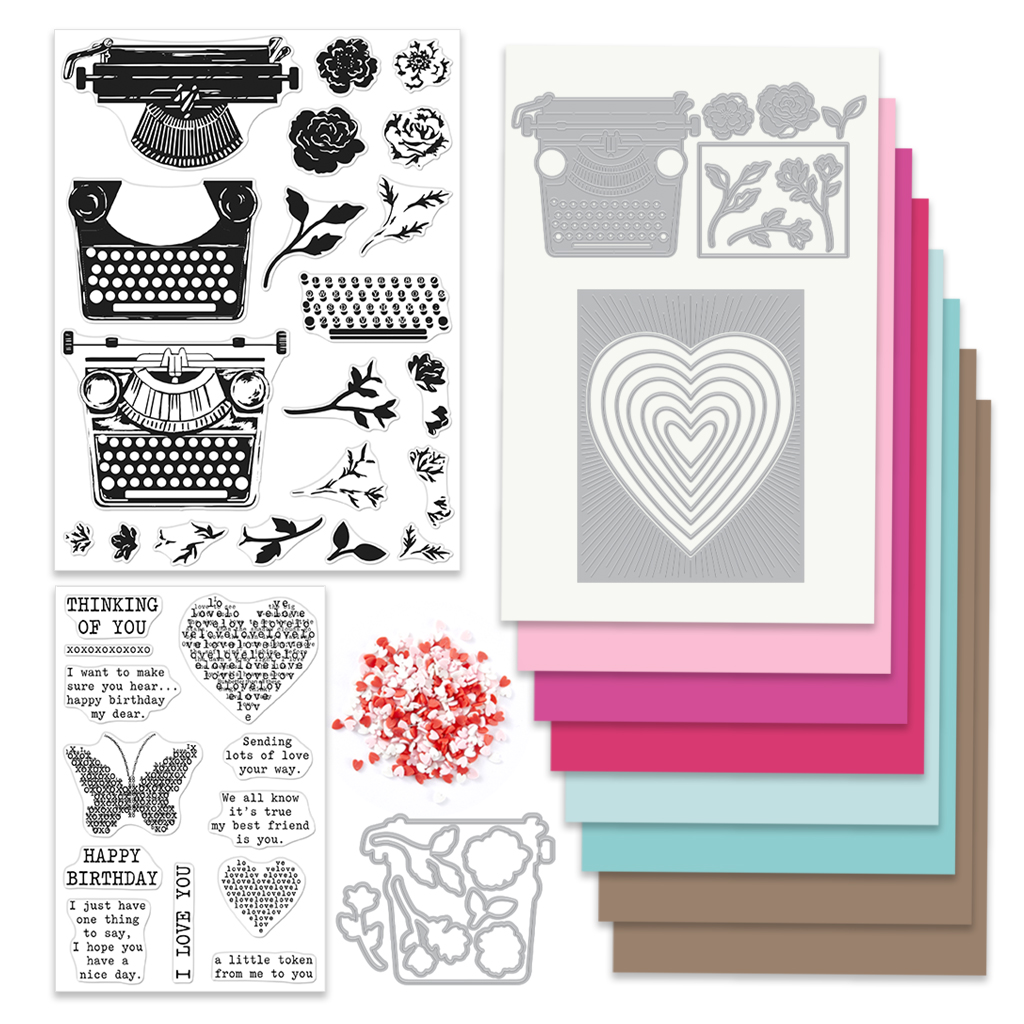
Let’s start by taking a closer look at the January Card Kit of the Month.
Includes:
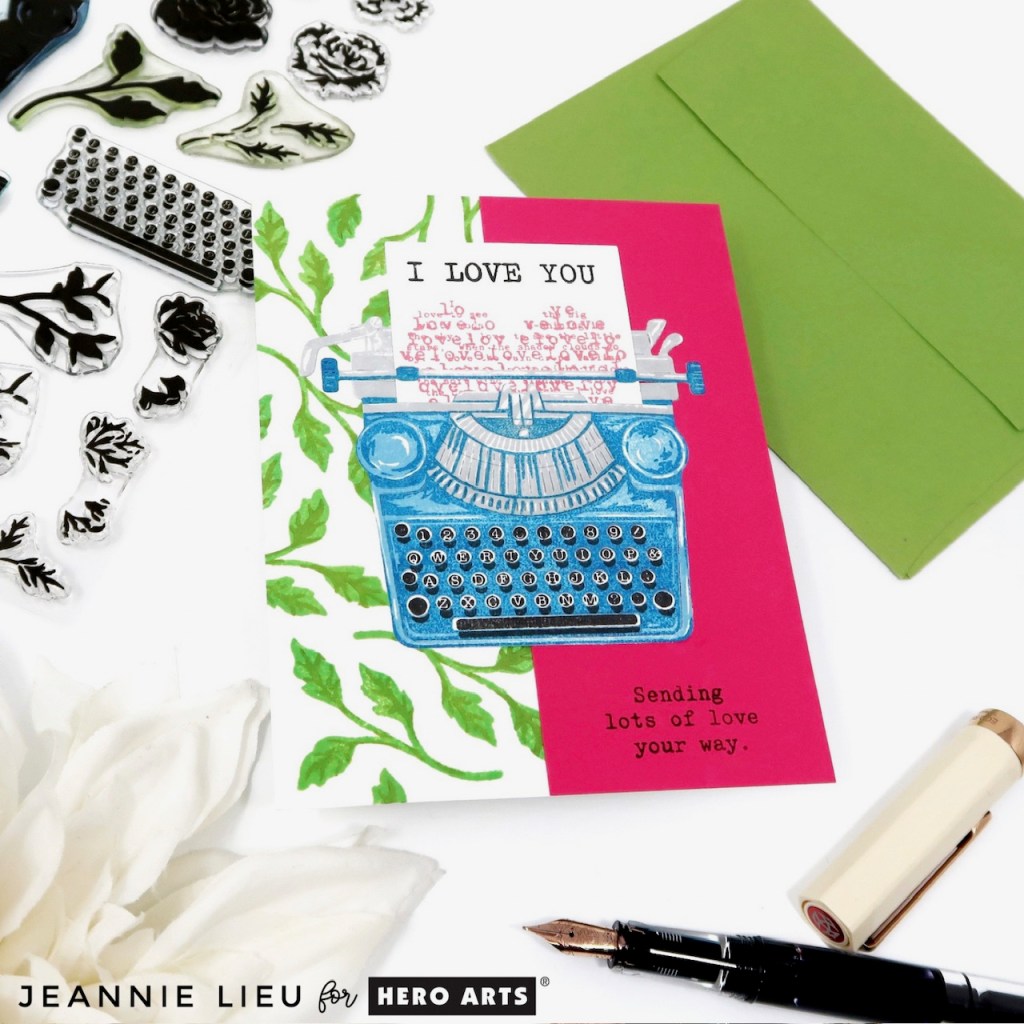
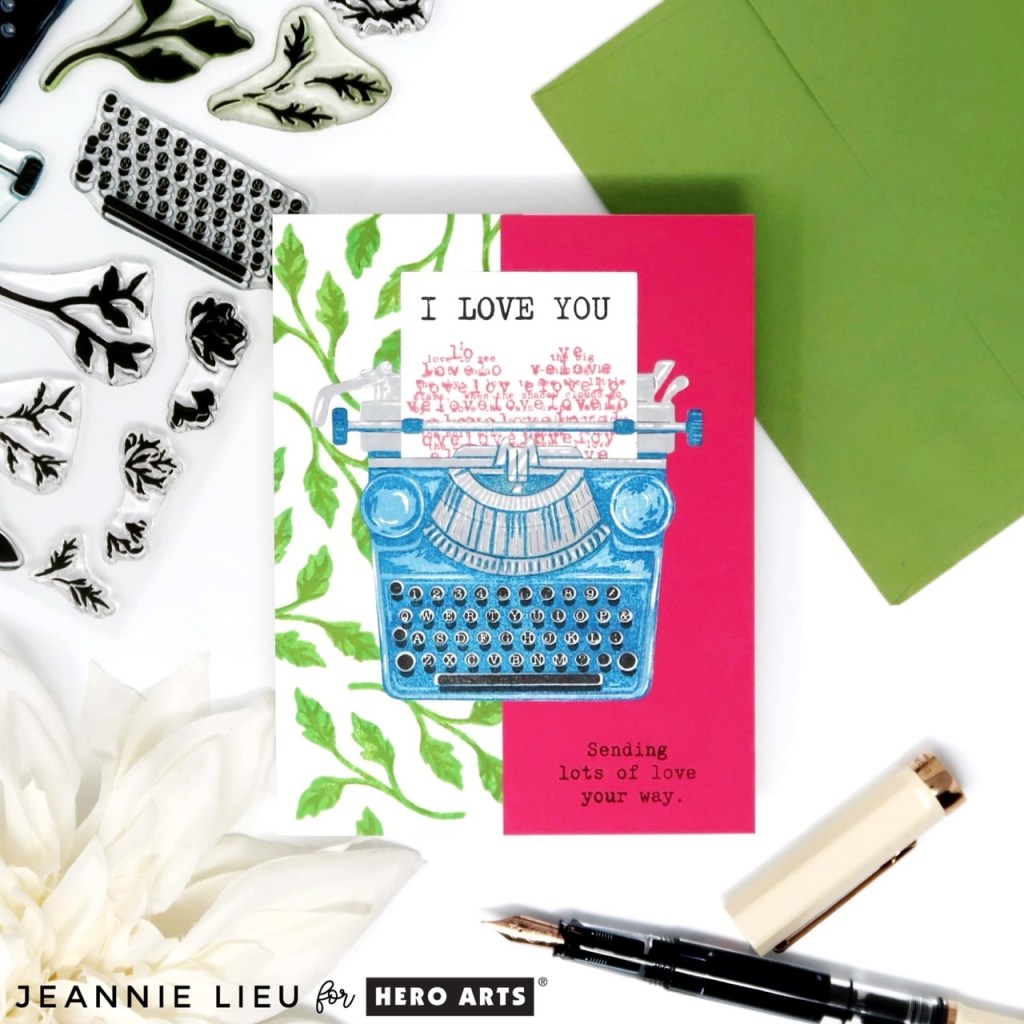
Color Layering Typewriter Clear Stamp Set, 6” x 8”
Typewriter Messages Clear Stamp Set, 4″ x 6″
Typewriter Frame Cuts
Typewriter Fancy Dies,
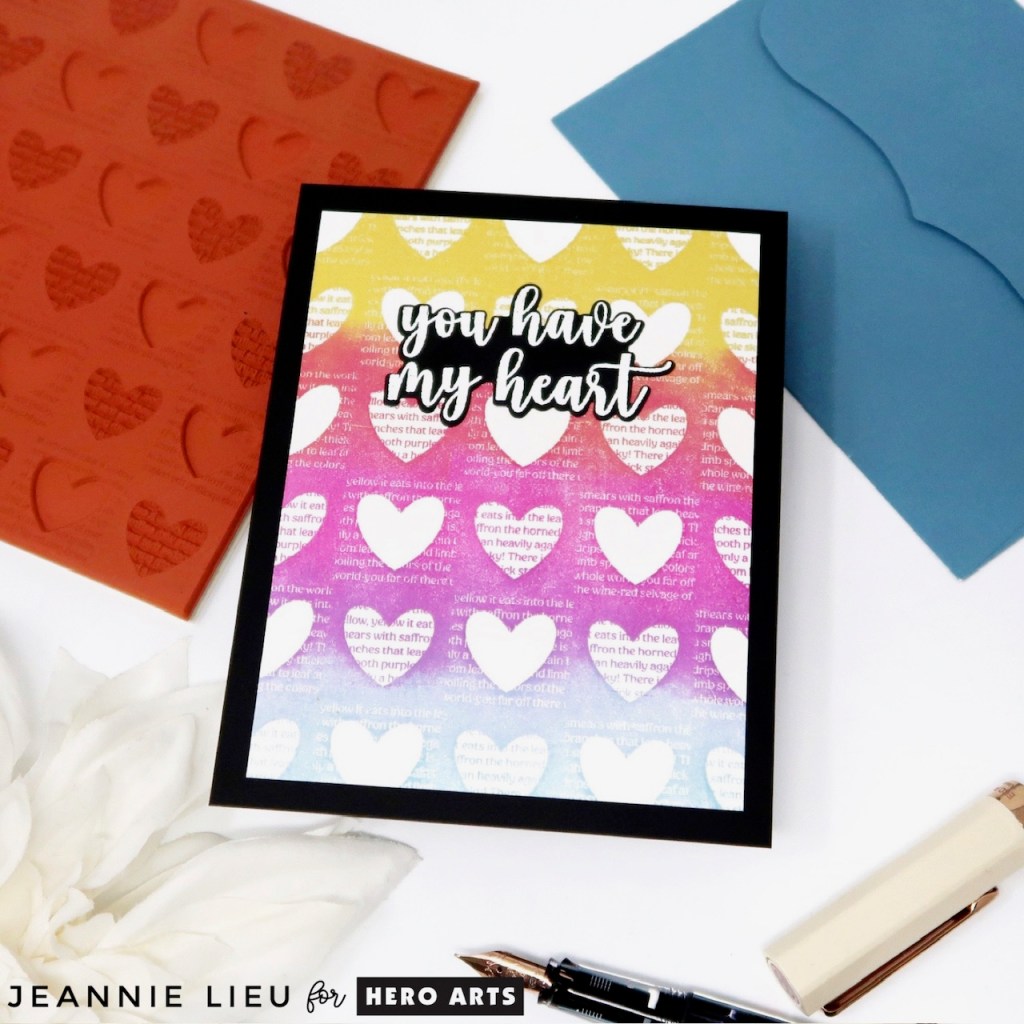
Infinity Hearts Cover Plate
Mini Clay Hearts
8 Sheets of Cardstock, 5.5″ x 8.5 (colors: Peony, Ultra Pink, Azalea, Arctic, Mist, Antique Ivory and kraft)
There’s a ton of inspiration and the full blog lineup can be found on the Hero Arts blog. You should be coming from Charlene Madrid‘s blog and your next stop will be Jennifer Kotas. The full blog list will also be updated below!
The first card focuses on the Card Kit of the Month. This Card Kit contains a lot of fun, pretty things that is so perfect for a lovey dovey card. I started off by stamping one of the layered leafy pairs using the Hero Hues Core Ink in Fresh Lawn and Moss on the side of the card. Then I worked on stamping out the layered typewriter with Intens-ified Black Ink along with Periwinkle, Deep Ocean and Granite. When it’s all stamped out, the typewriter is so cool plus it the card kit comes with a coordinating die! I also stamped out the sentiment on the piece of paper I insert into the die cut. I used Intens-ified Black Ink and Azalea. I stamped an extra sentiment in the bottom right hand corner on top of a piece of Azalea cardstock to tie everything together.
Here’s a quick video for this above card! Hope you enjoy it!
Thanks for stopping by today and I hope you enjoyed the two cards I shared today using some of the new Hero Studio collection. Hope you were inspired to create!
Giveaway:
Hero Arts will give away a $50 gift card, drawn from the comments left across the hop. Enter by Thursday, January 9 at 11:59pm PST, and the winner will be announced on the Hero Arts blog the following week. Leave a comment on all stops for more chances to win!
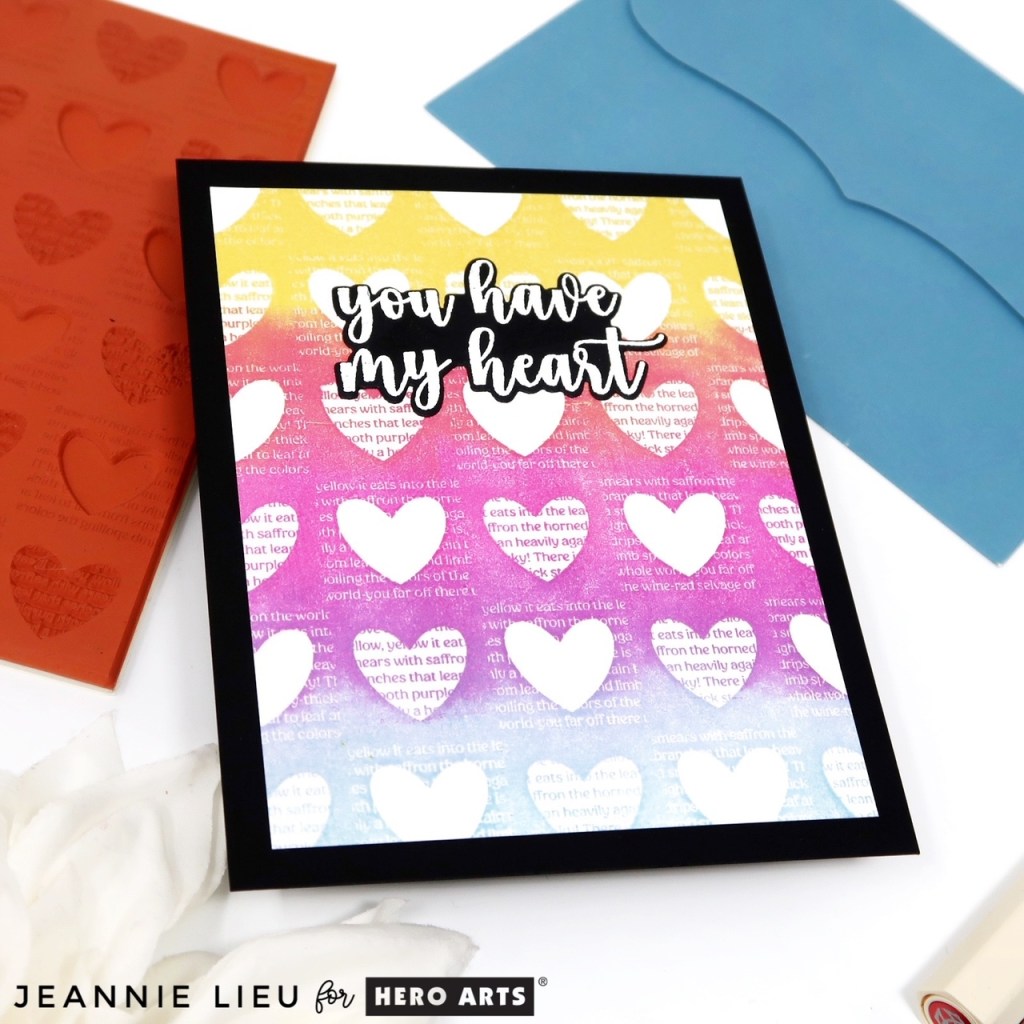
Gotta love the rainbow colors for a change from the cozy, jewel toned notes of Christmas. Don’t get me wrong, the holidays are filled with my favorite colors but I just love the sentiment Merry and Bright and love to bring in the rainbow colors.
All my supplies for creating this card will be listed down below (with multiple sources when available) for your curiosity and convenience. Affiliate links used when possible.
Black ink is pretty harsh especially on white, but when you stamp on pattern paper, it ends up being a pretty subtle look. I went with really simple for this card — stamping, and adding a sentiment.
All my supplies for creating this card will be listed down below (with multiple sources when available) for your curiosity and convenience. Affiliate links used when possible.
Smaller images are harder to create a scene since you need to use more to fill up the space BUT if you use a large die cut sentiment, you can place the images within and fill up the space that way.
All my supplies for creating this card will be listed down below (with multiple sources when available) for your curiosity and convenience. Affiliate links used when possible.
Let’s start by taking a closer look at the December Card Kit of the Month.
Includes:
Clear Stamp Set, 6” x 8”
15 Coordinating Dies
Floral Circle Fancy Die
5 Reactive Inkers, 1/2 oz. (Purple Galaxy, Blue Hawaii, Green Apple, Lemon Drop, Fruit Punch)
Plastic Watercolor Palette
There’s a ton of inspiration and the full blog lineup can be found on the Hero Arts blog. You should be coming from Ilina Crouse‘s blog and your next stop will be Jennifer Kotas. The full blog list will also be updated below!
I have two cards to share with you today featuring this month’s kit and one of the Extraordinary Extras.
The first card focuses on the Card Kit of the Month. This Card Kit contains a ton of fun pieces that you can make a colorful card. I did a very simple card using the reinkers with water to create a light watercolor background. Then I stamped the images and sentiments for a very simple card.
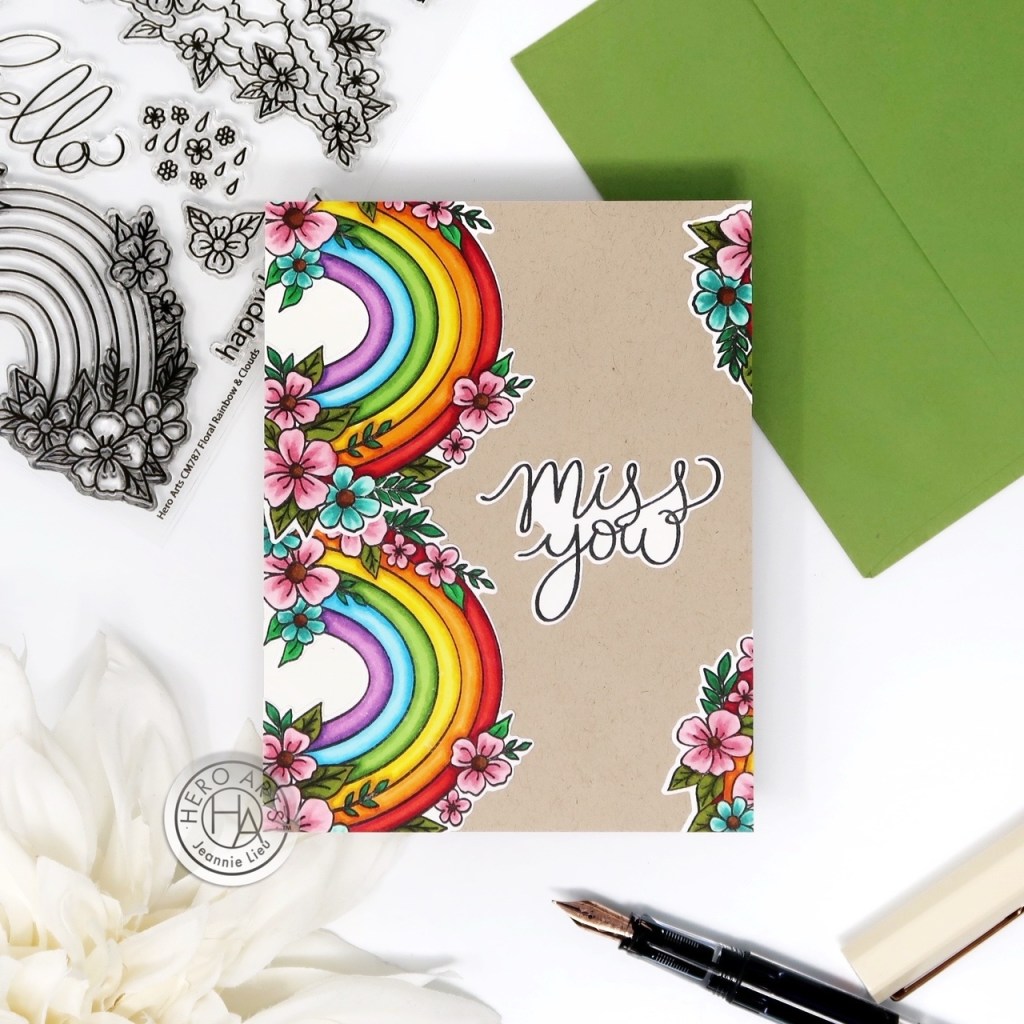
My second project focuses on the stamp set from the Extraordinary Extras, Floral Rainbow & Clouds. I stamepd and colored the rainbow and used it as a border to use it outside of its ordinary use. I used the coordinating dies to cut out the images and sentiments and placed it on top of cardstock.
Thanks for stopping by today and I hope you enjoyed the two cards I shared today using some of the new Hero Studio collection. Hope you were inspired to create!
Giveaway:
Hero Arts will give away a $50 gift card, drawn from the comments left across the hop. Enter by Sunday, December 8 at 11:59pm PST, and the winner will be announced on the Hero Arts blog the following week.